Patagonia: W Trek
Santiago, Puerto Natales, Torres del Paine
A highlight for a lifetime
A "glamping" backpacking trek that gives you a taste of the highlights and beauty of Patagonia. Glaciers, lakes, and mountains are on show!
Summary
The W-trek in Torres Del Paine is generally done as a 5 day, 4 night hut to hut trek. In total, we covered about 60 miles with a total of around 16000 ft of elevation gain, relatively evenly spread out over the days. As the name implies, the trek ends up shaped like a "W" and can be done from either East to West or West to East. In our case, we chose to go from East to West. Below is a summary of our itinerary, with more detailed points about planning laid out in the logistics section.
- Arrival into Santiago
- Buffer day in Puerto Natales
- W Trek: East to West (5 days, 4 nights)
- Departure from Puerto Natales, connecting to flight out of Santiago
Spreadsheet
Logistics
Logistics for this trip is probably worth its full own section and page. It pays to prepare and plan for this trek so that everything goes smoothly. As the route itself is pretty well defined, your main options will be 1) deciding how much money you want to spend and 2) what level of comfort you want on the trek (these two are inversely related to each other). The below are my insights and thoughts:
Before the trek- Booking process: Reserved Refugios/campsites (Chileno, Frances, Paine Grande, Grey) directly with the providers around August (mostly tents, except bunk beds at Paine Grande). We only carried sleeping bags and all meals except two dinners (Paine Grande, Grey) with packs around 25 lbs. Vertice was responsive over email when needed to change something. Torres Hike gives you an overview of availability and you can outsource to providers if you don't want to deal with booking or carrying as much gear.
- Food: We saved a ton of money by not prebooking most of the meals. But it was nice to have the dinner at Paine Grande after eating freeze dried for the previous three days. Food at Paine Grande/Grey is similar (buffet style, can order burgers/pizza). It seemed it could be cheaper to walk in to dinners vs online. Vertice sites had solid mini markets.
- We went East to West because we had heard the towers hike was the hardest and wanted to get that out of the way first.
- Trash: Las Torres sites (Chileno, Frances) all wanted trash carried out. Vertice (Paine Grande, Grey) had obvious bins to throw away trash.
- Bring eye masks and ear plugs if staying in the refugios vs tents (bunk beds). Your bunk mate may snore :’)
- Charging area for electronics was more obvious for Vertice sites than Las Torres. A good power bank may be able to last the whole trek.
- Showers: our group of four had varying rankings for which refugios showers were best. You won’t always get consistent hot water experiences even when showering at the same time. Bring a shower bag to carry clothes/toiletries in that can hang and is waterproof. Flip flops strongly advised. Closing time was earlier for chileno/cuernos
- The trail is extremely well marked, no need for a guide. If you are a decent hiker, the trek is pretty accessible. Being able to do sections with just a day bag is 👌.
- Take the weather for what it is. The forecast further out than ~5-7 days is not super accurate, Windguru was the forecaster of choice. Initially it was predicted to rain every day, but we ended up with great weather: almost no winds, a day of full sun and the remainder as cloudy (no or little drizzle). That being said, a windbreaker/rain jacket is a must.
- Except for the first day (Mirador Las Torres Hike) we didn’t find the trails too crowded even starting around 9-10 am. That being said, the towers hike was pretty crowded which made it less enjoyable (possibly something that could be avoided with W>E?). Our group agreed Frances Valley was our favorite “segment”.
- We put a buffer day in at both the beginning and end of the trek itself because of both logistics (we wouldn't have been able to catch the connecting flight to Puerto Natales) and as a safeguard. It also gave us the chance to explore Santiago before embarking on our journey. If you have time, you certainly could extend your time in the country and in South America, perhaps exploring also Puerto Arenas, the Argentianian side of Patagonia, or even Antarctica.
- We flew from Santiago to Puerto Natales. Booking on LATAM Chile is significantly cheaper and works fine. LATAM is a bit annoying in that flight availability will sometimes appear and disappear even though the flight is not sold out.
- A note on the kindness of strangers: my charging cord broke during the trek, which meant I was running around trying to find anyone with a USB-A to USB-C connector. One group ended up not only let me charge, but graciously gave me the cord.
TL;DR
- Dates: 3/2/24-3/9/24
- Choose your level of adventure (vs $). Requires some logistics and planning.
- Gentle entry into multi-day trekking; accessible to those of good fitness and who like showers when camping
- Well built up infrastructure to support those on the trek
- It's Patagonia, what more do I need to say?
Table of Contents
Last updated: 08/22/25
Photos!

Day 1: Santiago

We decided to fly into Santiago Chile (SCL) on redeyes from various points in the US. Santiago is much warmer than the south of the country (i.e. Patagonia) and it was quite toasty when we arrived in March. We were staying at a nearby airport hotel with a shuttle, so after dropping off our luggage there, we handled some logistics (pulling out cash) and grabbed empanadas at Emporio Zunino. Uber was readily available in Santiago, though I believe there are some public transit options available as well. Taking a bit of time to adjust from an international flight before embarkking on your adventure is strongly recommended, and gives you the chance to explore another location and city.
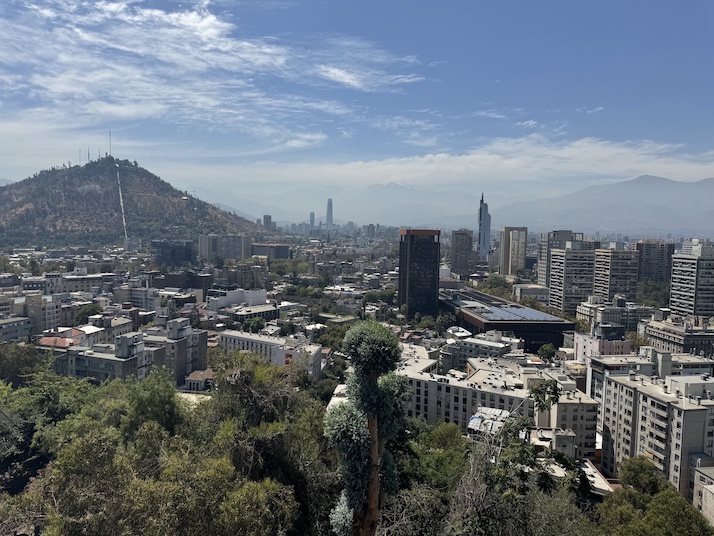
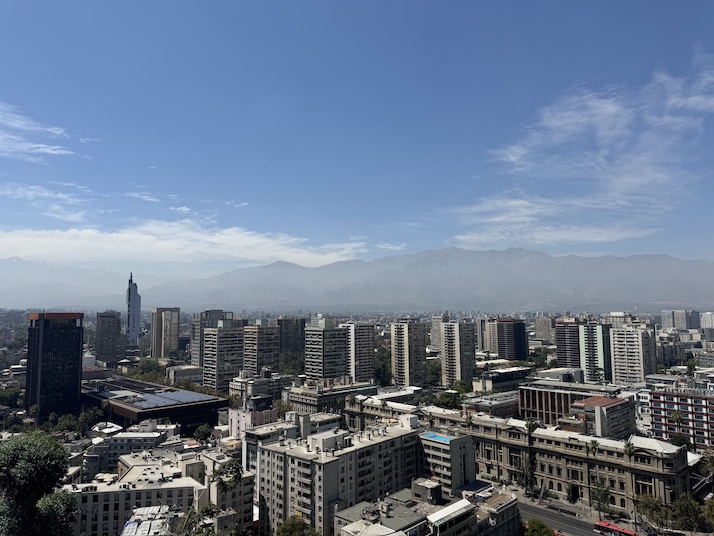
Mercado Central itself was a bit of a wash in my opinion, but from there we walked to Plaza de Armas and peeked into the Cathedral de Santiago. We also walked up the somewhat nearby Santa Lucia Hill, a city park, where we got panoramic views of Santiago and the surrounding mountains. From there, we could see the nearby Cerro Cristóbal, where you can take a cable car up and likewise have a view of the city below. Given the heat of the day, we were happy enough with Santa Lucia and headed down after wandering around the park a bit.
We had a pretty early morning flight the next day to Puerto Natales, so we grabbed some drinks at Bocanáriz and dinner in Bellavista before heading back to the hotel to sleep.
Day 2: Puerto Natales
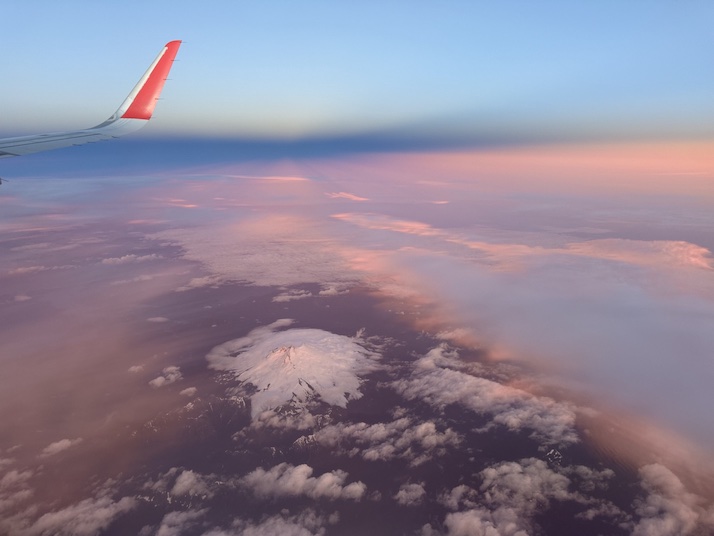
The next day we had a very early flight over to Puerto Natales from Santiago. There aren't many flights per day to Puerto Natales (airport code PNT), so some people opt to fly into Puerto Arenas and then bus (few hours) to Puerto Natales. We wanted to maximize our limited time, so we flew directly to Puerto Natales, which is the town to base in before embarking on treks in Torres del Paine. The one pro about having a way too early flight is that I was able to watch the sun rise on the 3 hour flight over.
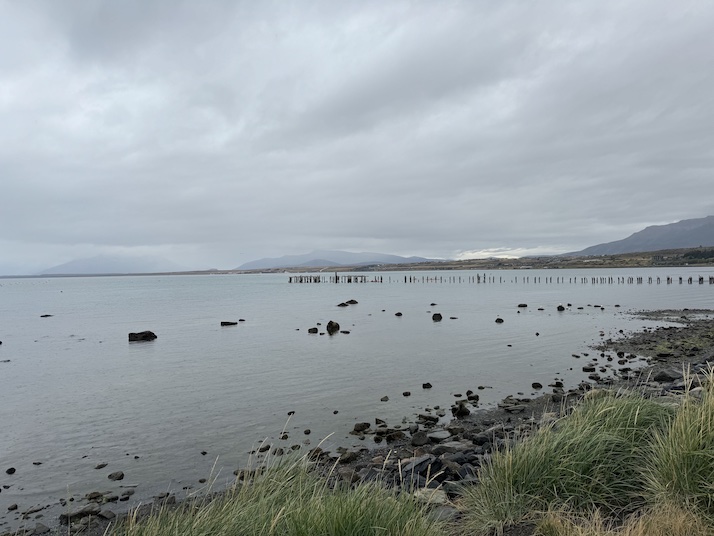
Upon landing at Puerto Natales, we took a shuttle (about $4 USD/person) to our airbnb. Our host was gracious enough to let us check in early (even though it was only around 10 AM). It is pretty common for hotels and Airbnbs in the area to allow for the storage of luggage while on the W-Trek, but it is something you should confirm with your host/accomodation provider. It was a bit of rainy day (but we were glad it was raining on this day and not the trek!) and we set off to walk to town to run a few errands (including breakfast).
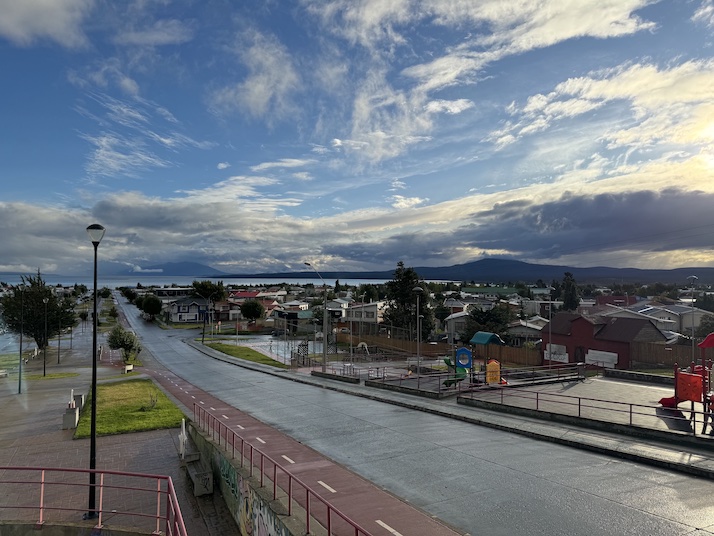
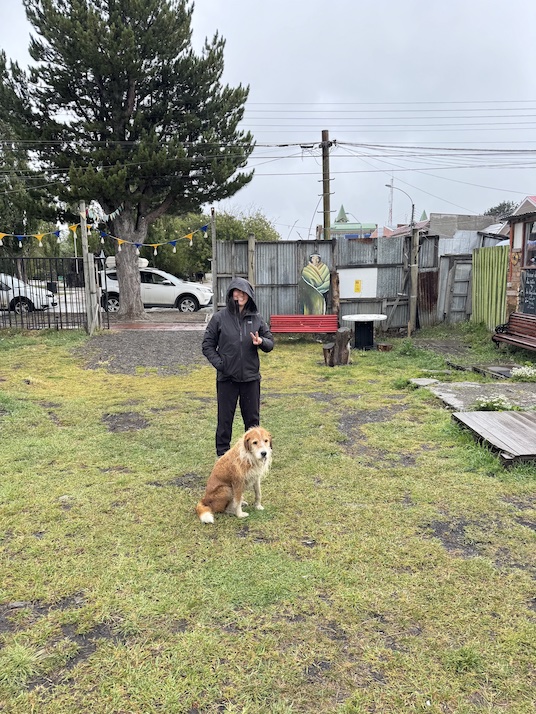
The town itself is not large, and easily walkable. One thing to note is many stores and restaurants in Puerto Natales don't really open until closer to noon and there were quite a few dogs around (though didn't bother us). However, we were still able to complete most of our tasks. We popped into Rental Natales to rent some gear (e.g. sleeping bag, backpacking bags). We found the gear reasonably priced and of decent quality; what you will need to rent vs bring will depend also on what you are renting from each campsite/refugio. The two main grocery stores are Unimarc and Super Frut, though I would recommend bringing as much of your food from outside if possible (i.e. they had some freeze dried meals, but definitely not at the standard of REI). We grabbed coffee/breakfast at Kau Lodge, lunch at Cafe Artimana (cash only), and dinner at El Brisket.
Day 3: W Trek - Central to Chileno (ft Mirador las Torres)
Segments- Central -> Chileno: 3.7 miles, 1,413 ft, ~2 hours
- Mirador Las Torres: 5.91 miles, 2,386 ft, ~4 hours
Our next day started early again with a 7:00 AM bus from Puerto Natales into Torres del Paine. We had optimized our airbnb to be closer (~5-10 walk) to the bus station rather than the town (~20 min walk) and it paid off here. We packed and weighed our bags the night before so it was pretty easy to just throw them on and head out. Our extra luggage was left in the Airbnb for our host to store for us until we returned after the trek.
We had pre-purchased our bus tickets online from recorrido, though on the day of it was a bit of chaos at the station as many buses were bringing trekkers from Puerto Natales to the park. As we doing the W Trek from East to West, we took the bus to the Laguna Amarga stop. Make sure to have pre-bought the park entrance tickets beforehand as well as have some cash (4000 CLP/person) for the shuttle at Laguna (run by Las Torres, one of the accomodation providers) that takes you from Laguna Amarga to the actual trailhead. Some of this is covered in more detail in the logistics section.
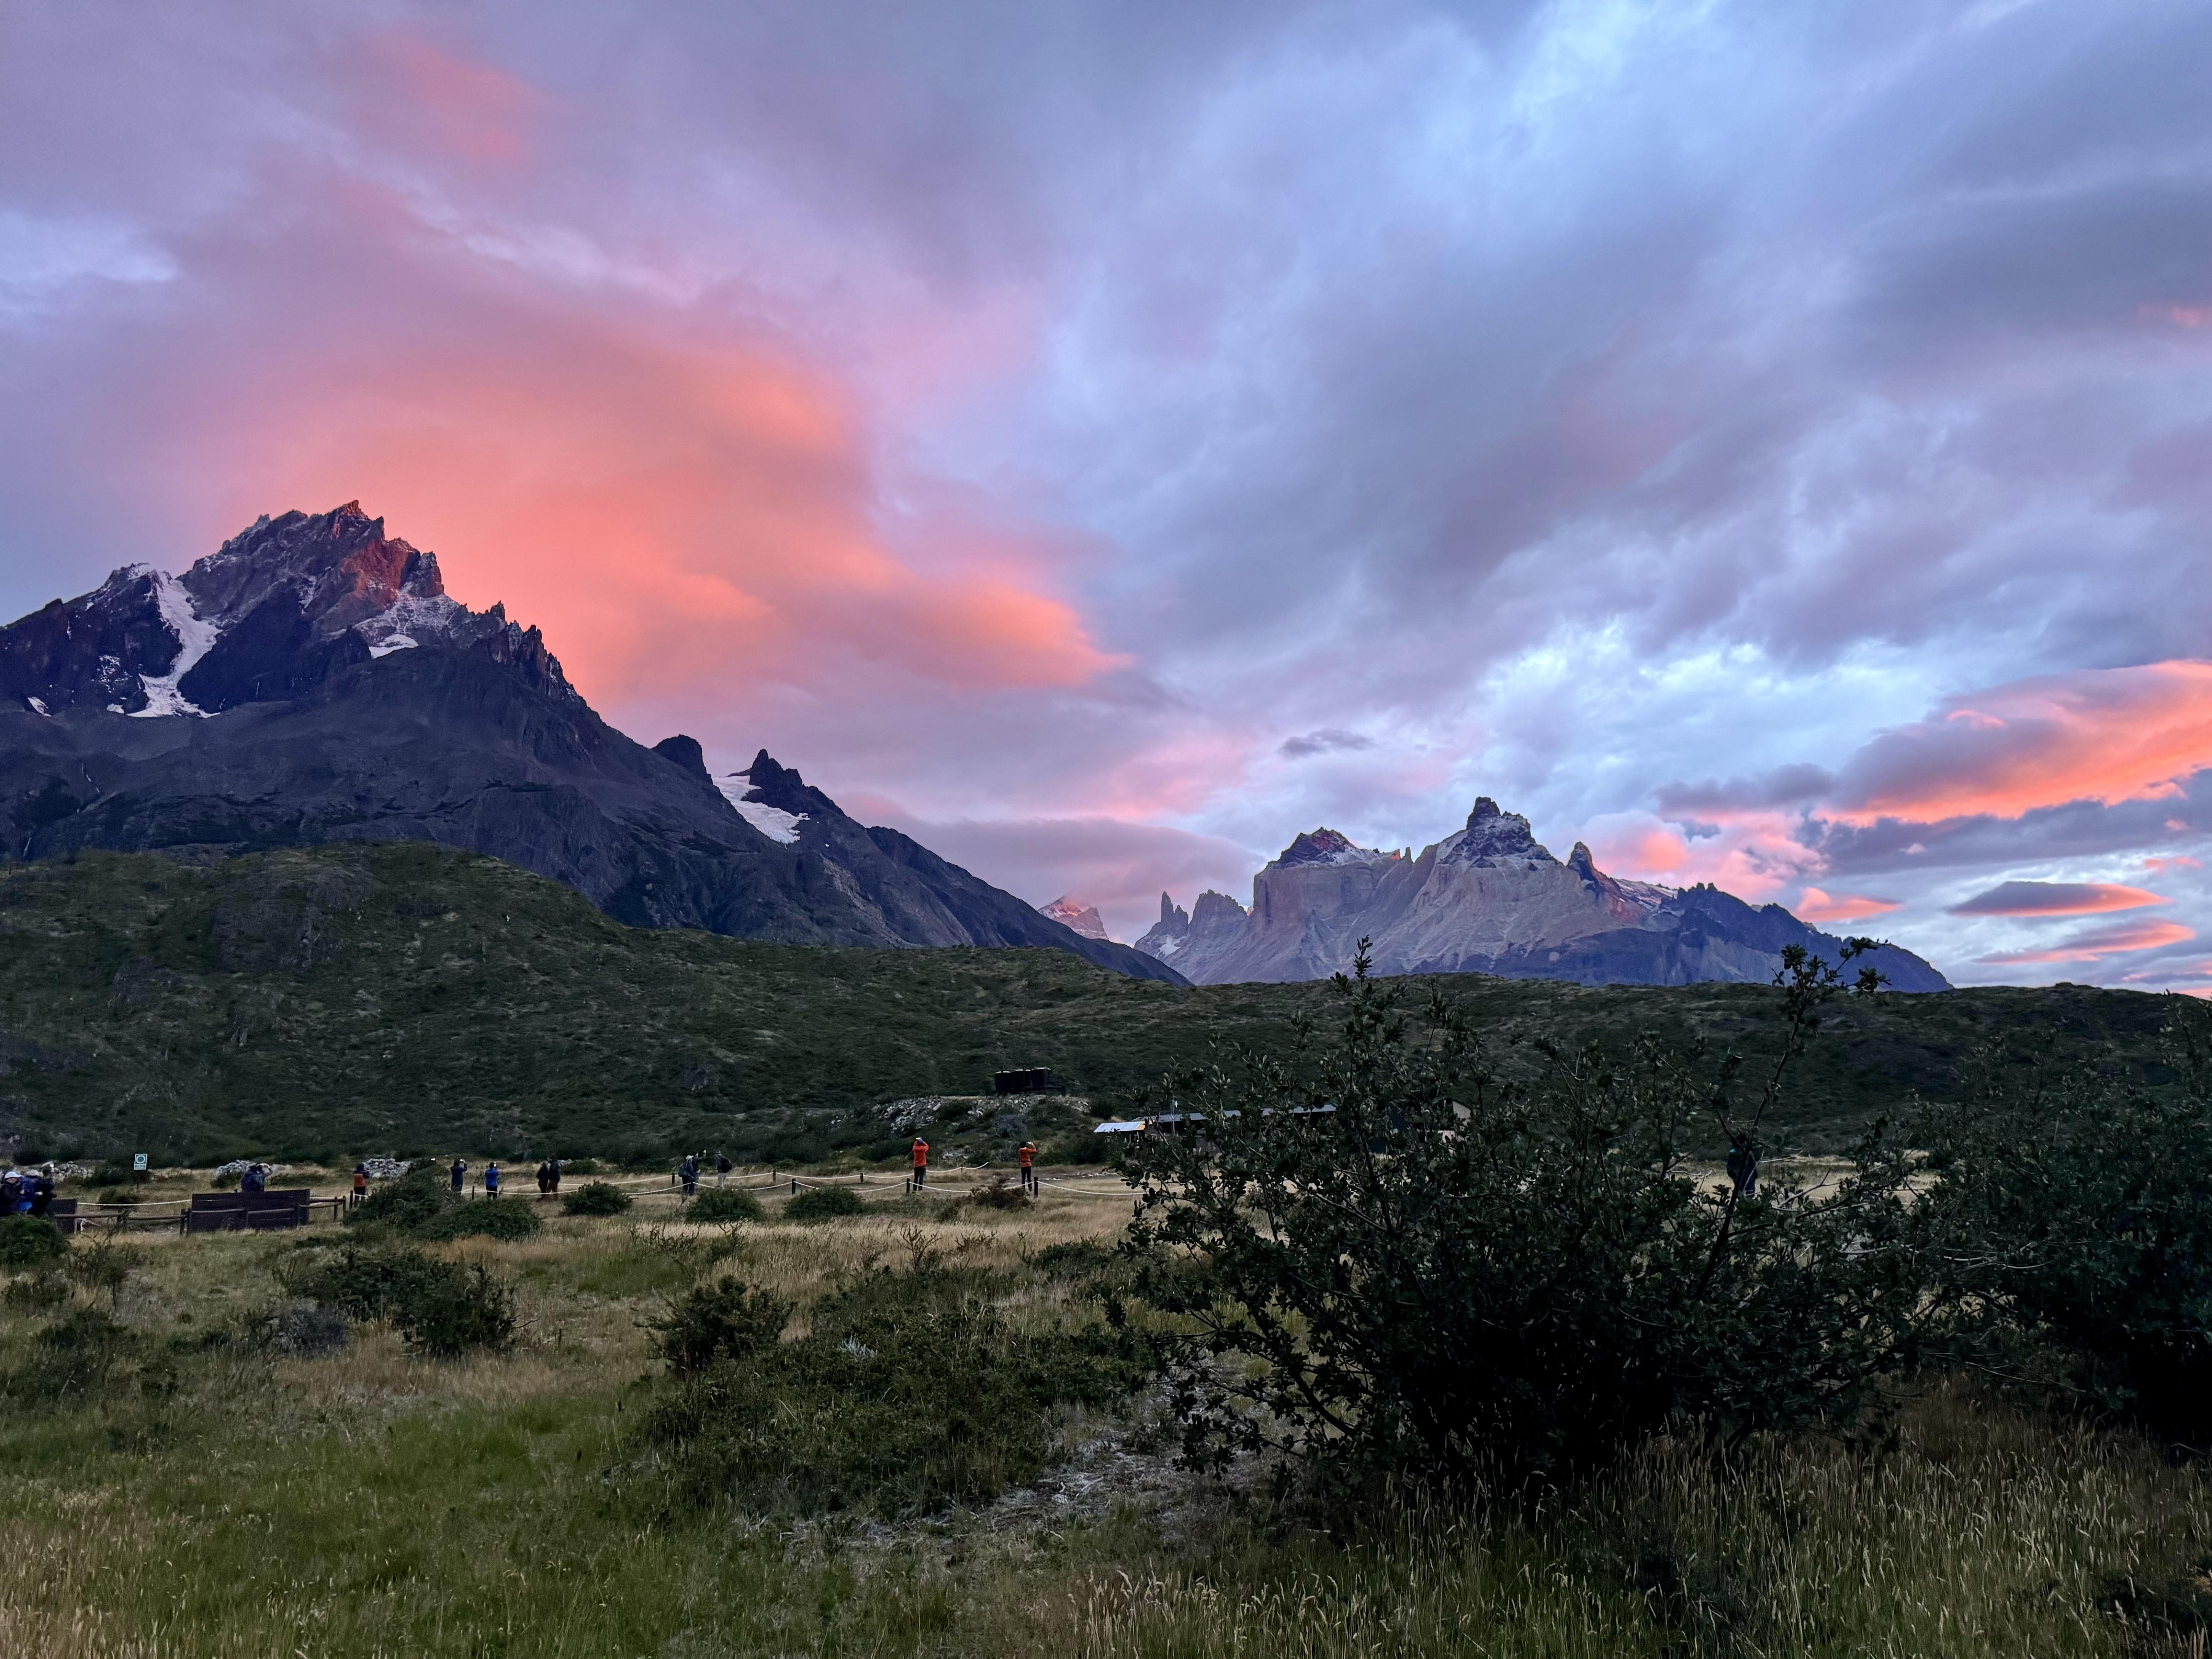
Patagonia is notorious for its unpredictable weather. Yet, we were extremely lucky on this trip to be blessed with at most light rain (if that) during the day and frankly largely clear skies. Despite the rain the previous day, our first day on the trek was full sun. The refugios use Windguru as their forecaster of choice (I would just search "Rental Natales" to get a variety of the different locations along the trek).
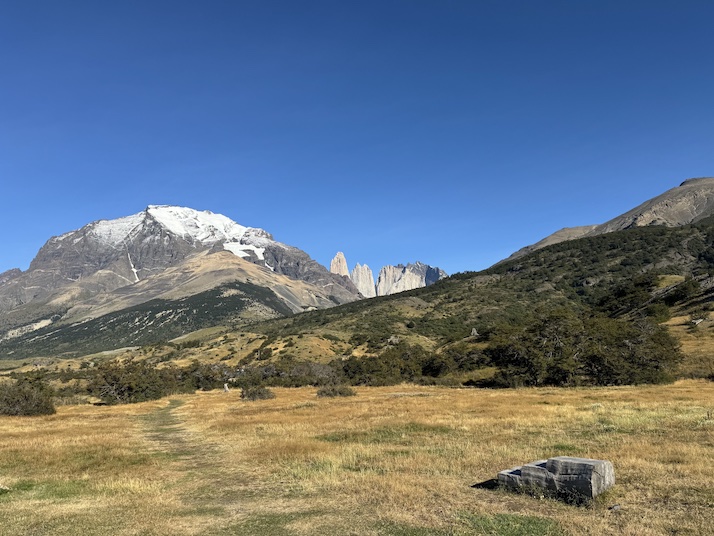
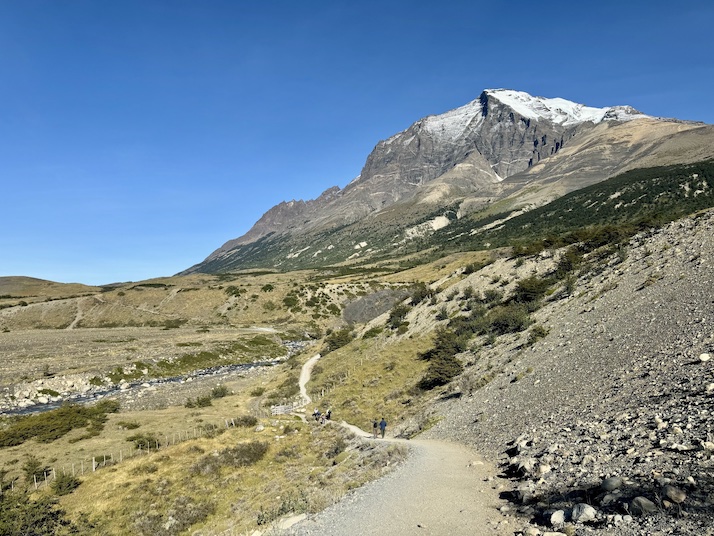
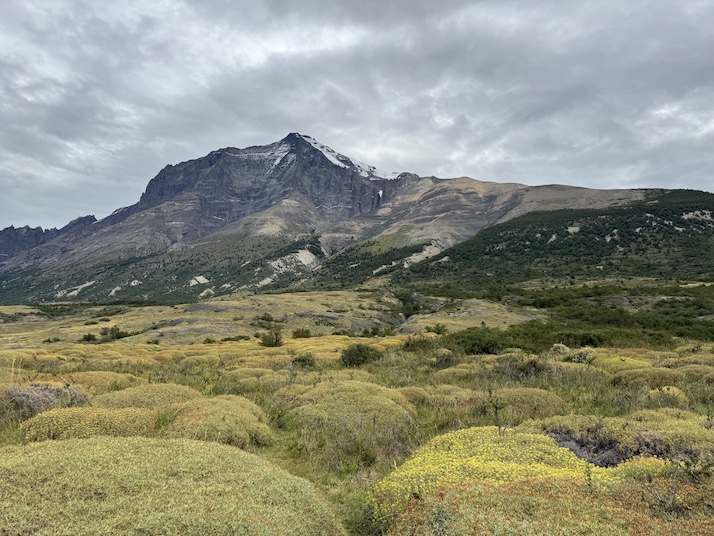
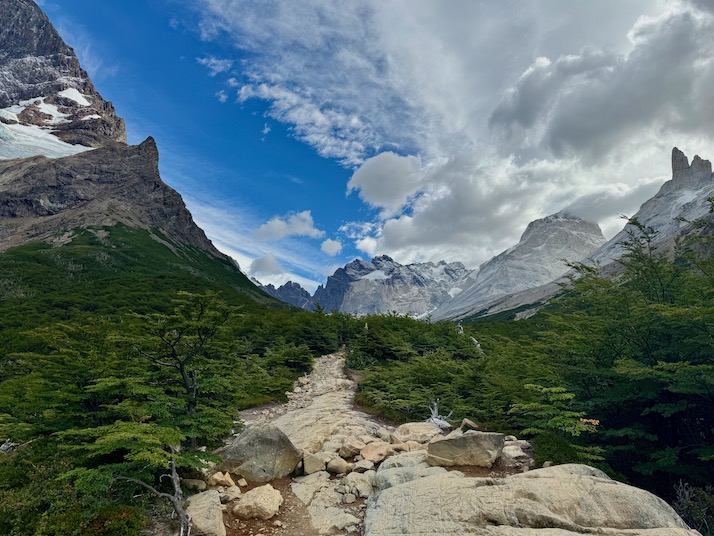
Energized and ready, the first segment of the East to West W Trek is Central to Chileno, about 3.7 miles and 1,413 ft of elevation, taking us about 2 hours to complete. At the trailhead you can see the tips of the iconic Torres del Paine, which we would see much closer later on in the day :) Starting out flat, you eventually do start a relatively gradual climb up to the Windy Pass (where some of us had cell signal!) before you arrive at the Chileno refugio, run by Las Torres.
Since we arrived around noon but checkin for the refugio happens at 2 PM (exactly), so we dropped our backpacks in a somewhat designated area (under an alcove, can't miss it given many bags are probably already there) and took a quick break for snacks and refill water. In addition, the one big pro of the W Trek, even though it is theoretically "backpacking", aside from the built up infrastructure around it, is that some segments can be done with just a day bag. Our mid day hike from Chileno was one of those treks, up to the iconic Towers.
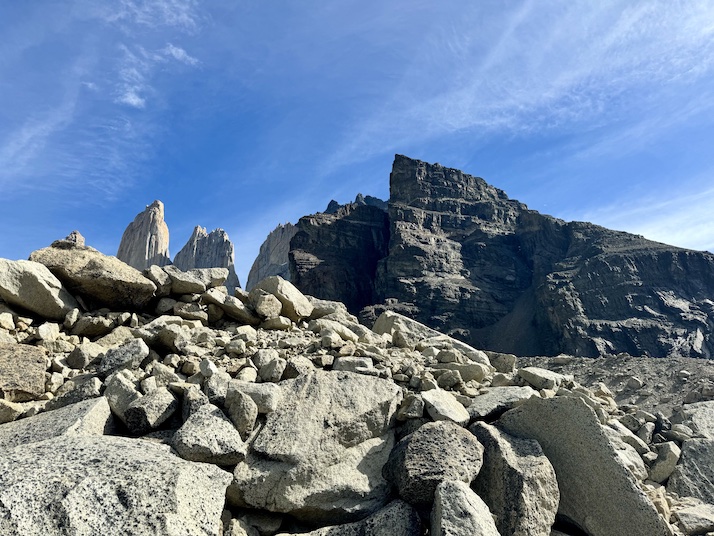
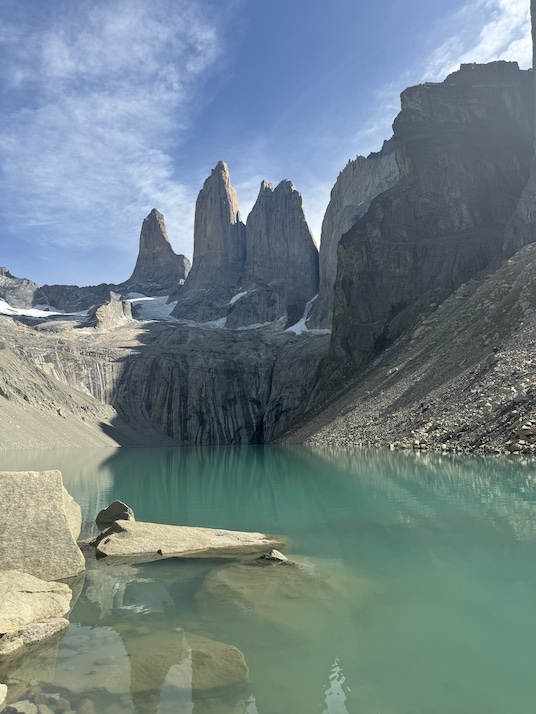
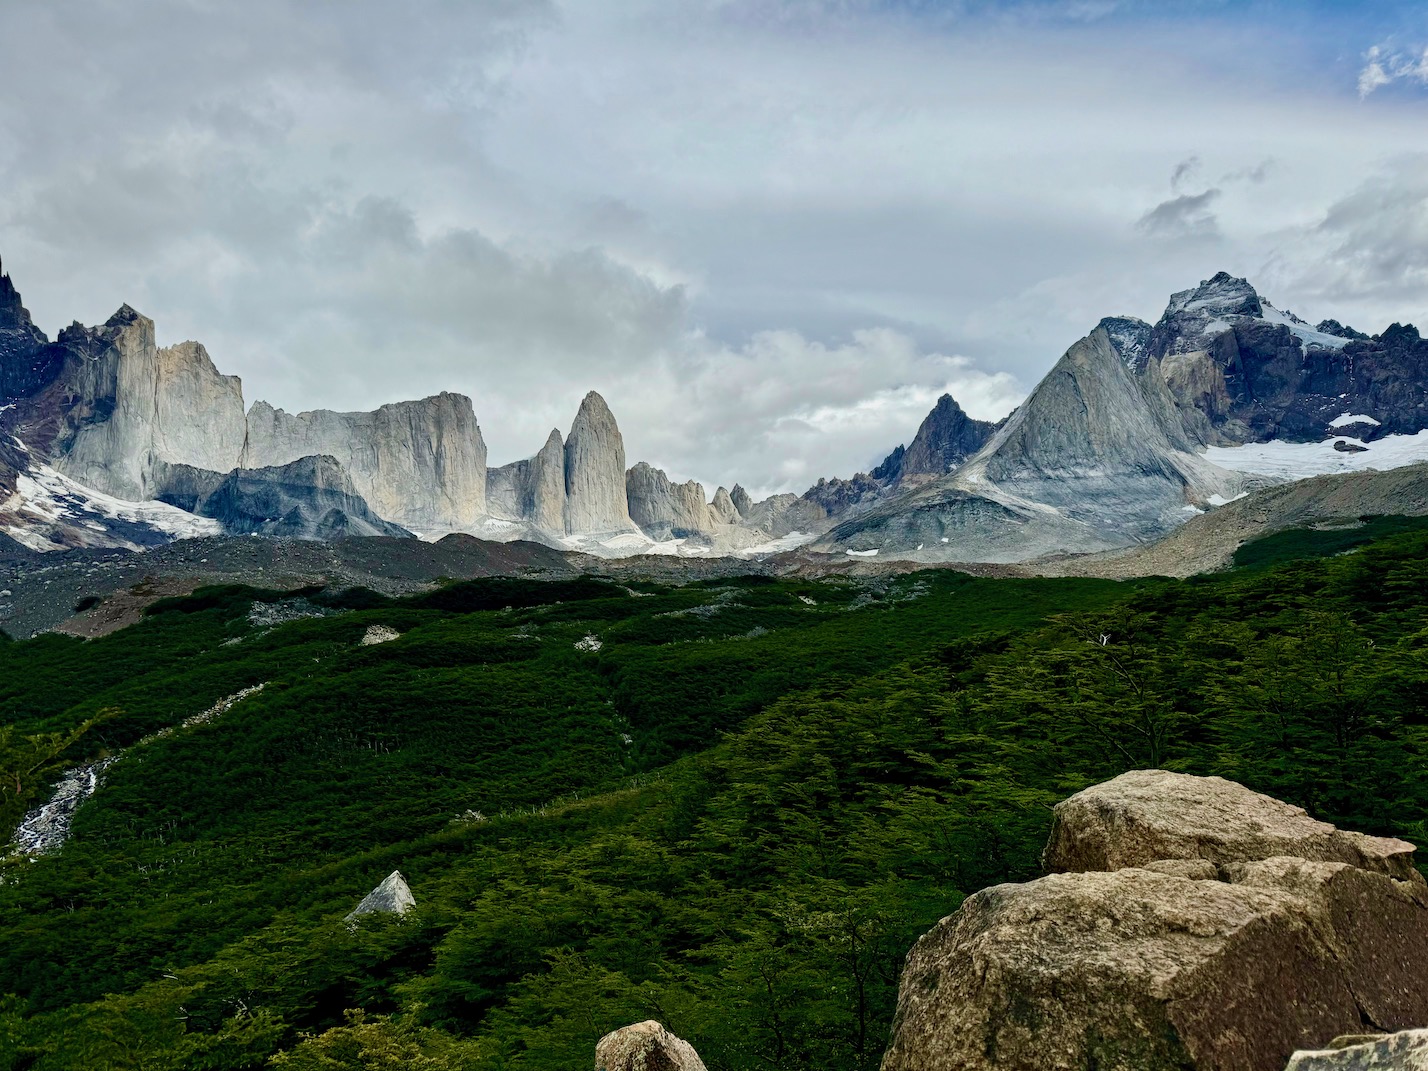
This was probably one of the most crowded sections of the whole trek for us, probably because there are also day hikers and because we were starting relatively "late" that day since we had bused in in the morning. We didn't spend too long at Chileno because there is a cutoff time for the Torres del Paine hike at 4 PM at the base and we wanted to make sure we weren't rushing. Our trek up to the Mirador Las Torres took us about 4 hours in total, clocking in at 5.91 miles and 2,386 ft of elevation.
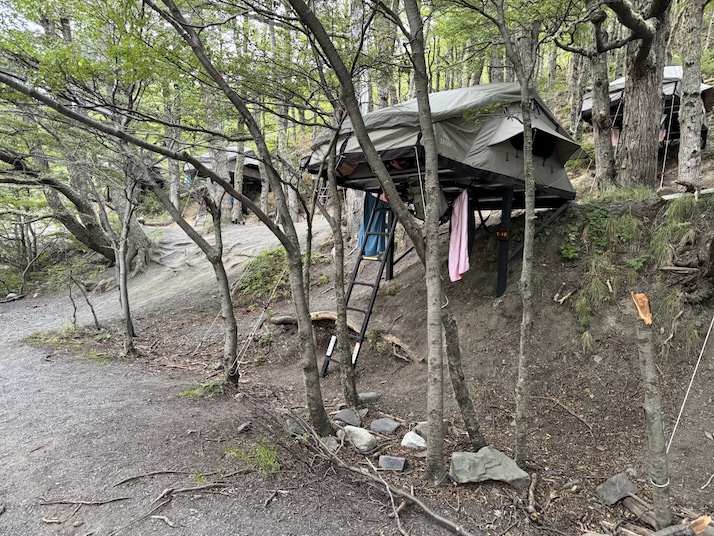

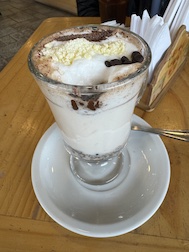
I think the photos speak for themselves. We relaxed at the base for a bit before heading back to Chileno, where we showered, ate our freeze dried meals, played some cards, before heading to sleep in the provided elevated tents. Chileno does provide a place for potable water, as well as boiled/heated water, and has a concession as well for drinks and snacks. There is a stream that runs along the site, which made for great white noise as we slept.
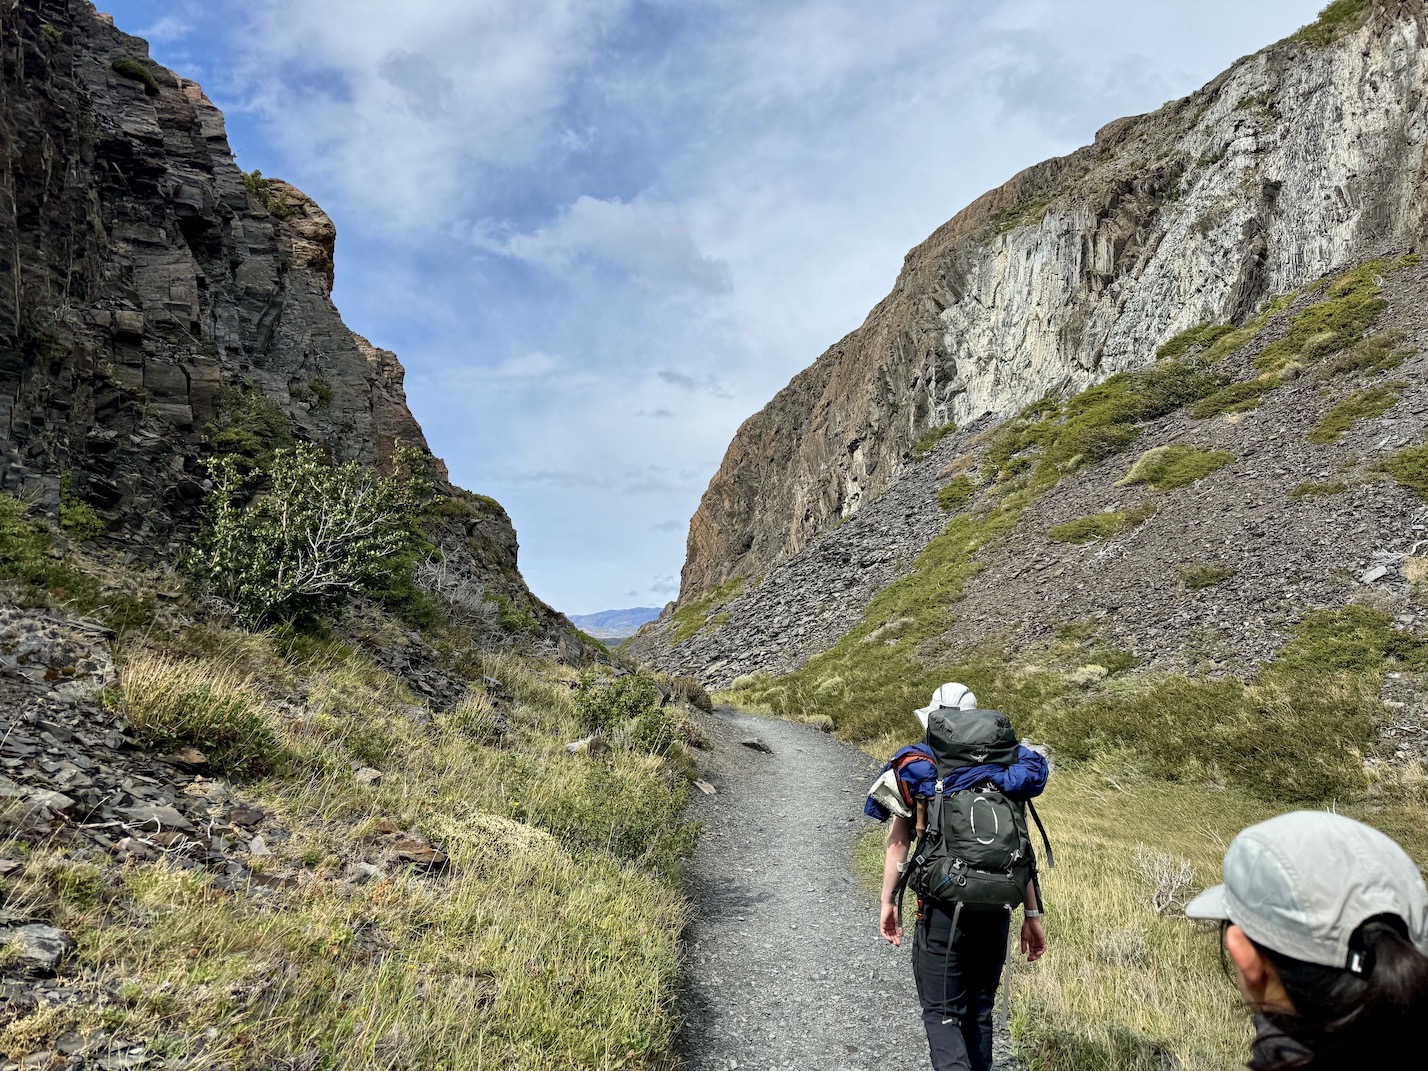
Day 4: W Trek - Chileno to Frances
Segments- Central -> Frances: 14.37 miles, 4,430 ft, ~7 hours
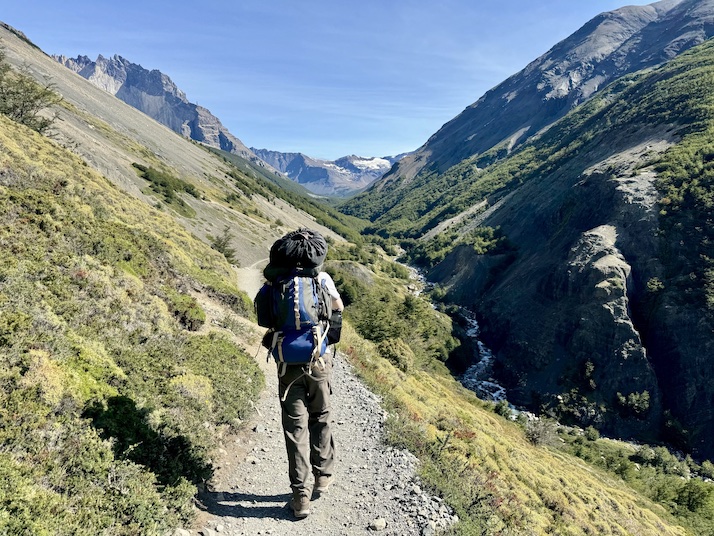
The night before, we had considered waking up early to catch the sunrise at Mirador Las Torres. However, we ended up deciding against it given there was some uncertainty in the forecast on how low the clouds would be, and frankly weren't as motivated since we already got a wonderful view yesterday. Since we weren't catching the sunrise, we could sleep in a bit and after eating breakfast, headed out from Chileno to Frances, our next refugio.
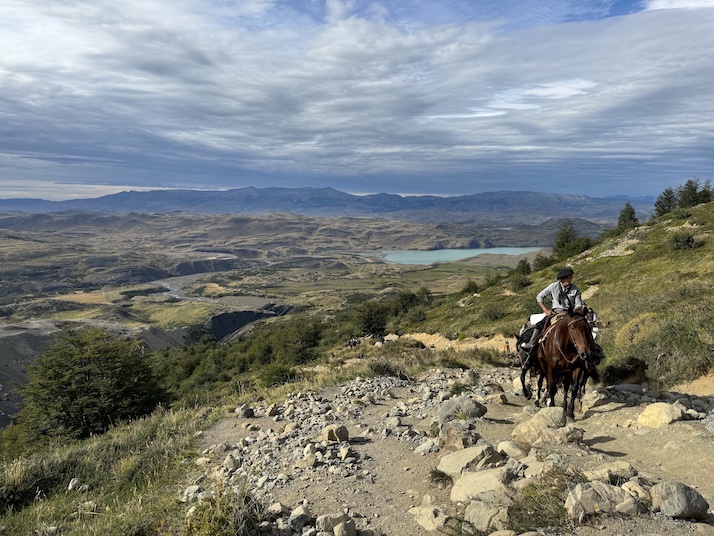
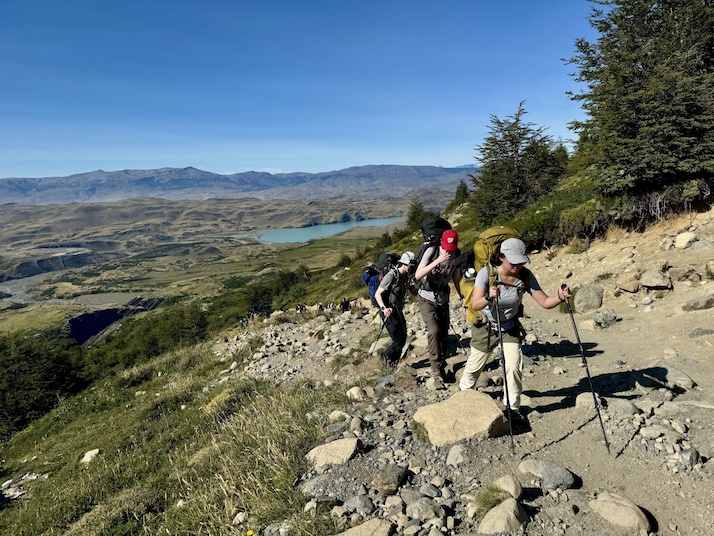
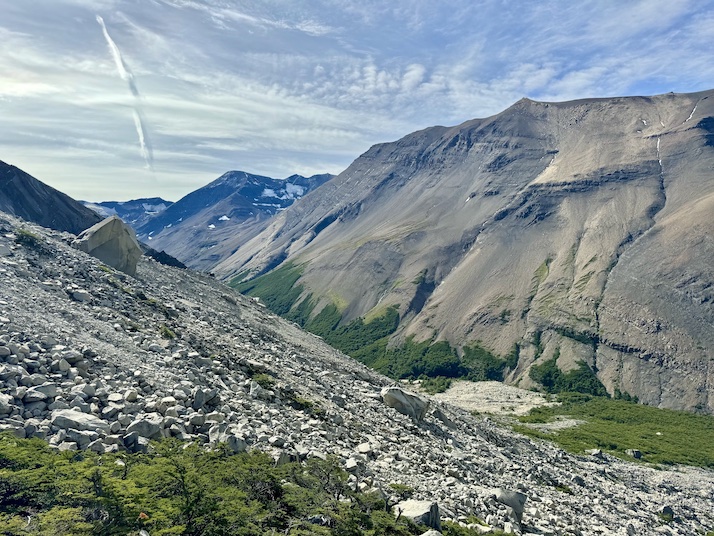
This is a full day, though not necessarliy the most strenuous in terms of stats. We clocked about 14.37 miles, with 4,430 ft of elevation, and spent about 7 hours to reach the refugio. You head out back the way you came into Chileno, passing the Windy Pass again and connecting partially back to the trail that you came in on from Central (apparently there was a shortcut... but we missed it). On our way, we passed a horse/mule train that was carrying up supplies (such as toilet paper!) up to Chileno.
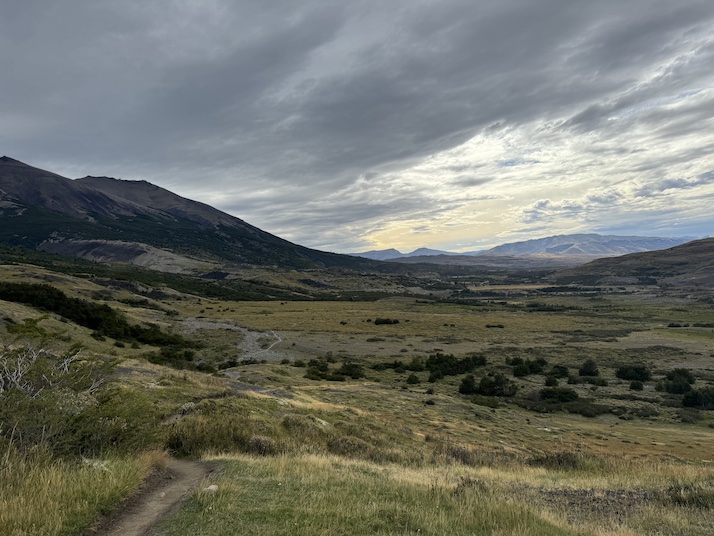
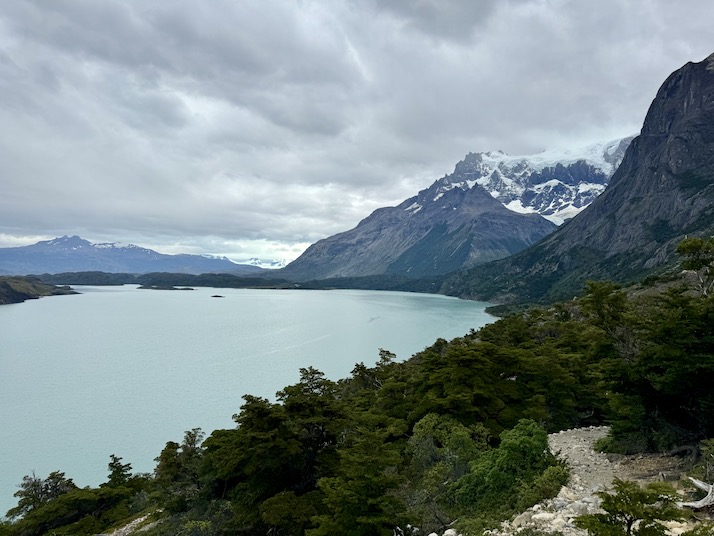
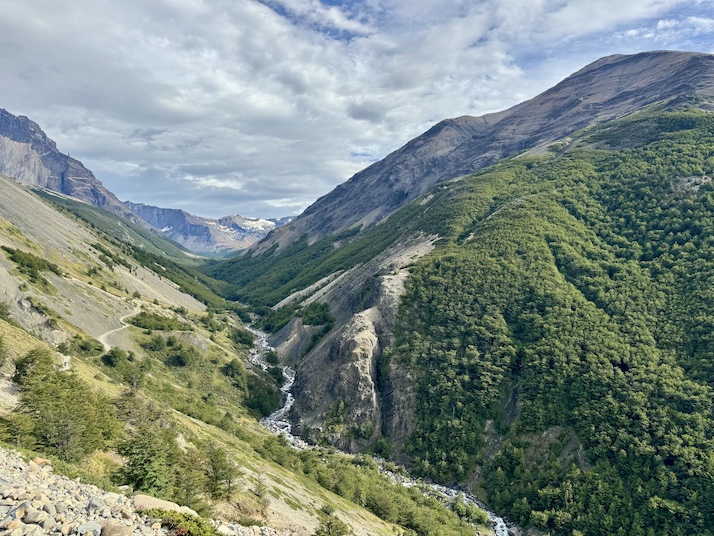
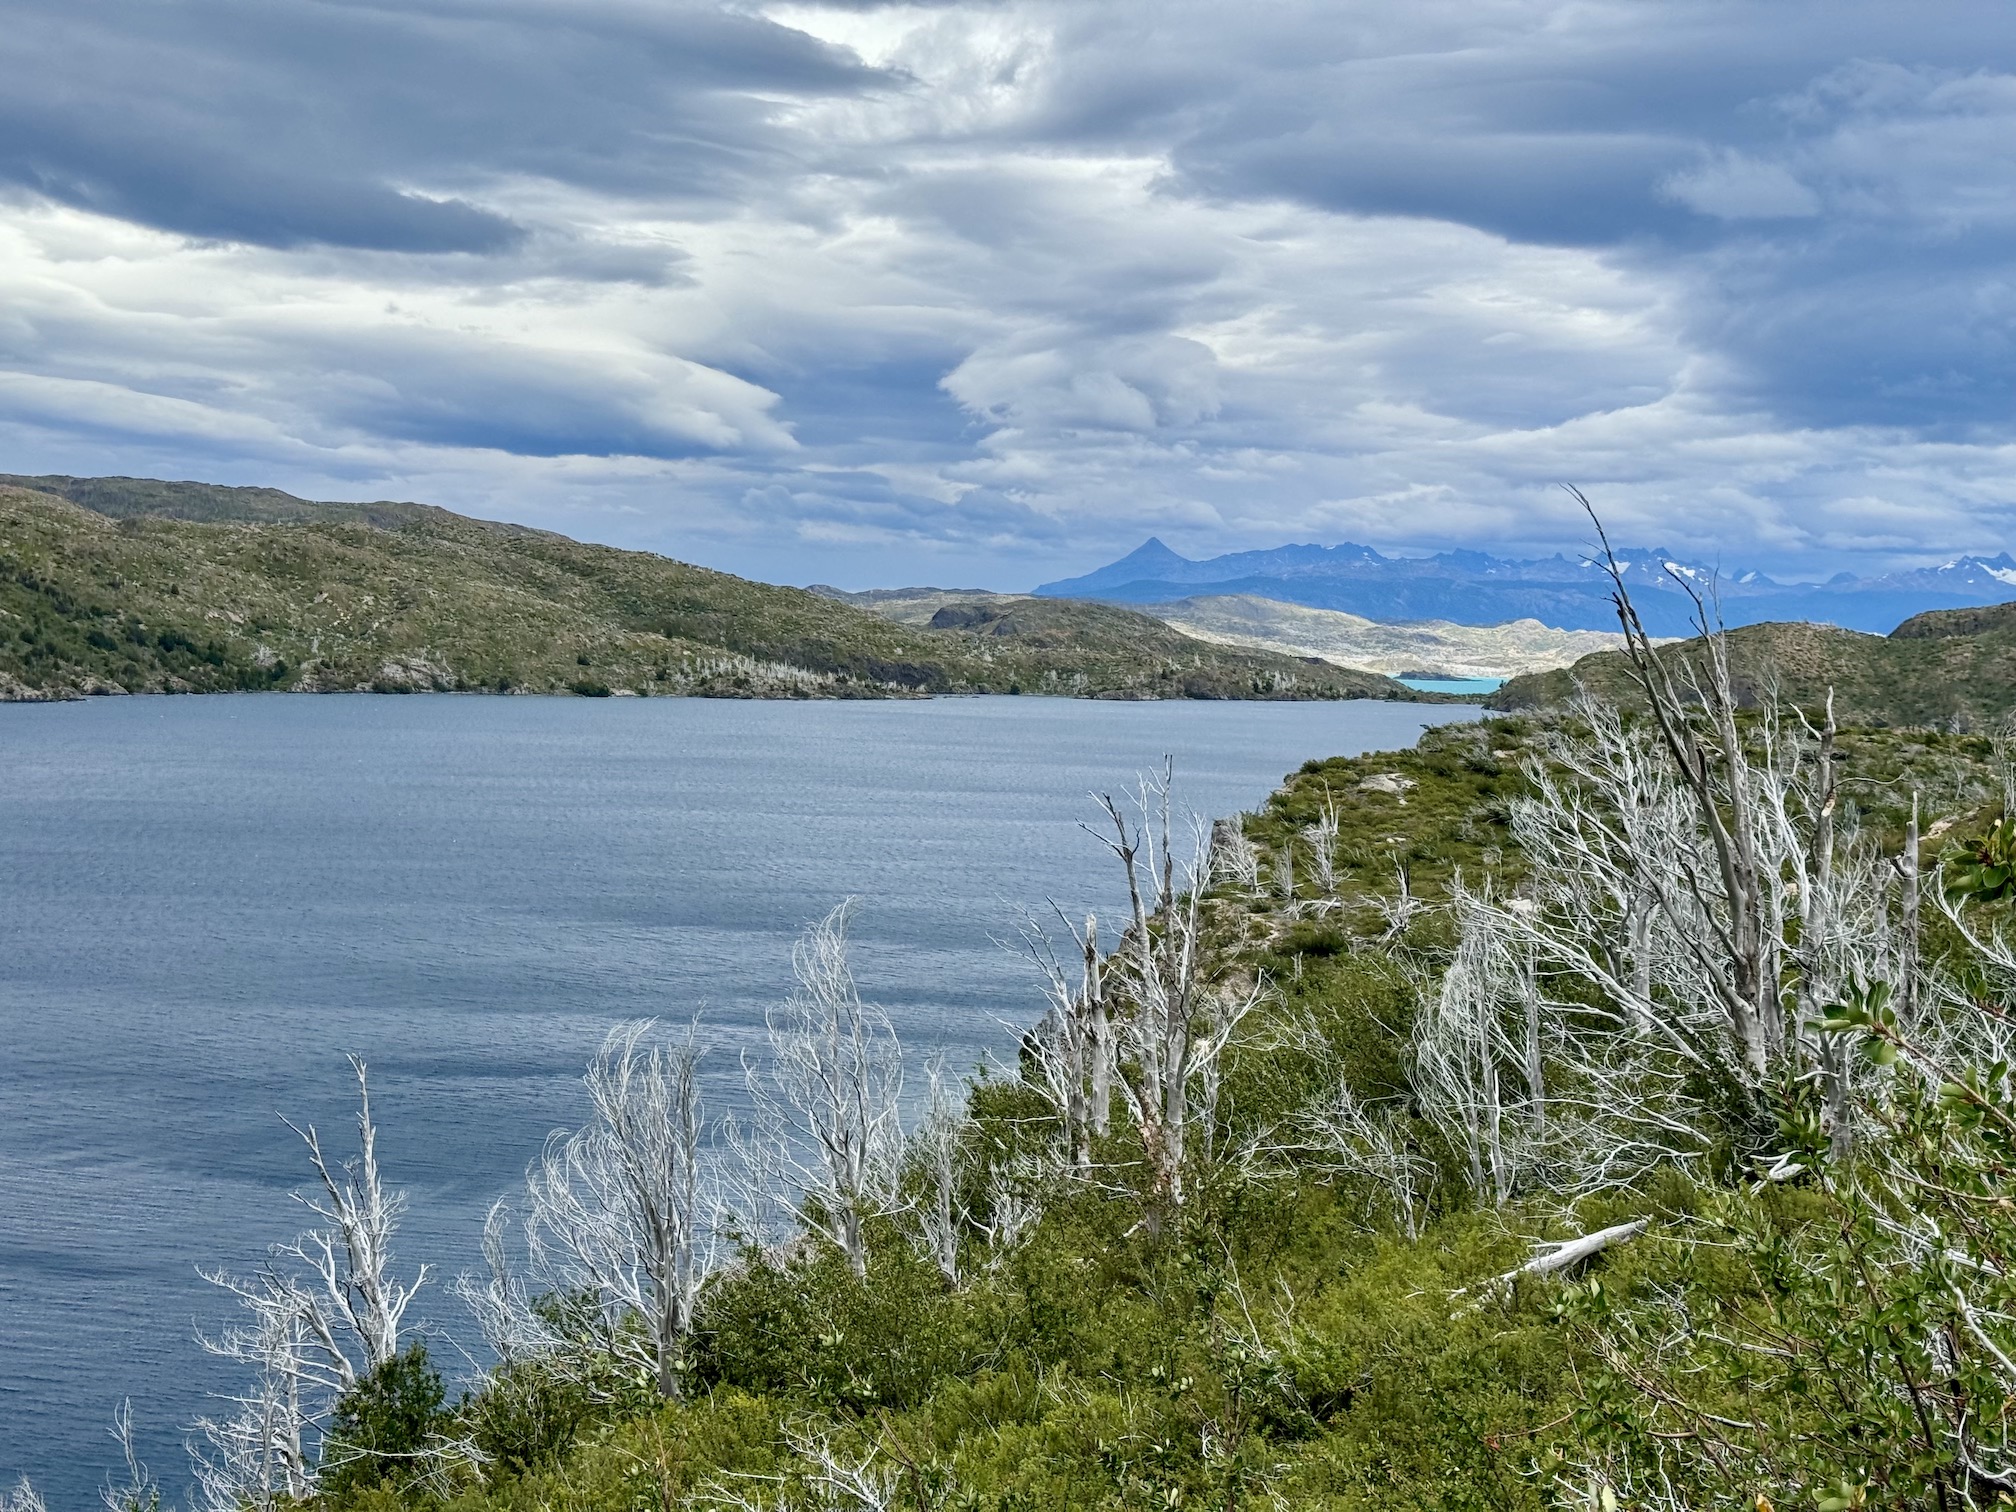
Having completed one of the arms of the W, you continue following the mountain range. The expanse is relatively wide open and you can see into the horizon. We did see a few groups on our way, but largely we had the trail to ourself. It definitely got more cloudy as the day went on, though the temperature was arguably more comfortable than the blazing sun of the previous day.
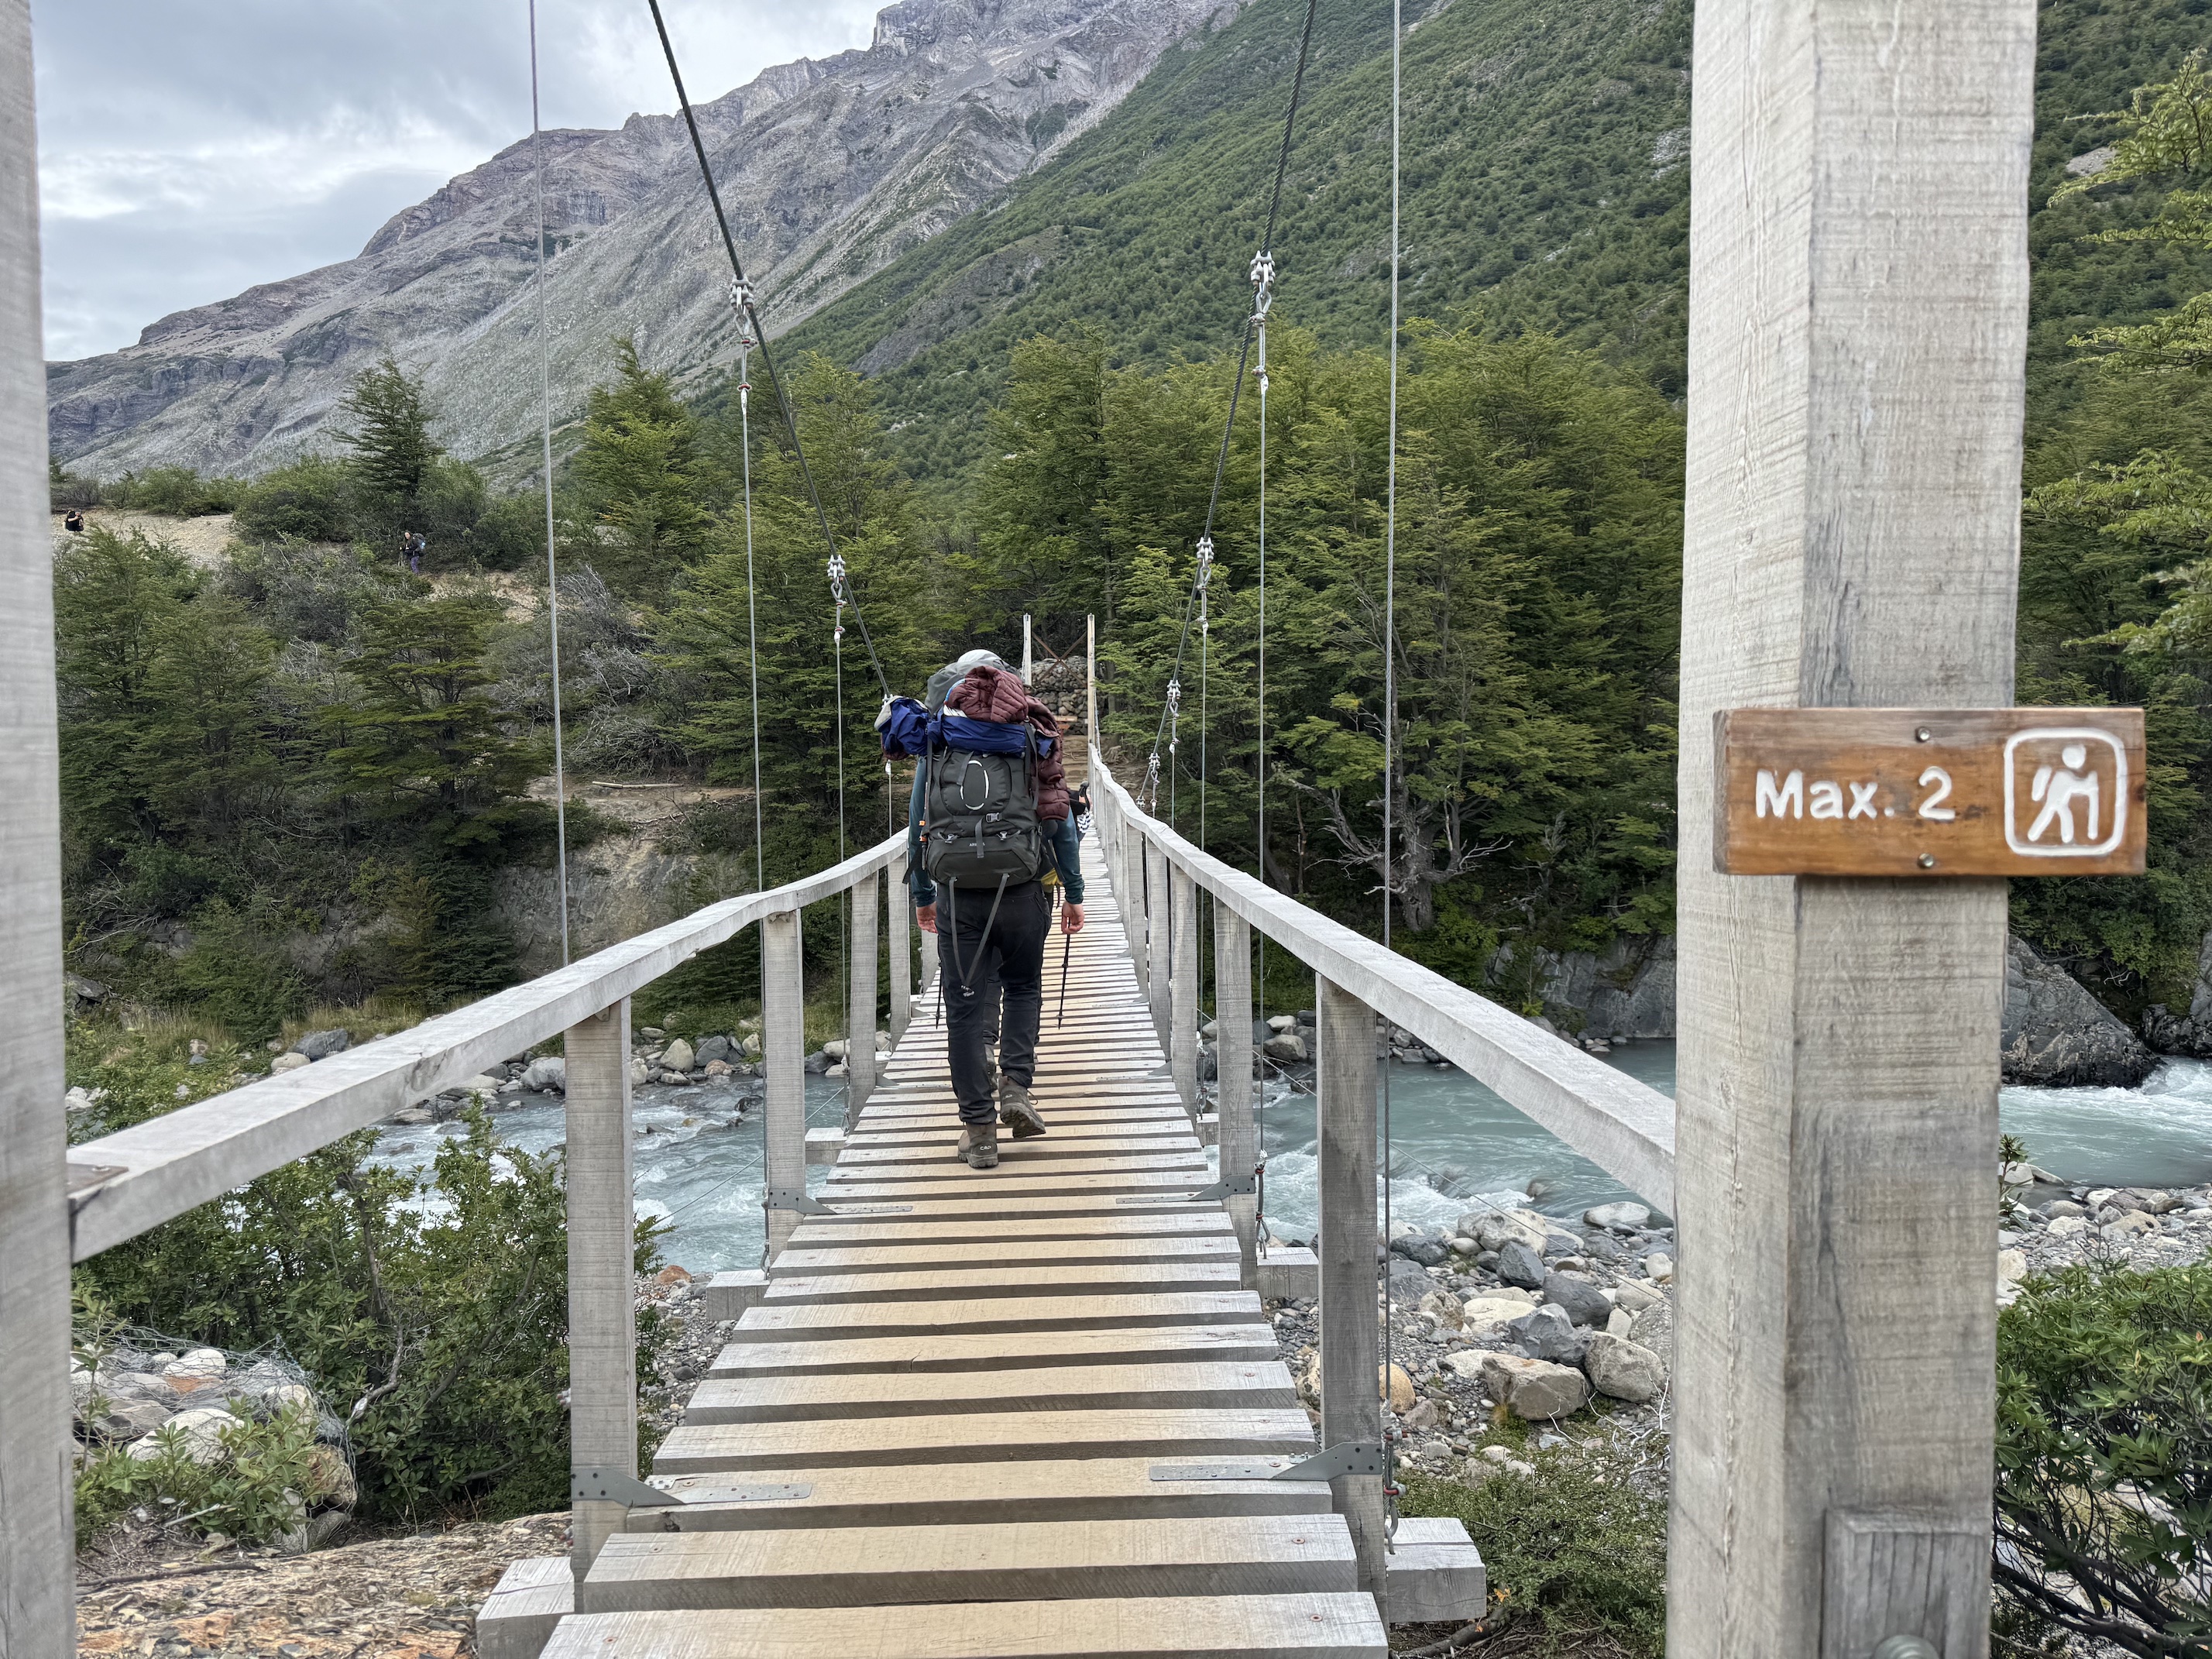
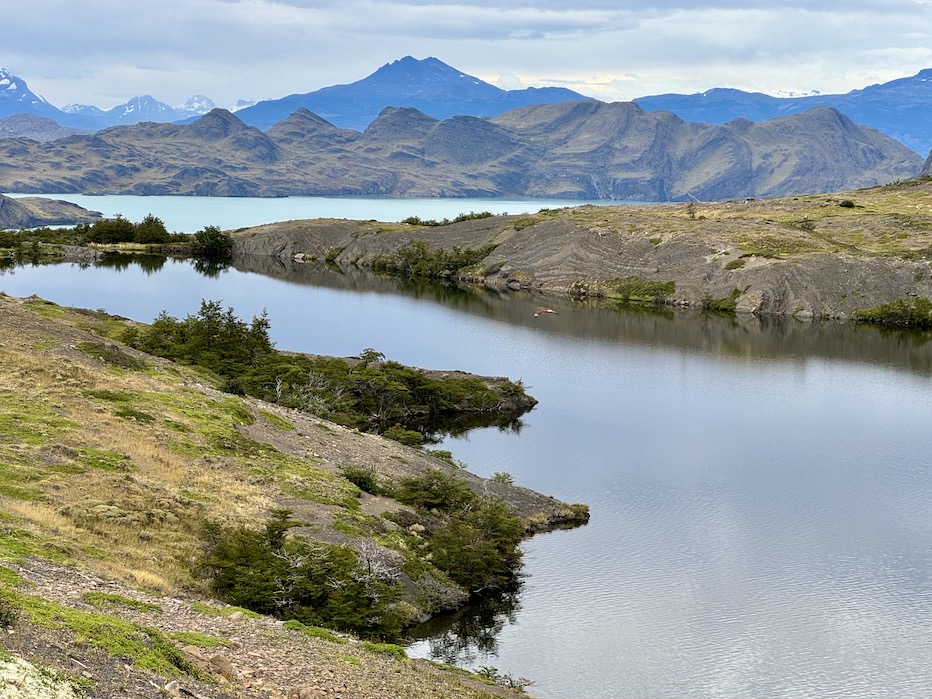
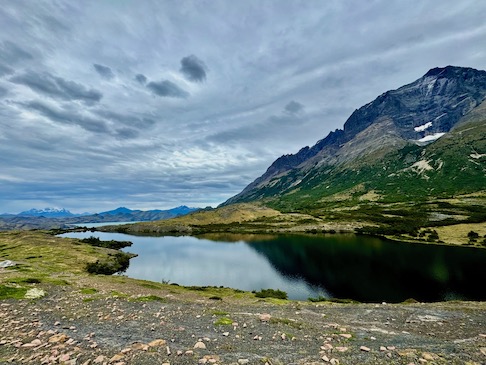
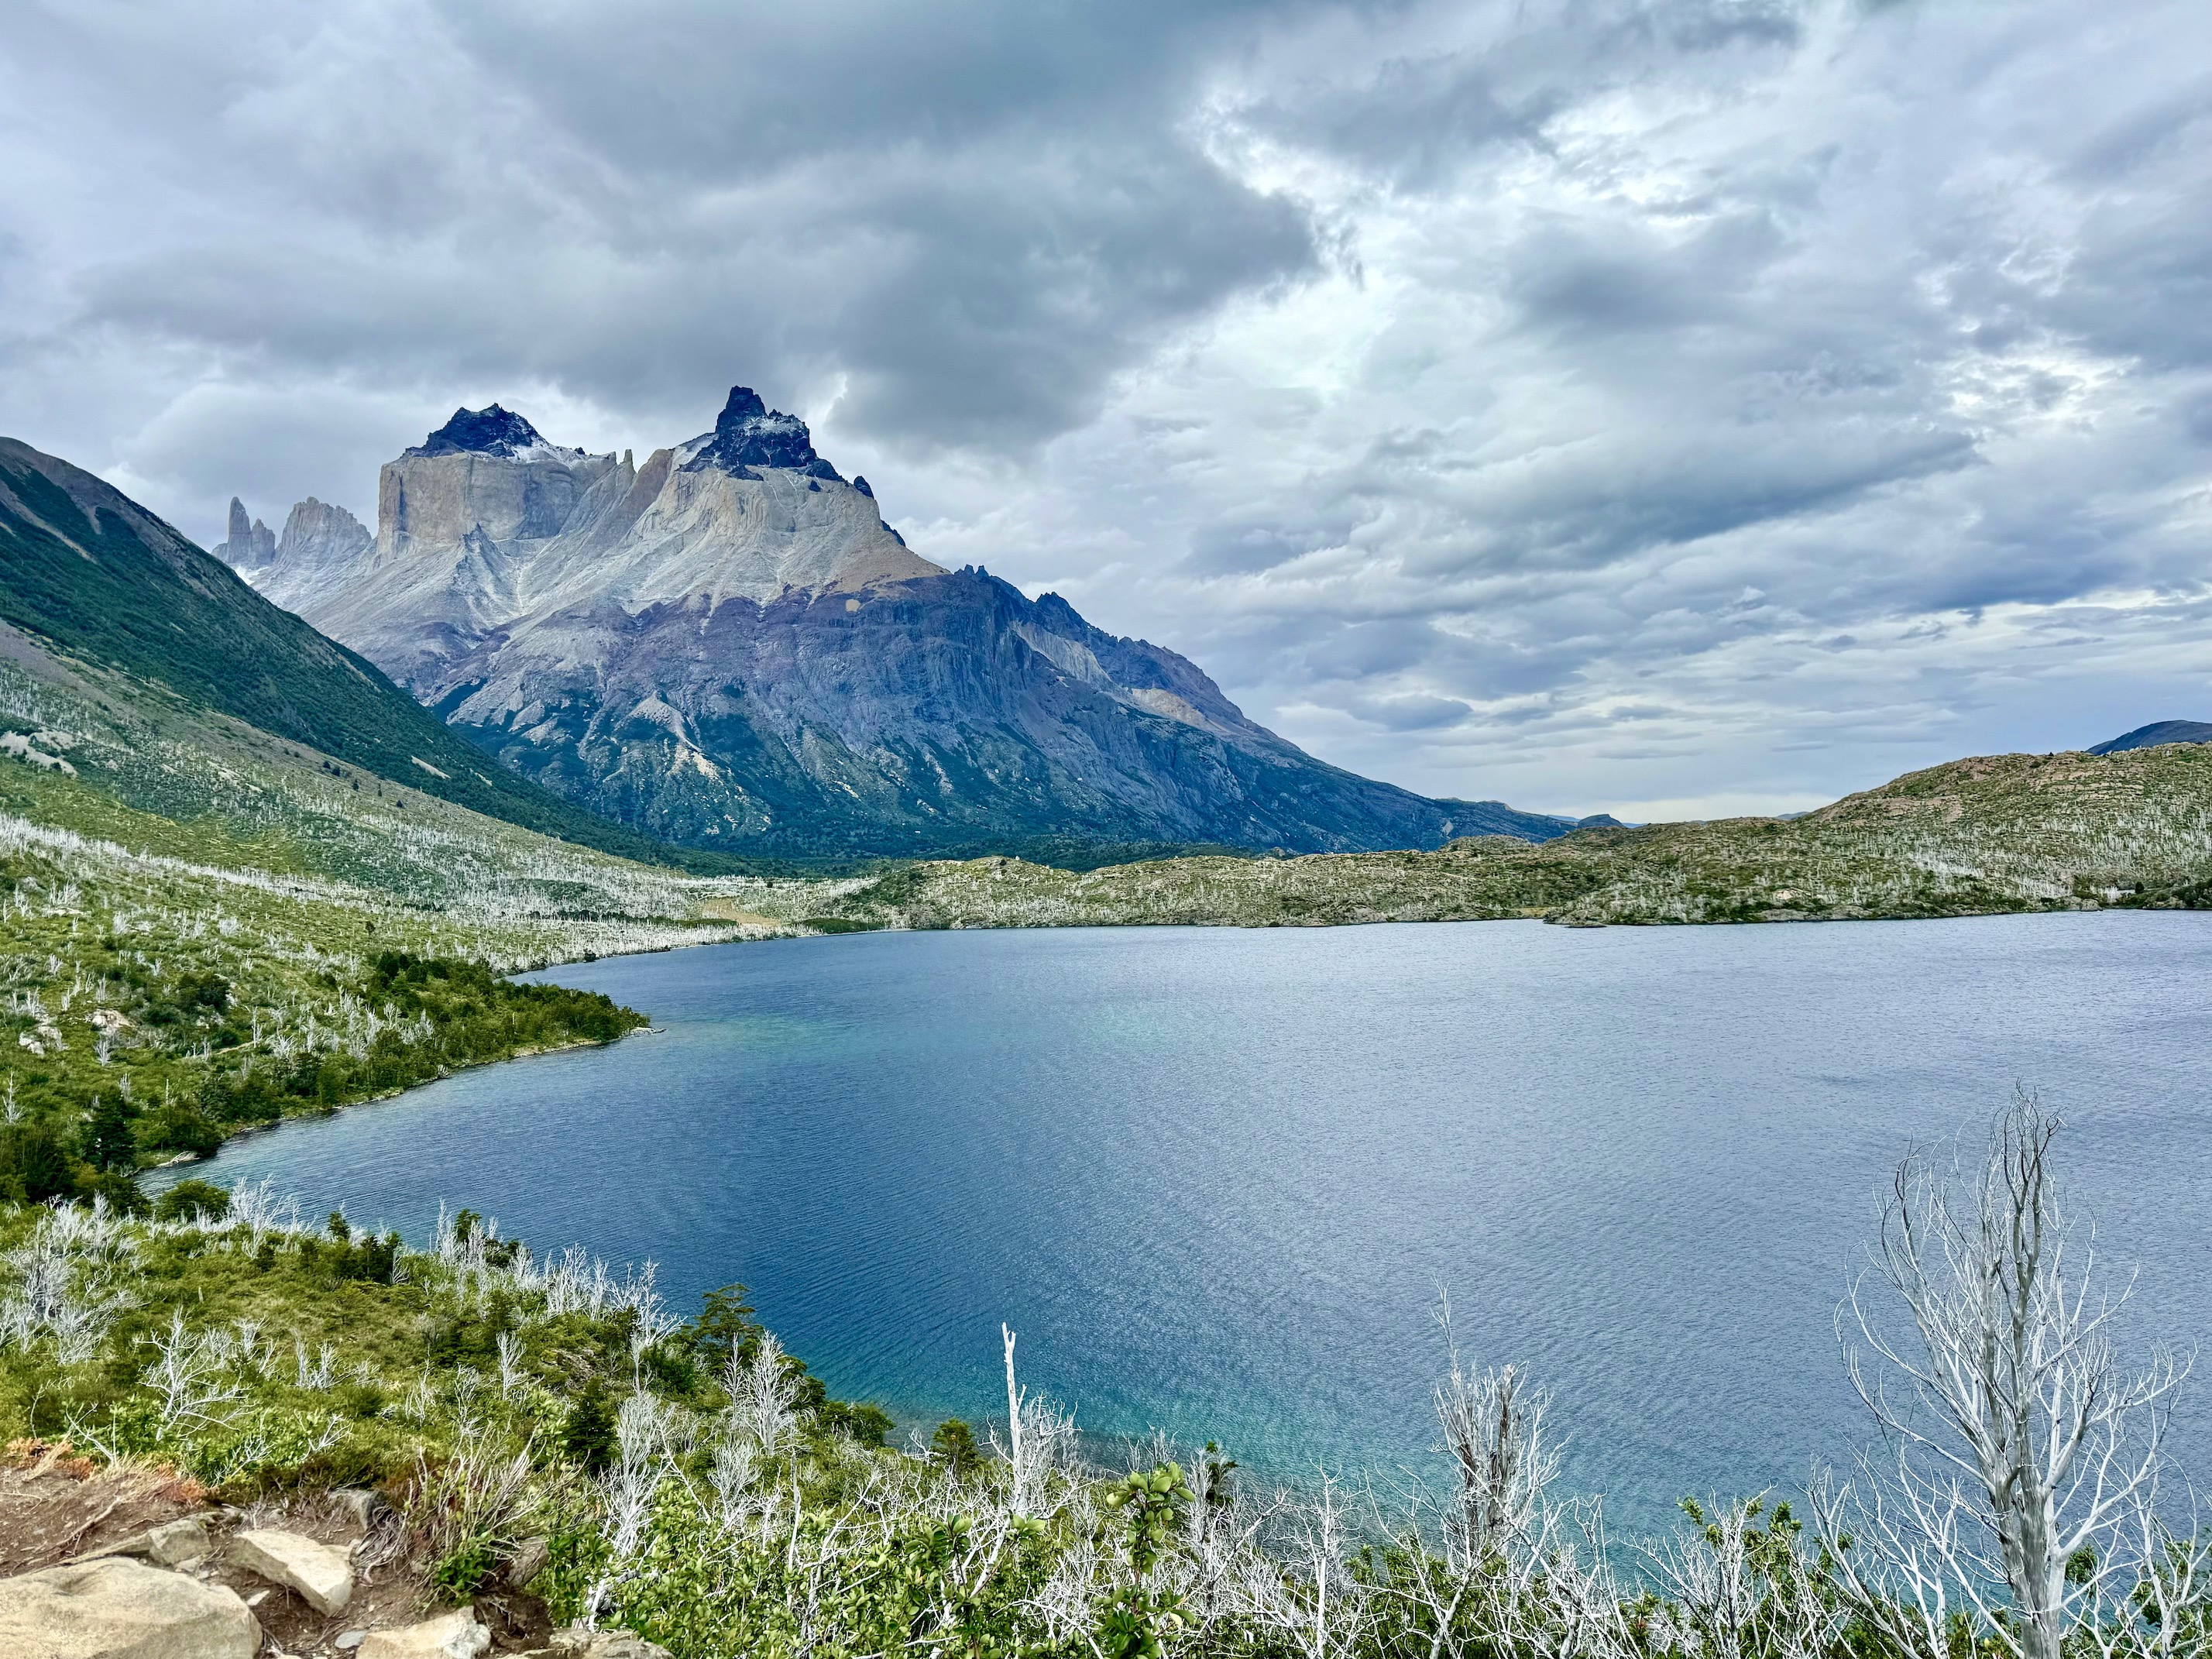
You eventually also start following a few lakes, including Lago Nordenskjöld, a large lake that you will see throughout the trek. It never really rained too hard on the trail for us (luckily), but we did feel a few drops of rain on this day. Passing a few glacier-blue lakes and going over a small hanging bridge or two, you eventually run into Refugio Cuernos, which is run by Las Torres as well.
This refugio is also another option for the second night lodging on the East to West W Trek, with the tradeoff of a longer trek for the next day (I believe it also may be a bigger site with a bit more amenities). We had preferred making this day longer with the advantage of the next day being shorter. So for us, it was just a pit stop on the way, but a nice place to use the restroom and eat a few snacks before setting out on the last few miles to Frances.
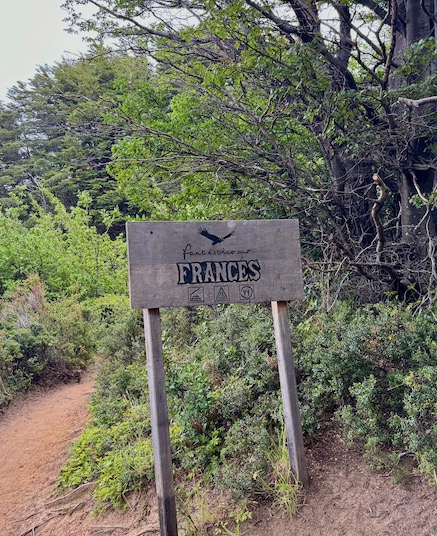
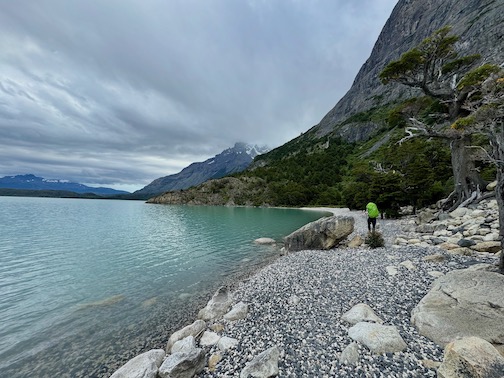
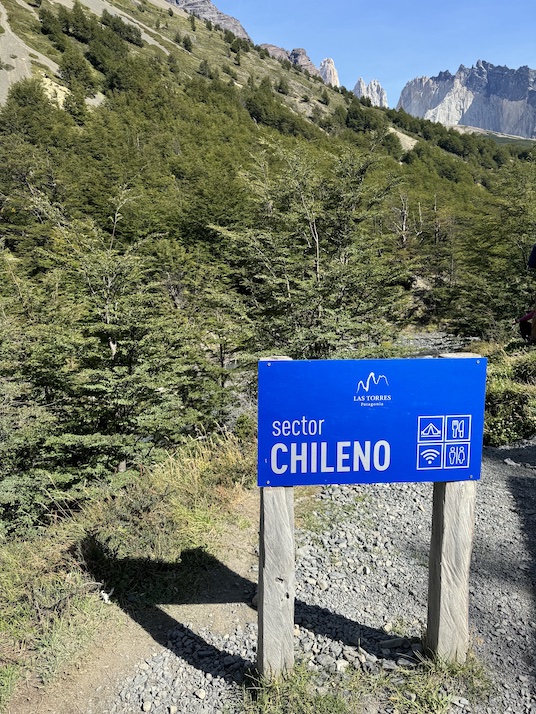
You walk for a portion directly onto the lakeshore (a small little beach), which was a lovely viewpoint. As we got closer to Frances, we kept hearing some crashing noises, which at this time, we had thought was thunder (especially as it seemed like the weather was getting more cloudy/rainy) -- we learned the next day it was not thunder :). We soon managed to make it to Frances (we were very happy to see the sign), which is run by the other accomodation provider on the trek Vertice. Like the night before, we checked in, dropped our stuff off, showered, and ate our freeze dried meals for dinner. There was not a ton of seating area in Frances to eat, but we managed to squeeze into one of the little picnic areas. Frances is built a bit on a hillside, so take that into account when wandering to and from your tent.
Day 5: W Trek - Frances to Paine Grande (ft Francés Valley)
Segments- Frances -> Mirador Britanico (Frances Valley) -> Paine Grande: 14 miles, 3,797 ft, ~6.5-7 hours
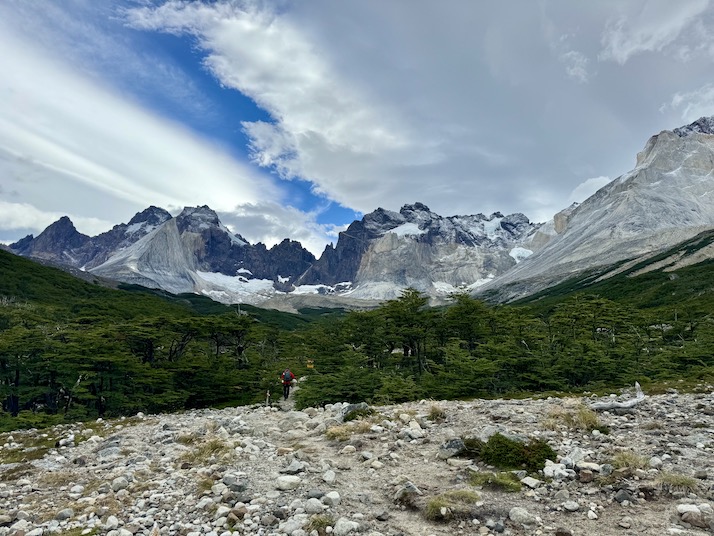
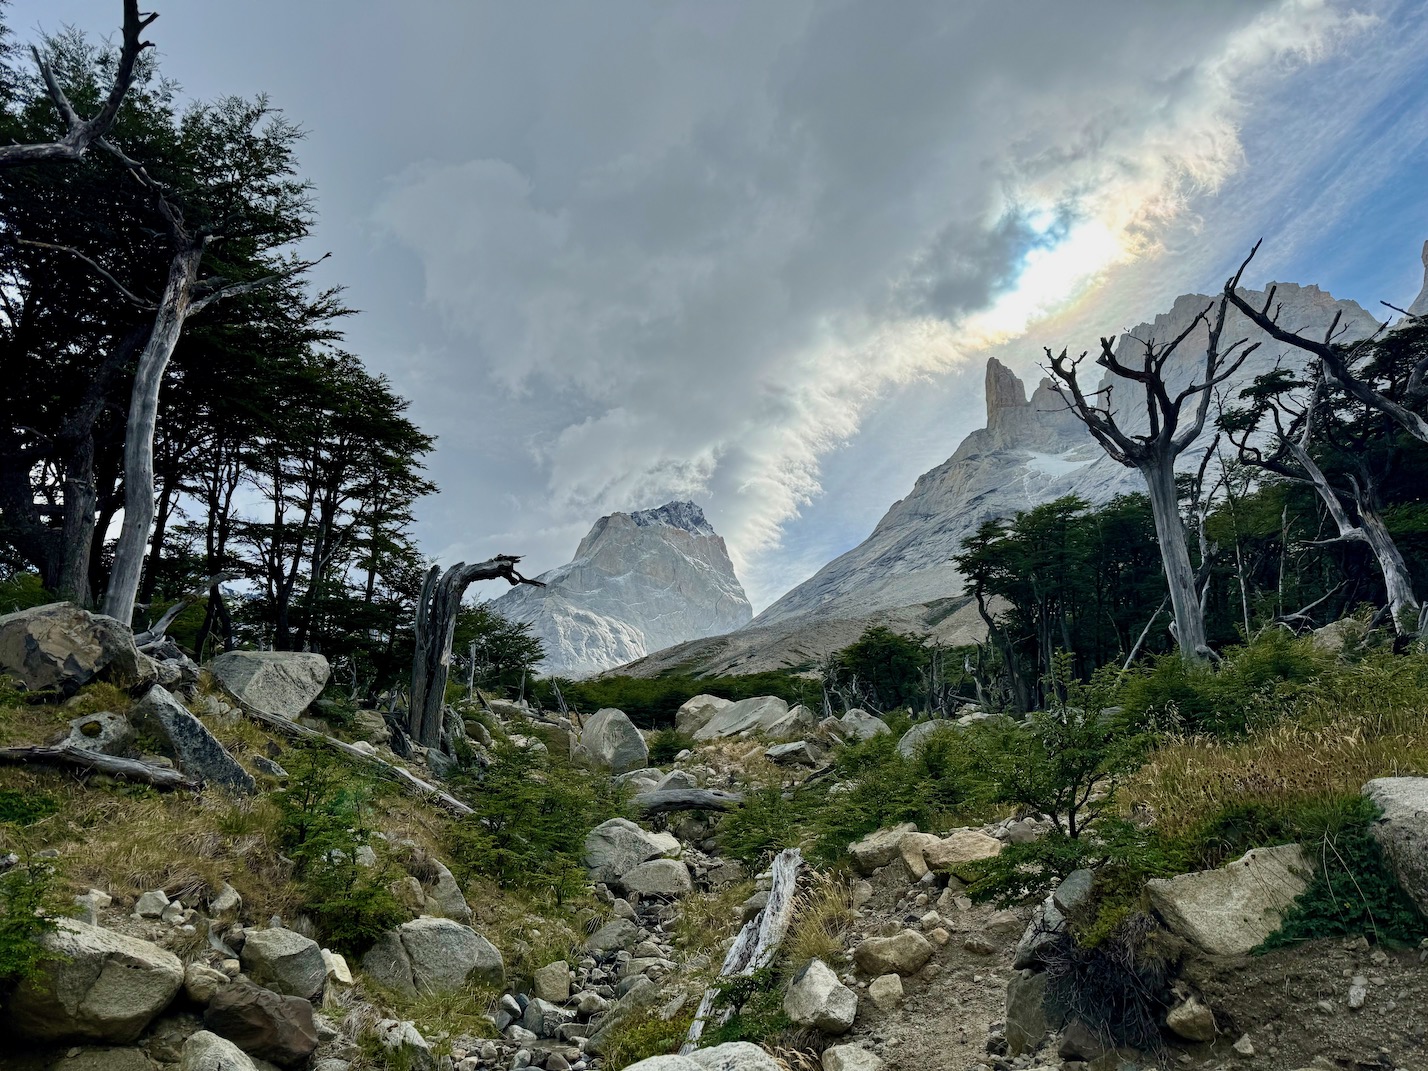
The agenda for the 3rd day on the W Trek involves completing the middle straight section of the W formation. Like the first day, part of this will be done with just a day bag. After waking up, we ate breakfast and headed from Frances to a ranger station (Italiano) only about 0.5-1 mile away and the start of the Frances Valley portion. This is also the other advantage of staying in Frances vs Cuernos -- while we started at a relatively normal time of 9 AM, because we were situated closer to the Valley we got a head start on most of the other backpackers. When we dropped off our larger bags in the ranger station (there's a pretty obvious alcove where people leave bags), it was pretty empty. When we returned, there were many more bags. As we drew closer to the valley, the scenery was readily apparent.

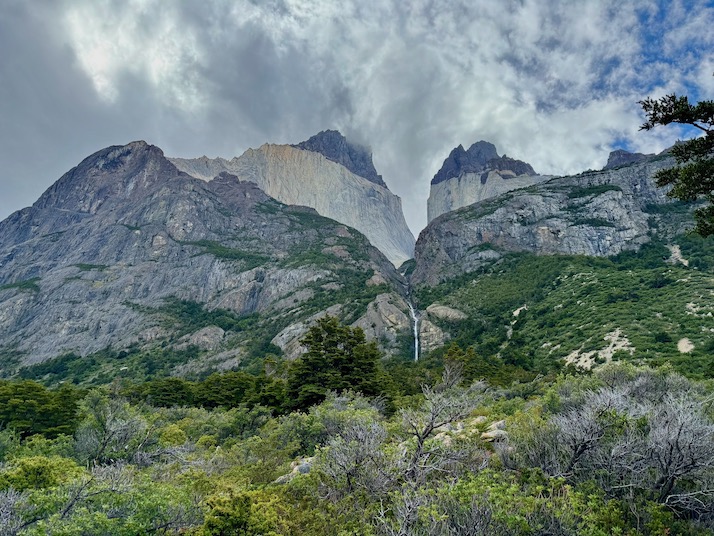
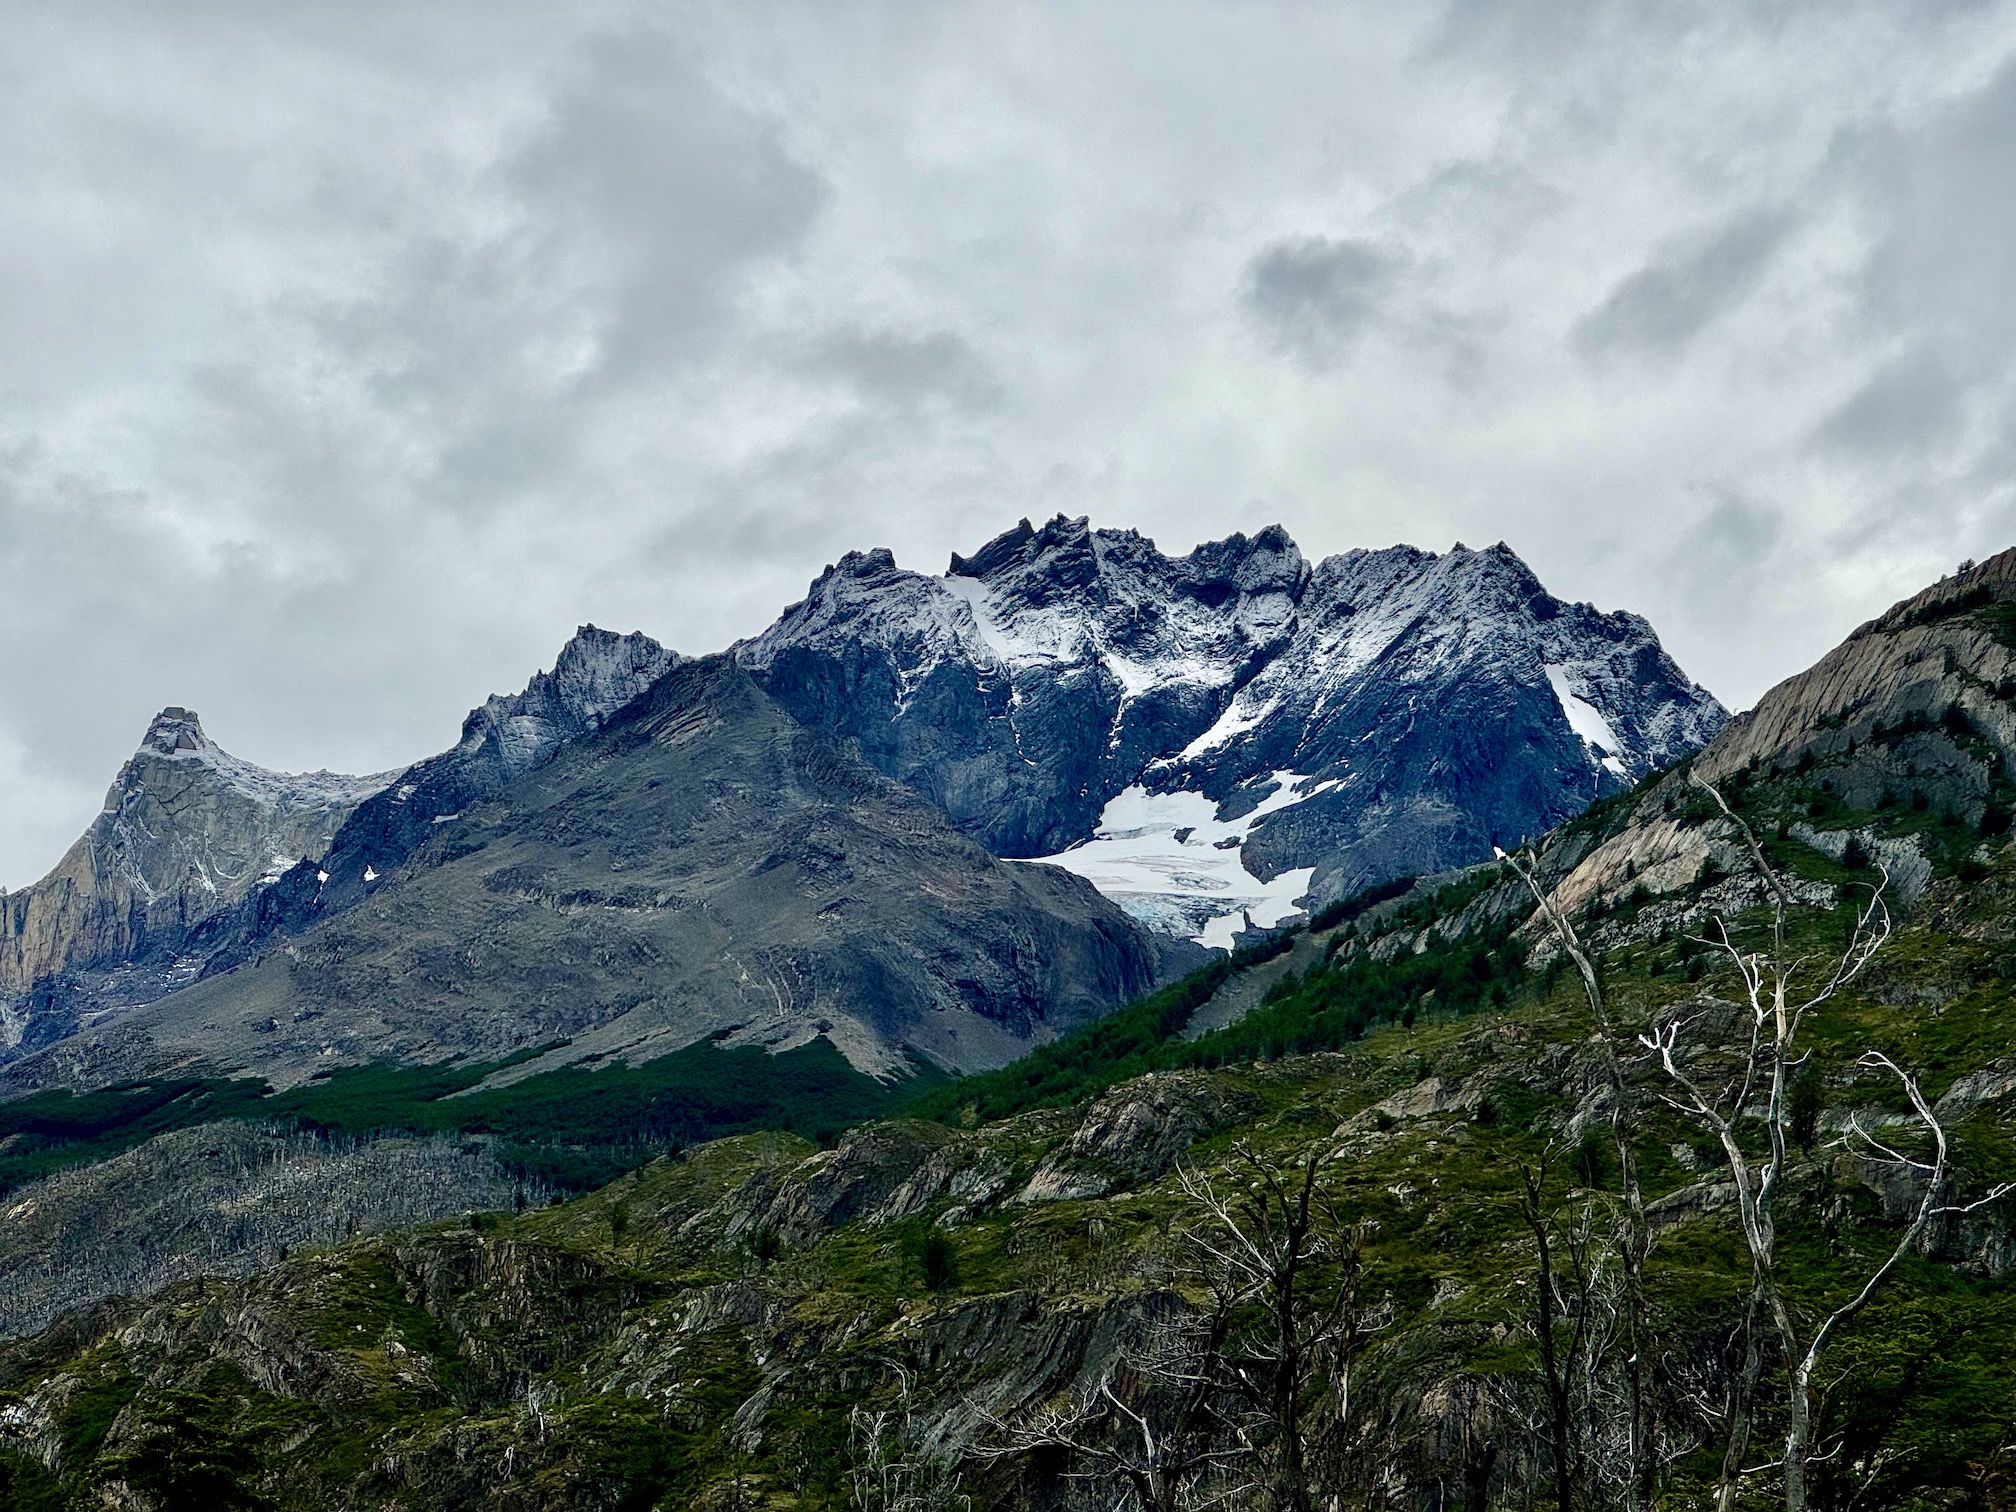
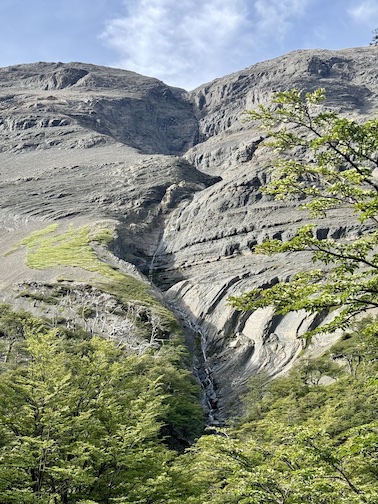
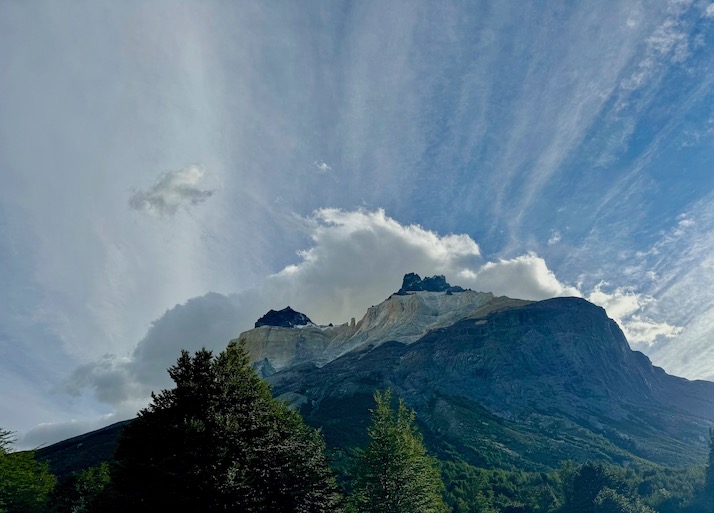
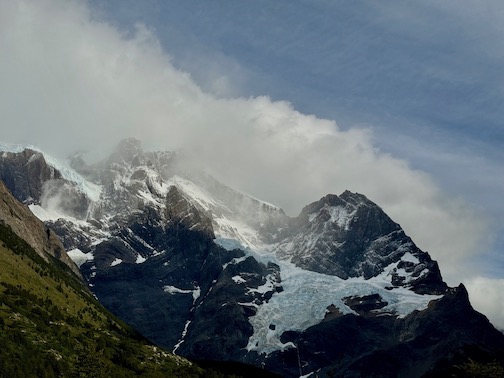
I would say this day was one of our best in terms of weather, and arguably views. The whole section -- Frances to up and back down the Valley and then to the Paine Grande refugio -- will likely take the whole day. It took us about 7 hours total, covering 14 miles and about 3800 ft. That being said, our group found Frances Valley to be one of the highlights. It is an out and back trek into the valley, so if you are ever feeling you are running out of time you can always turn back around. There are ~2-3 main viewpoints or miradors that make good "stopping" points, though personally I would suggest making your way all the way to Mirador Britanico if you can. But from the start, because of its valley shape, you have sheer mountains with glaciers on them surrounding you on both sides. The first real viewpoint gives you a wonderful view of the glacier on the mountain and a taste of the panoramas you will be able to see if you continue on.
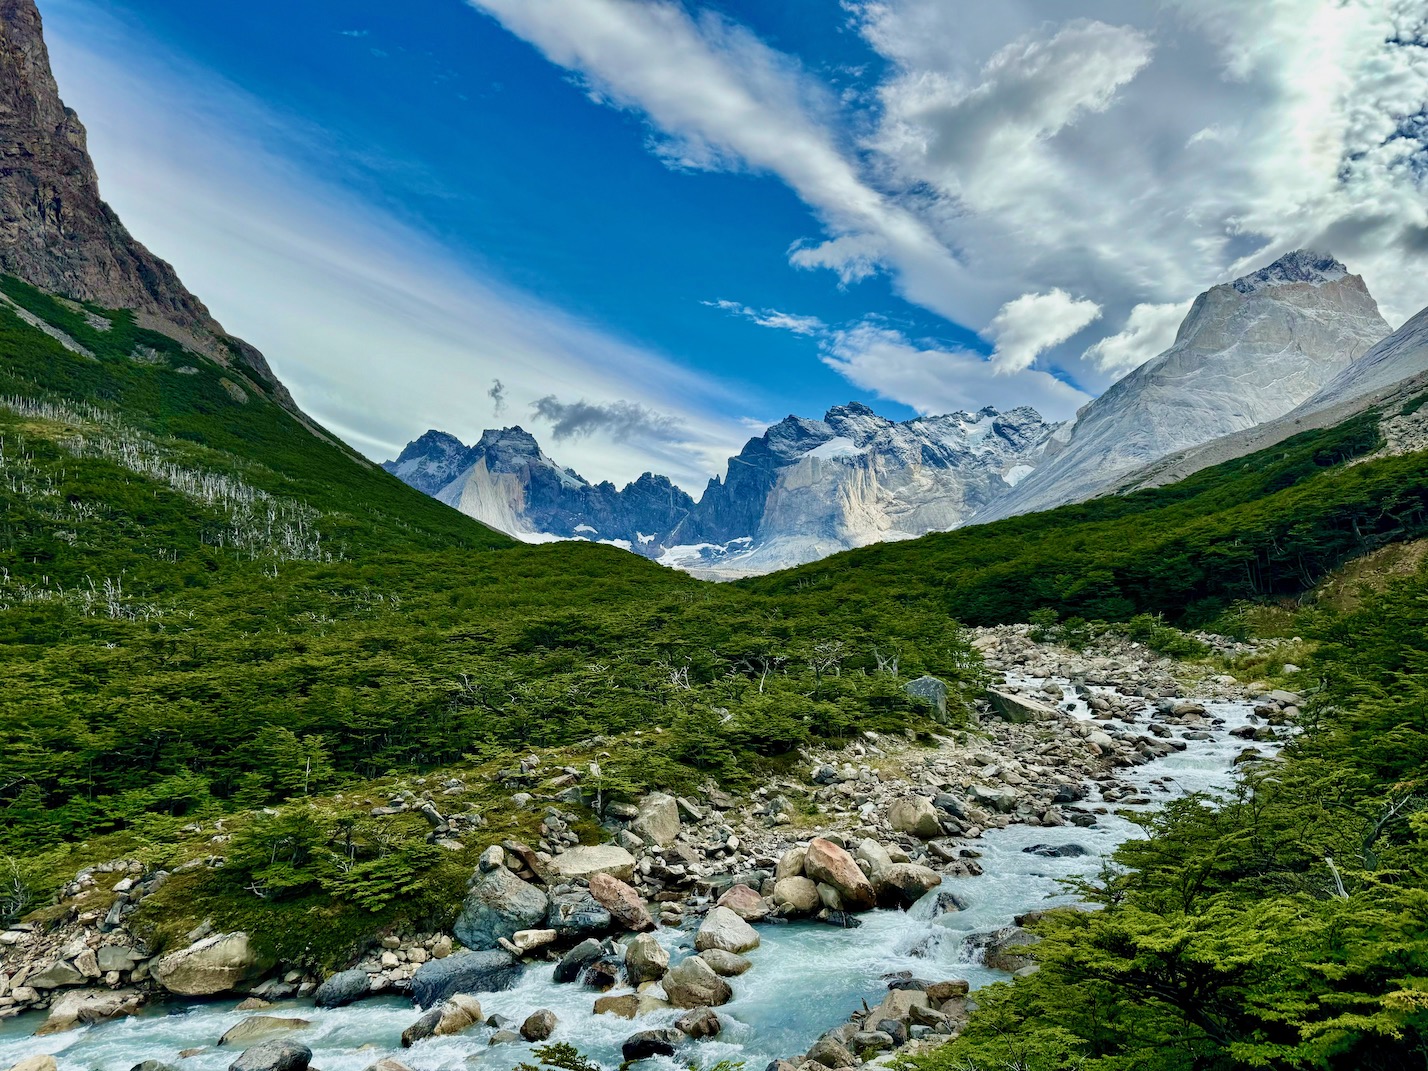
Looking at these photos again, I am in awe at the beauty of what we glimpsed. While you get further from the mountain-glacier combo you spotted at the previous viewpoint, the valley winds and opens up to vistas over the valley and the surrounding mountains. The furthest you can head out to before the trail ends is Mirador Britanico. Apparently during the "fall" (spring months), this is also a great place to watch the leaves change color.
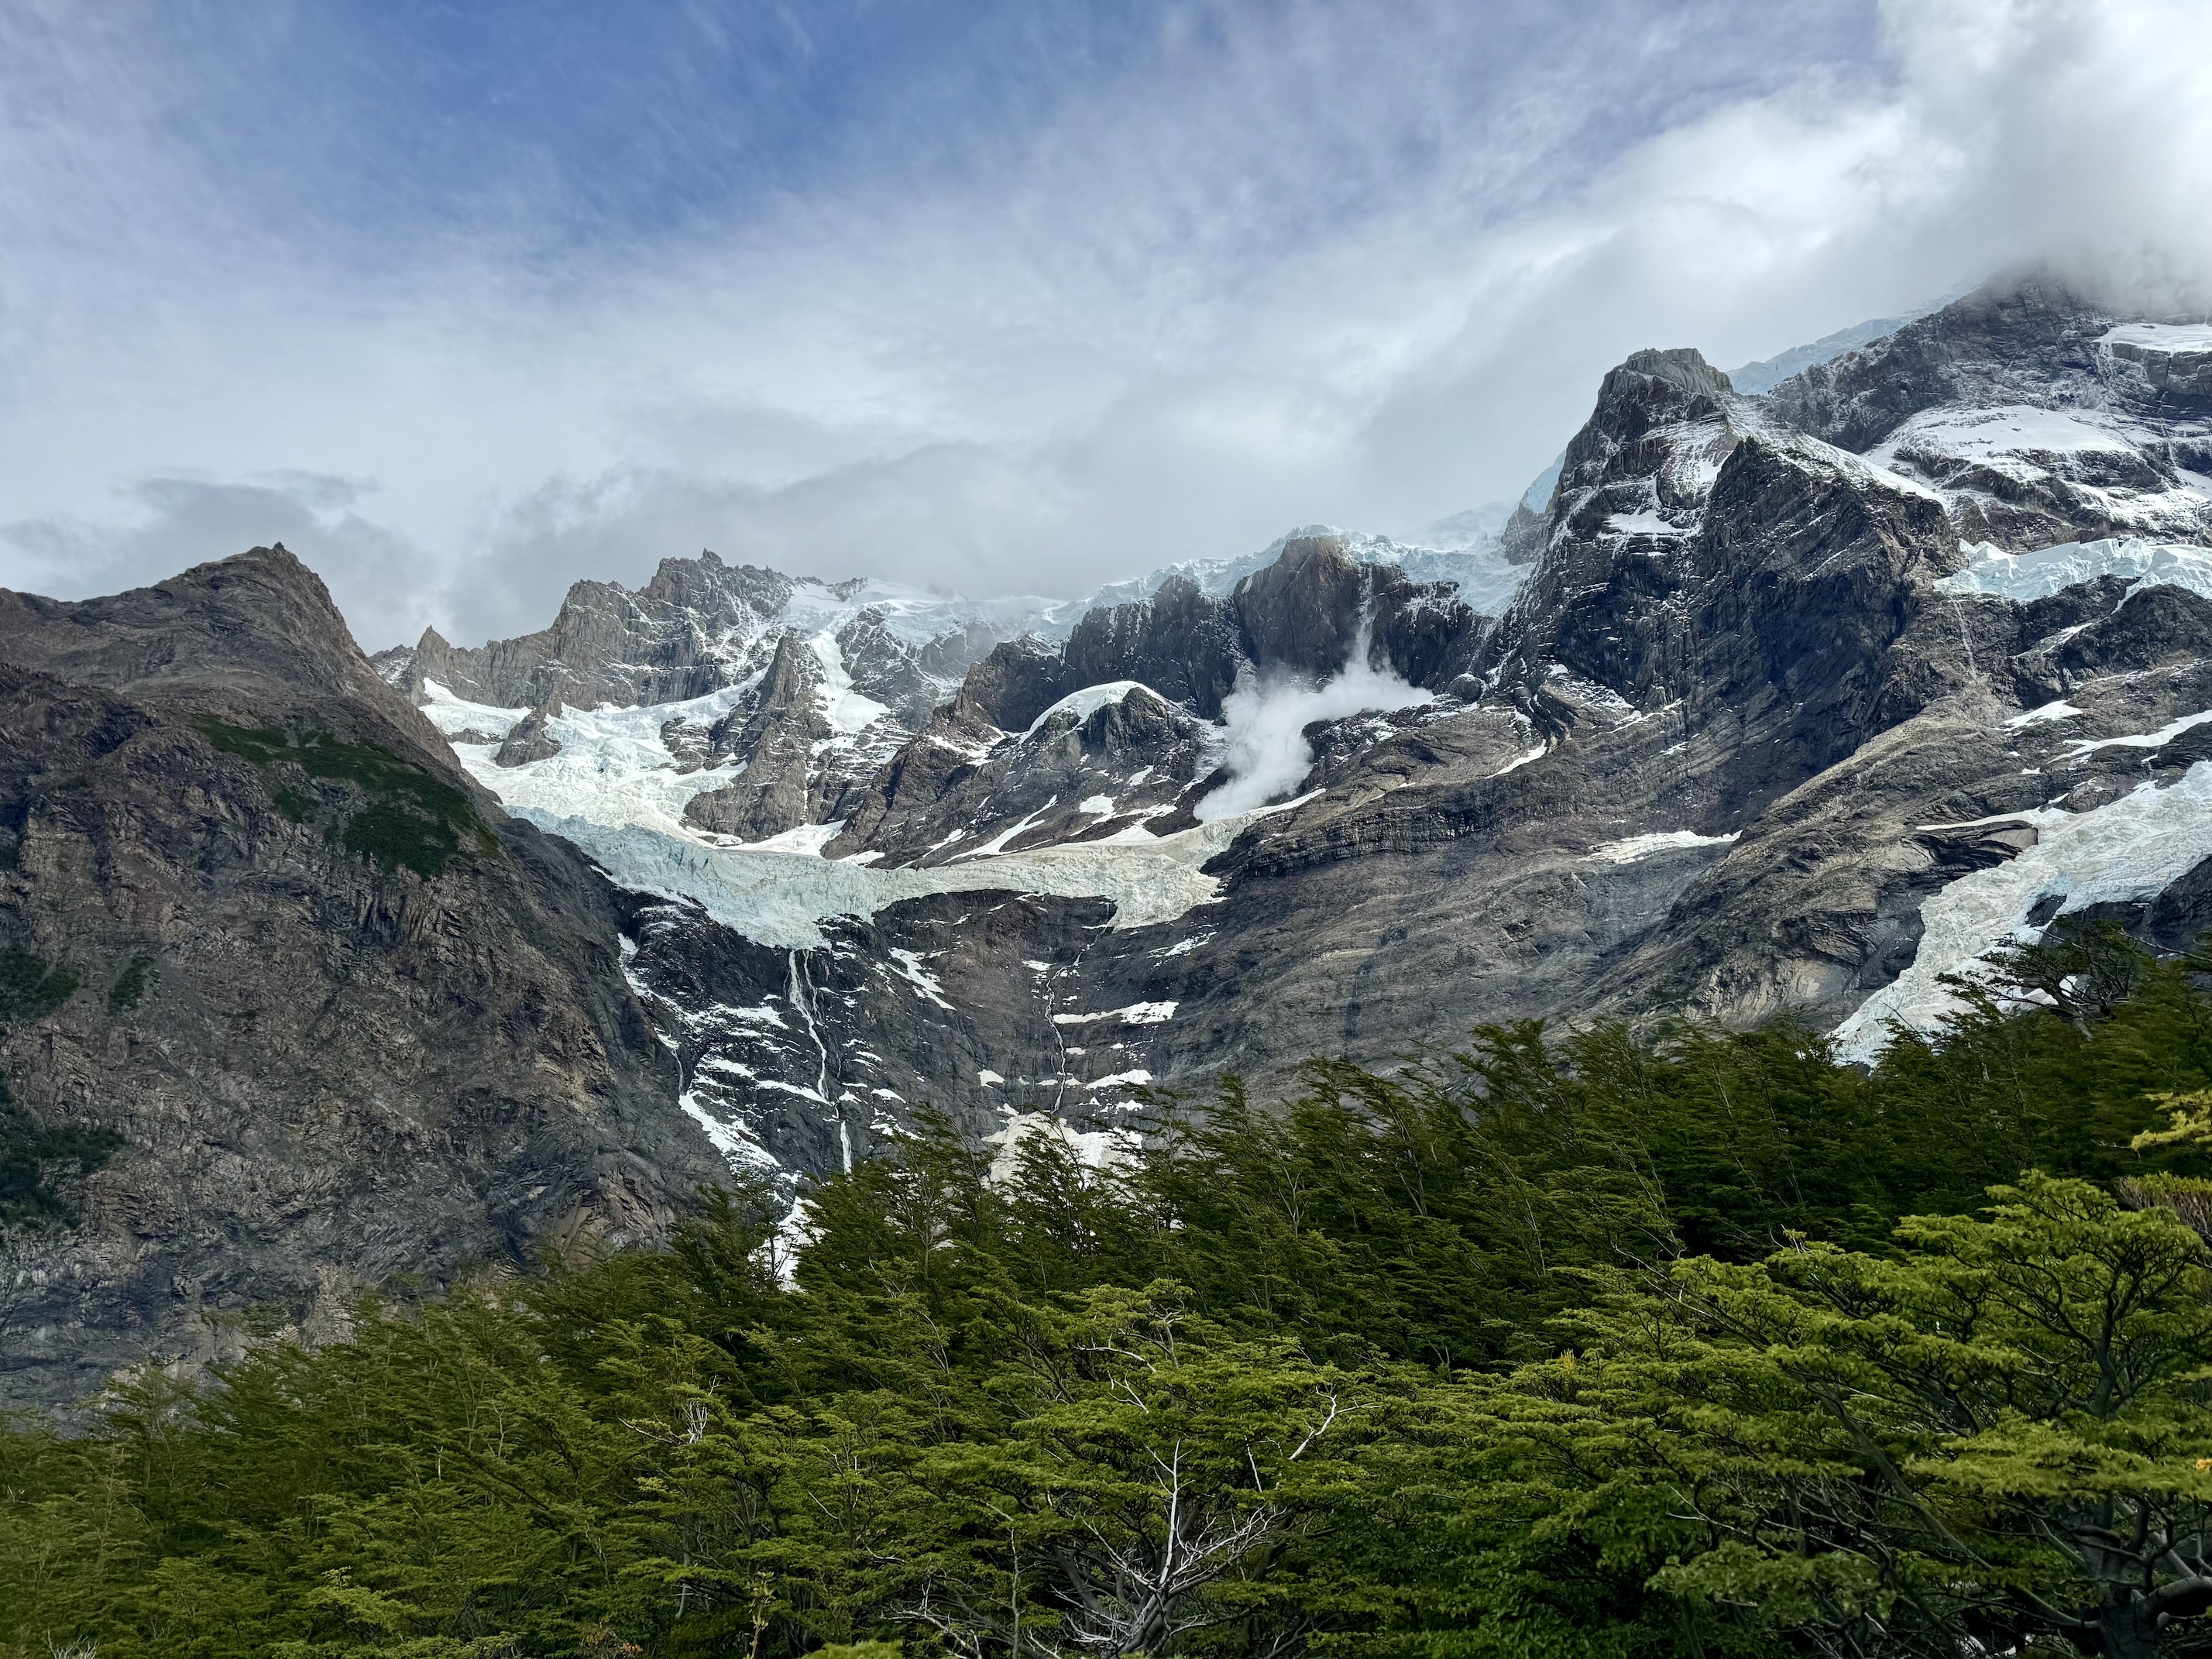
As we trekked through the valley, we kept hearing the "crashing" thunder noises we had heard from the previous day. We quickly realized that this sound was coming from ice calving off of the glaciers on the mountain with the noise echoing out. If you watch carefully, you are likely to even be able to see one in action.
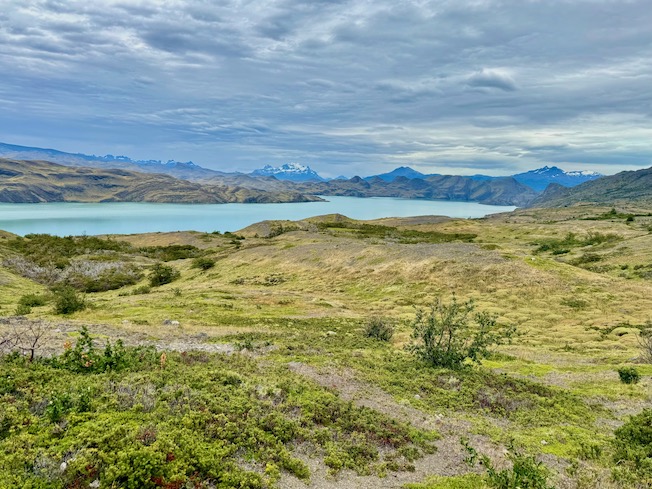
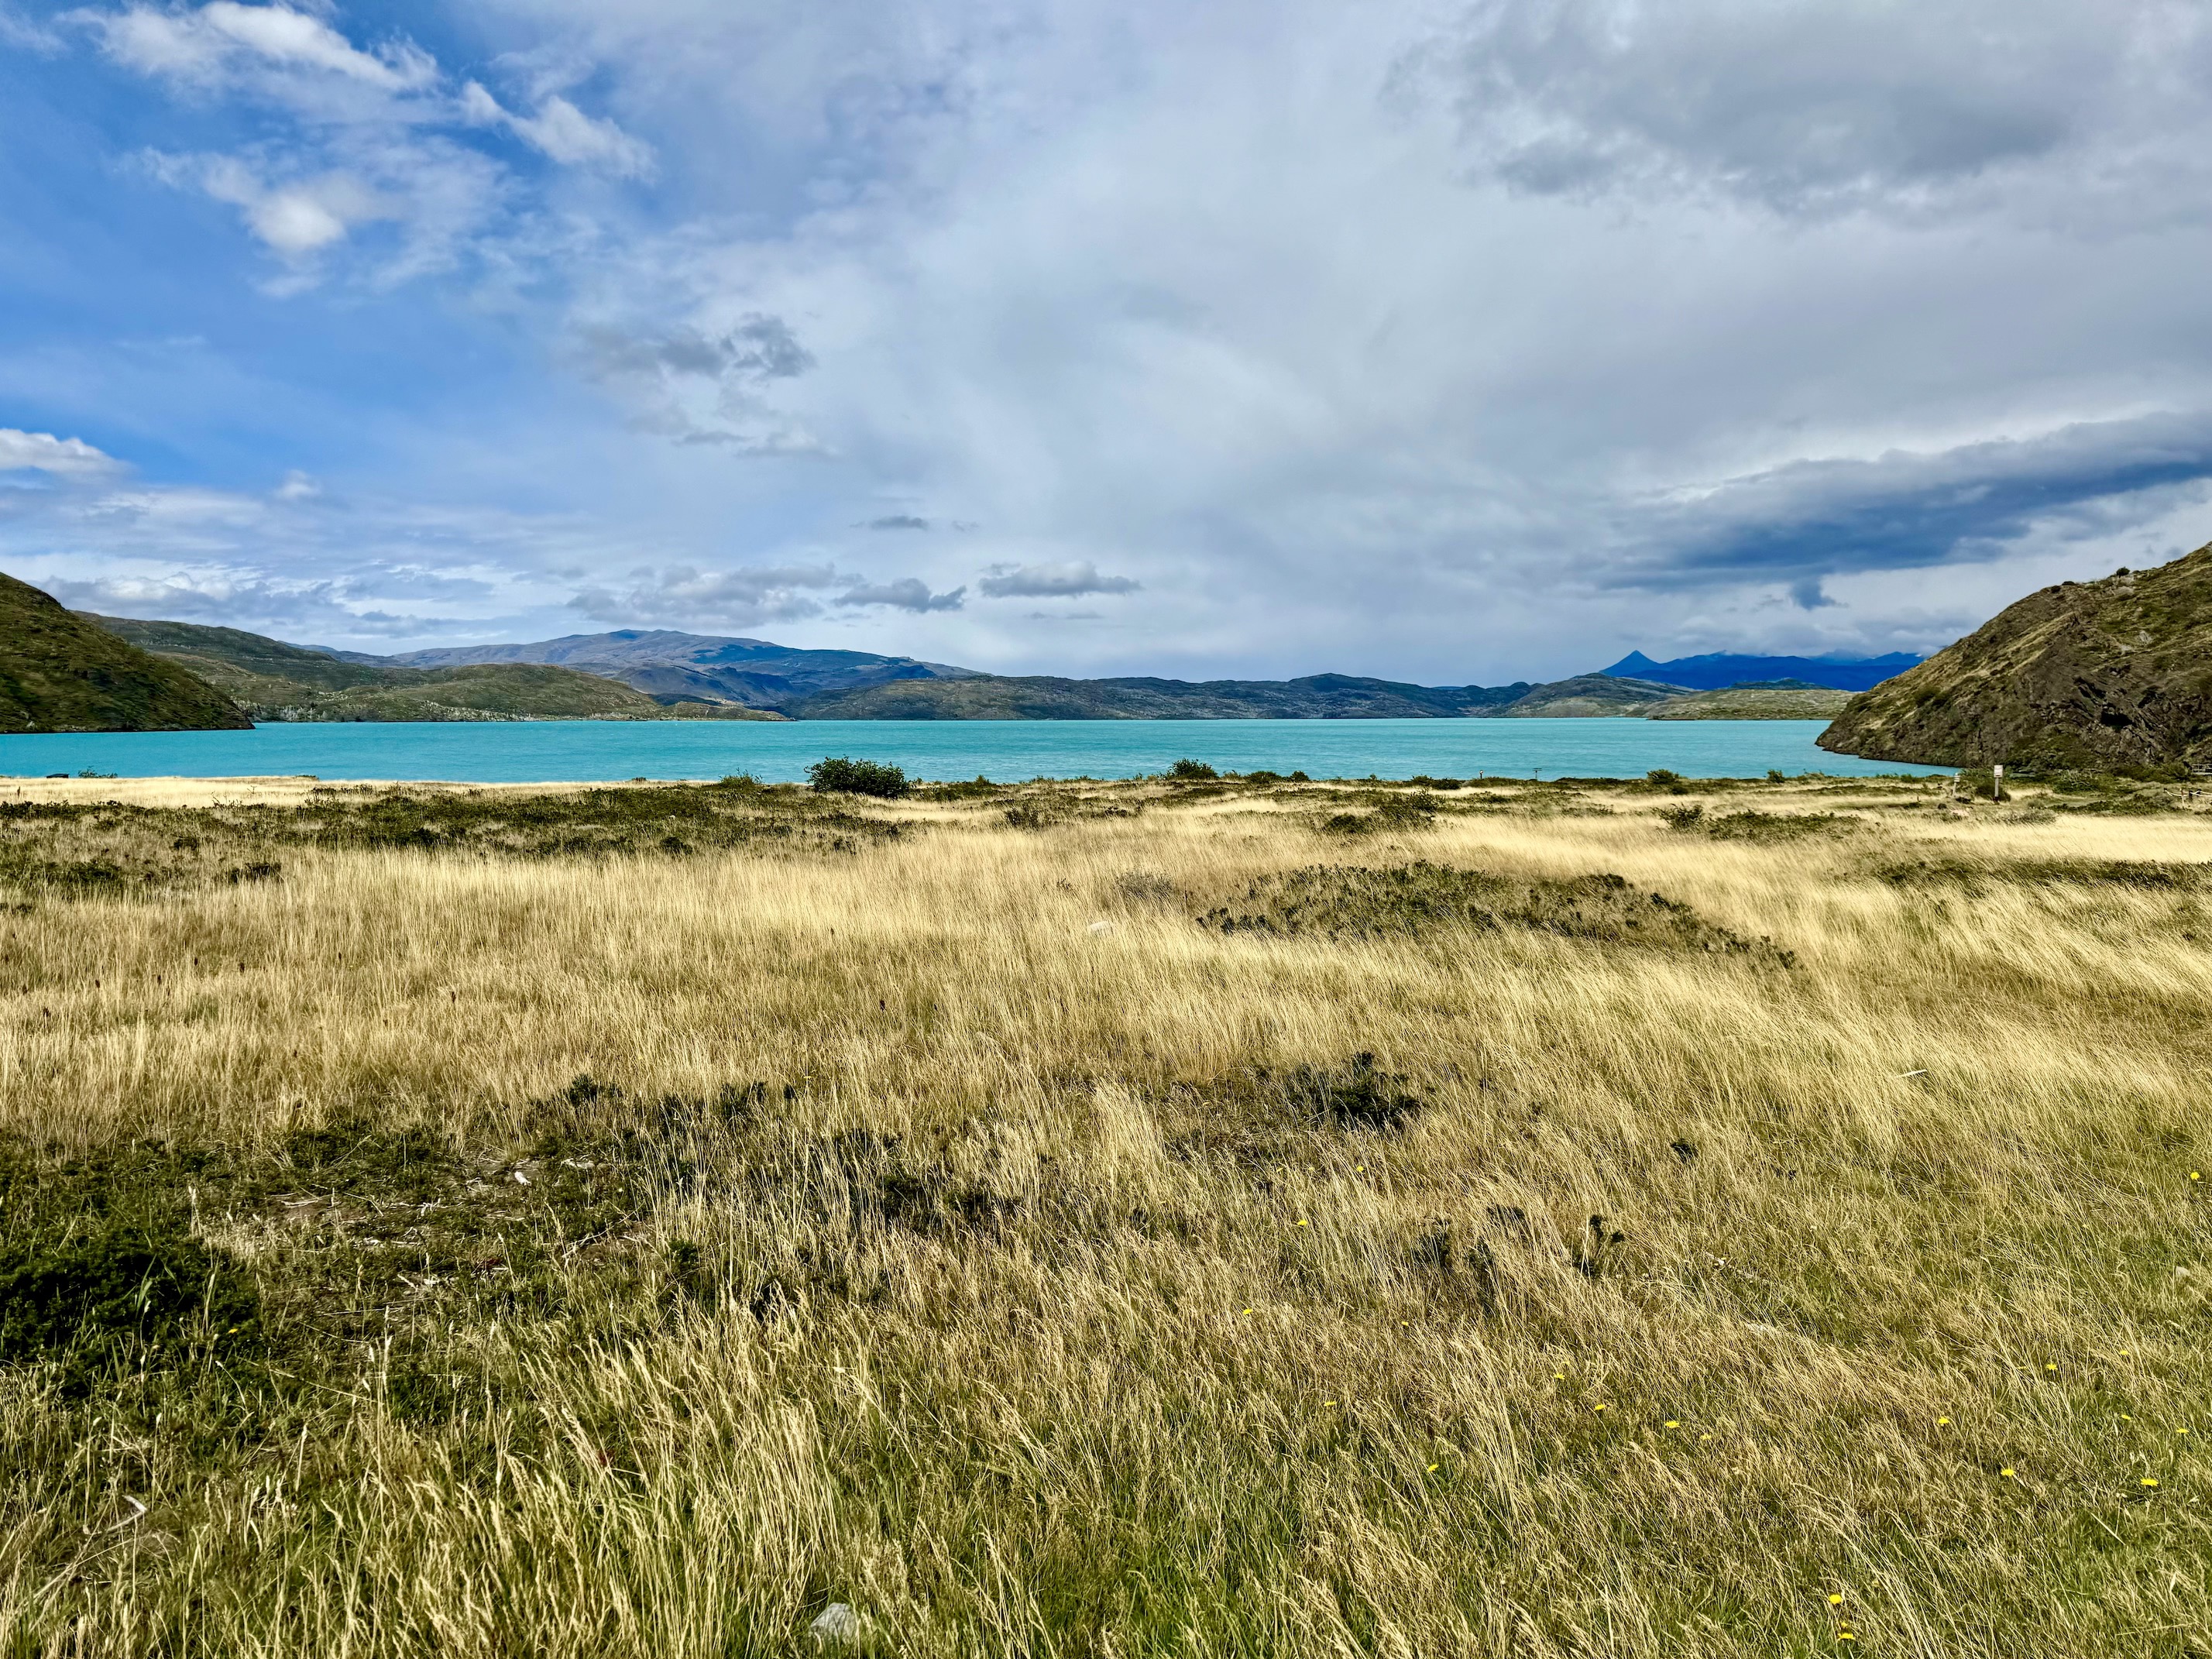
After making our way out and picking up our larger bags, we still had the somewhat grueling task of hiking over to Paine Grande. This felt in some ways felt like the longest part of the trek, but was likely just due to us being tired and this being the "hump" day. This section is relatively minor compared to some of the previous segments, but still takes a good few hours until you reach the refugio. You hike alongside Lago Pehoé for some time, and this is also the lake that the refugio itself is next to. You can also see the ecosystem and vegetation notably change in this area.

Paine Grande, also run by Vertice, was significantly more built up than Frances or Chileno. It is possible to quite easily day trip from Puerto Natales to this lodge, and is a not uncommon thing to do, especially if you are unable to secure lodging at the other campsites. Here we did have the option for bunk beds, which we selected, though since we were already carrying sleeping bags we didn't need the sheets add on. Each room holds 6 beds, so we were joined by two others -- just a word of warning, if you are a light sleeper it would pay to bring ear plugs and an eye mask to help you sleep! To help reduce weight (and because it was getting a little boring eating freeze dried meals), we had also pre-ordered dinner service at Paine Grande. It was buffet style when we went after eating freeze dried meals we were very very happy digging into the hot food.
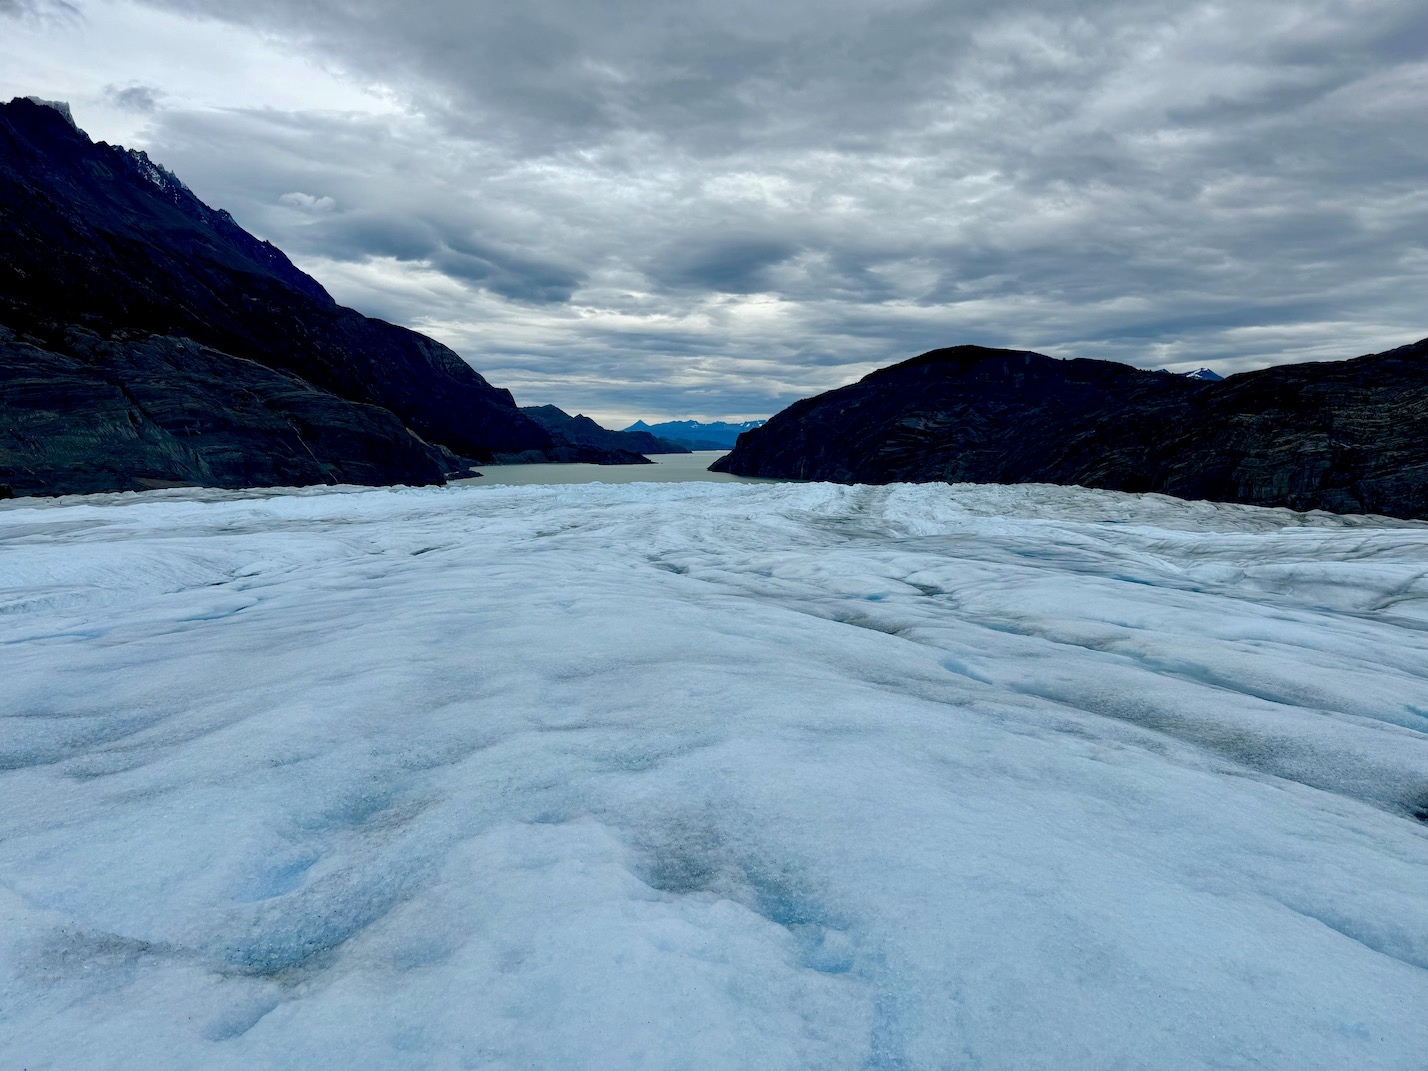
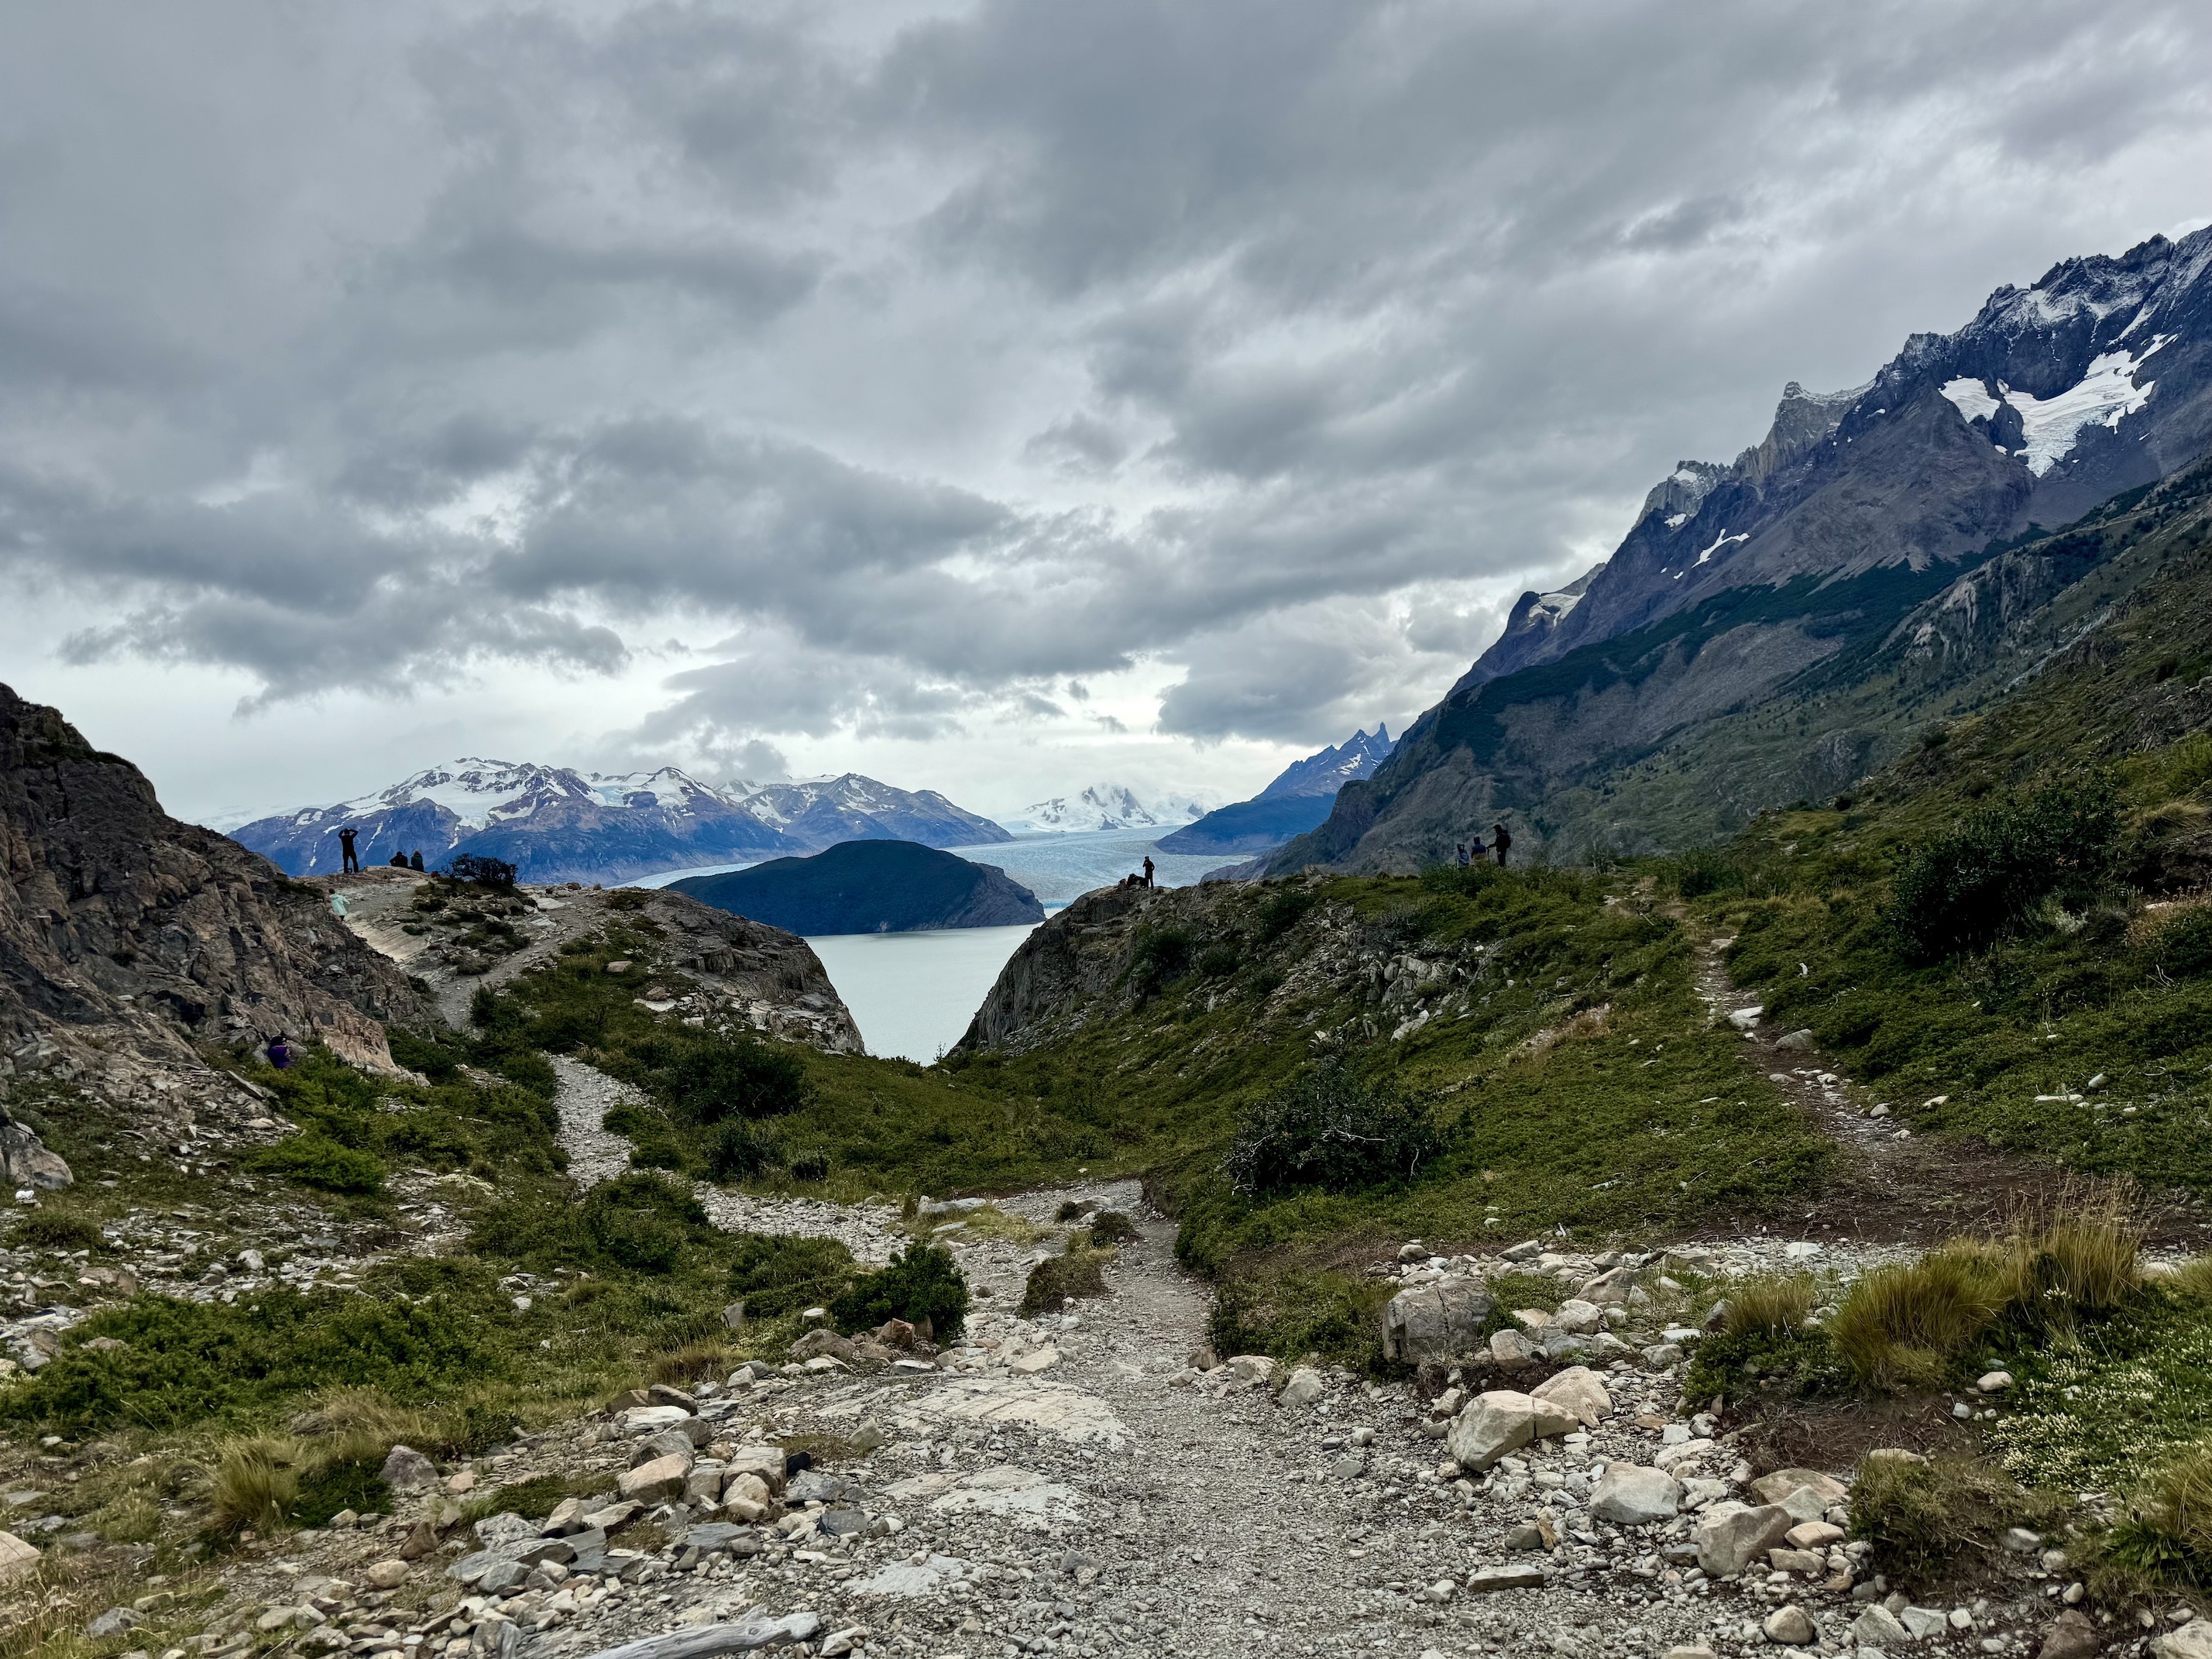
Day 6: W Trek - Paine Grande to Grey (ft Glacier Grey ice trekking!)
Segments- Paine Grande -> Grey: 7 miles, 1,722 ft, ~3 hours
After a freeze dried breakfast (there's a pattern!), we set out for Grey Refugio relatively early (~8:30 AM) in order to catch an activity we had scheduled at Grey at 2:30 PM. From Grey, Bigfoot Patagonia runs both glacier kayaking and hiking tours. Since I had done kayaking in Alaska previously (highly recommendeded!), we opted for the glacier ice hike (not sure if true, but apparently the ice hike tends to get cancelled less for bad weather than kayaking). While Bigfoot Patagonia has a website for booking, it is worth reaching out to them directly (WhatsApp) if you don't see the availability you want (it worked for us!). The one advantage of waking up earlier was we got to catch a glimpse of a beautiful sunrise over Paine Grande!
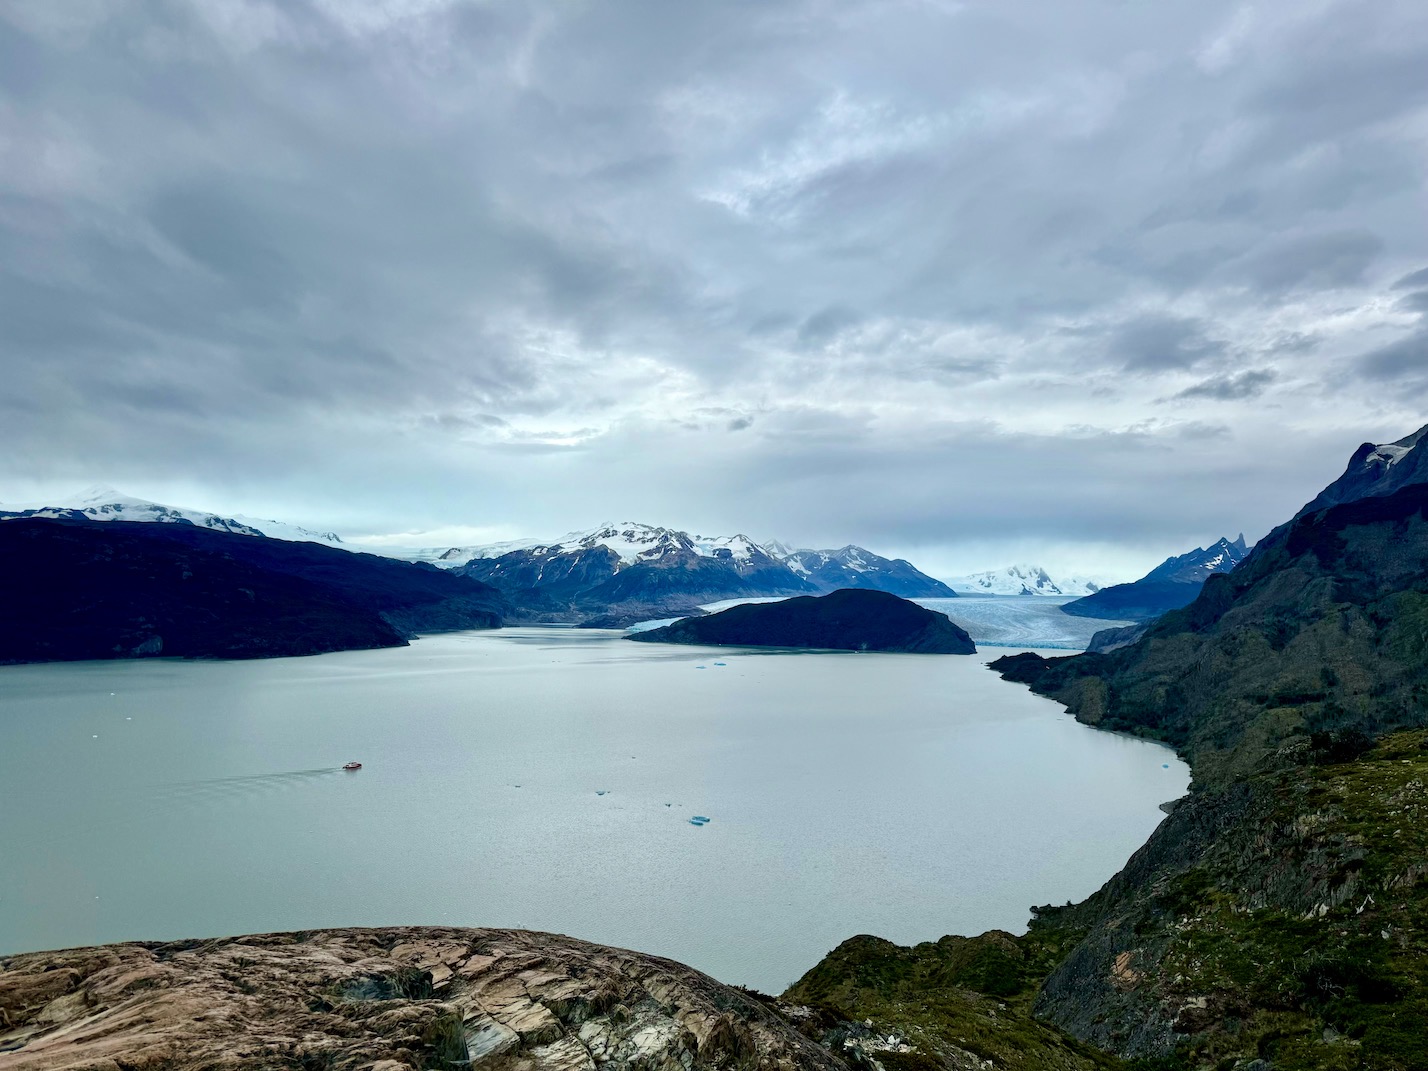
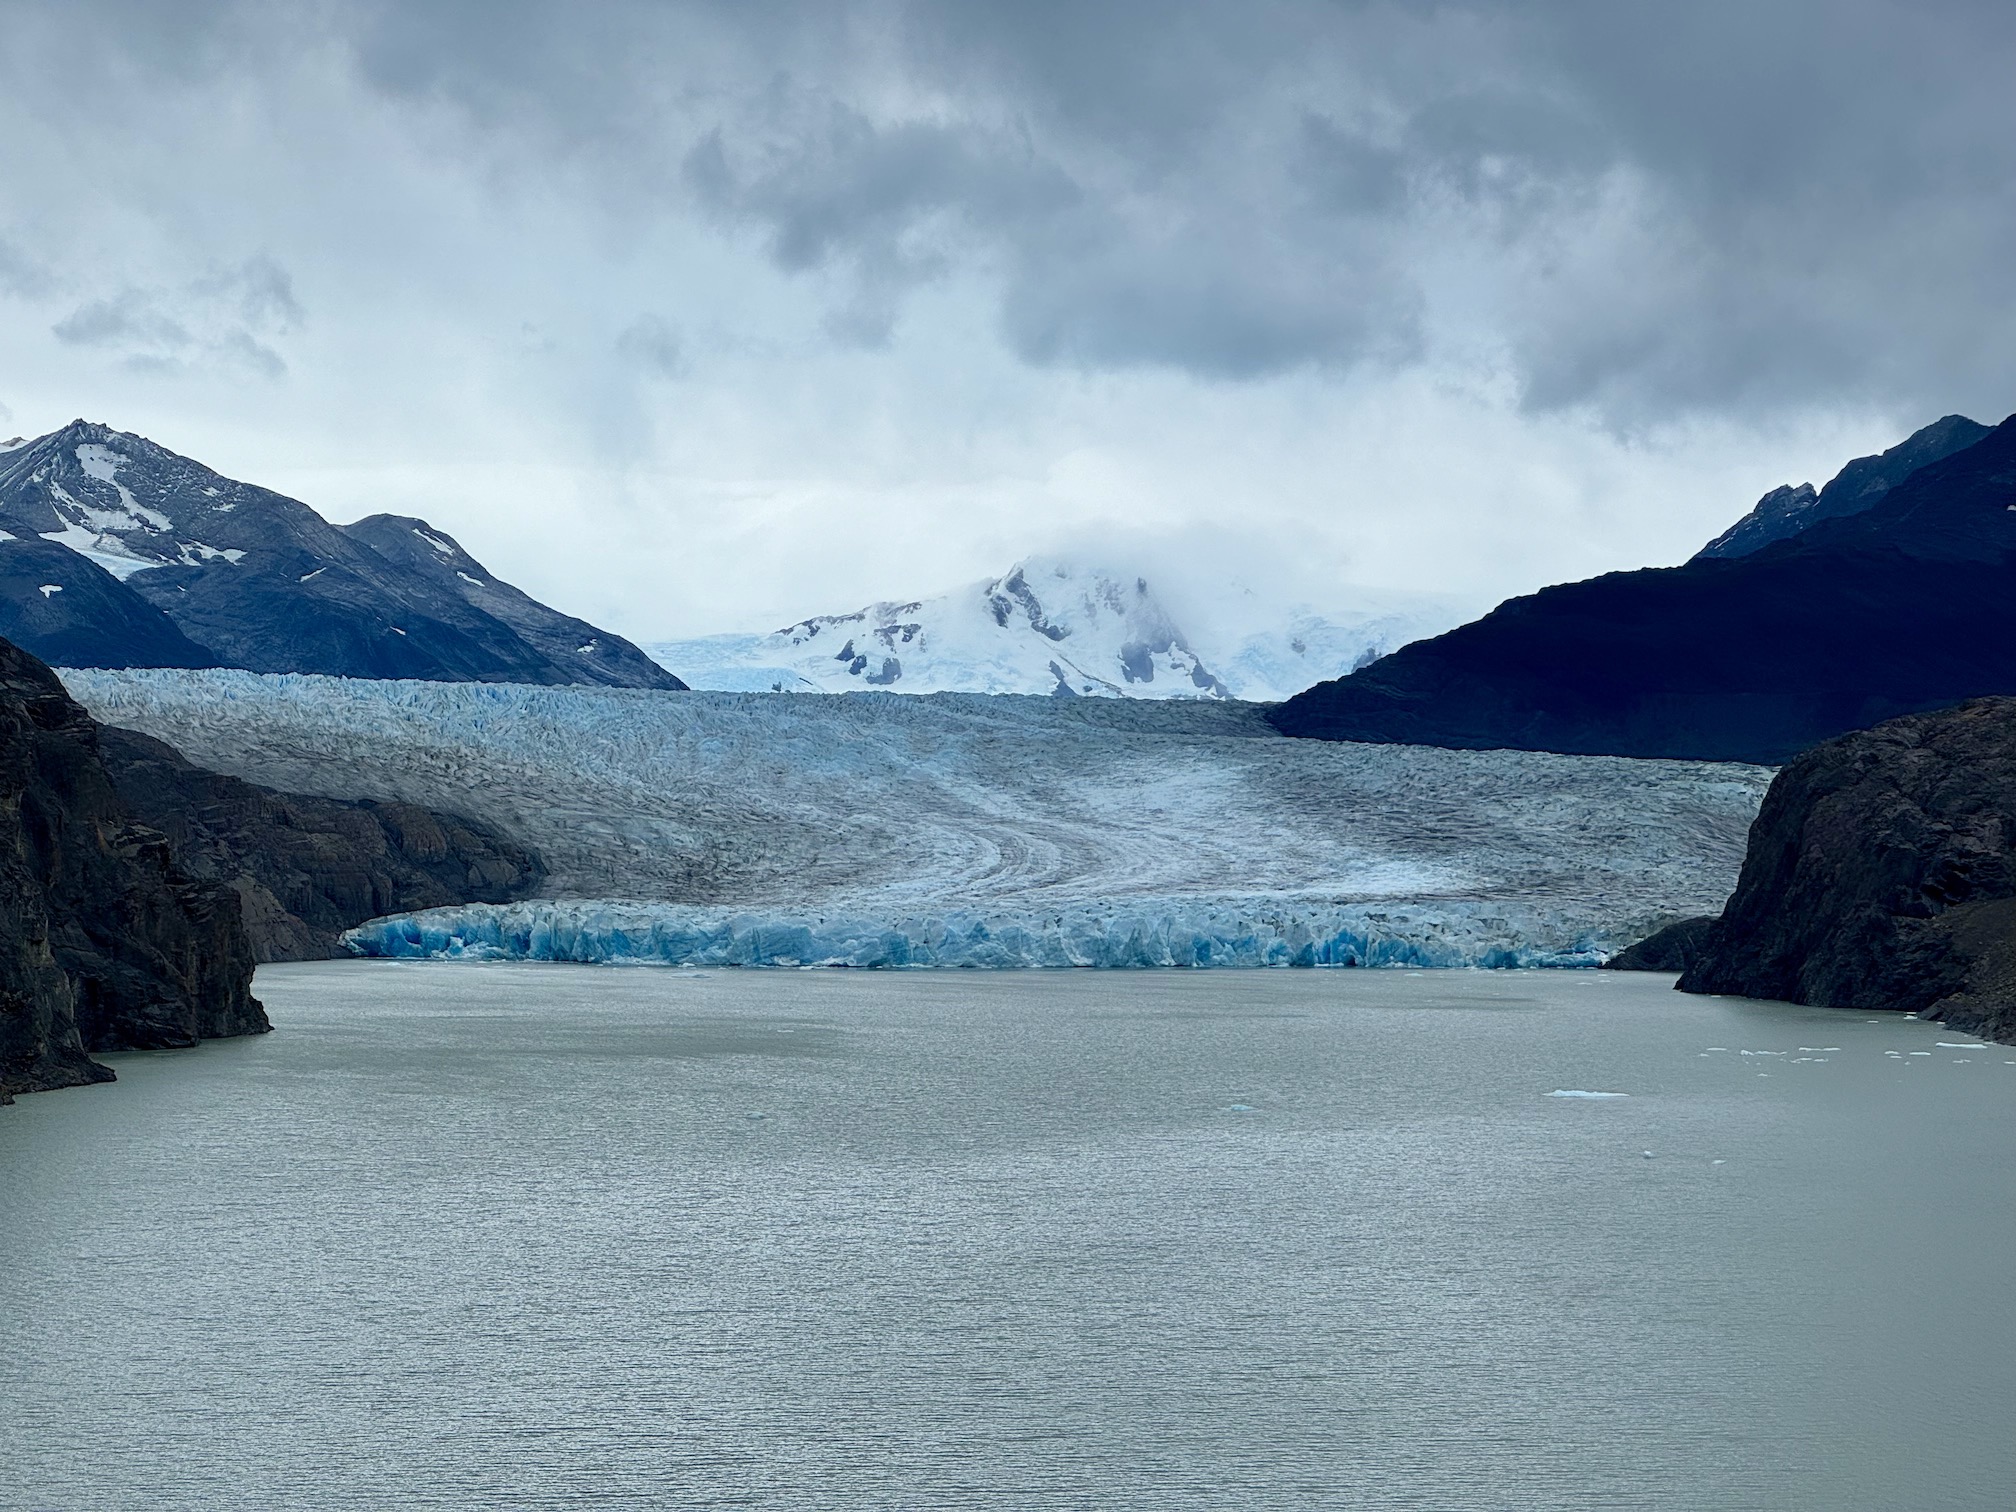
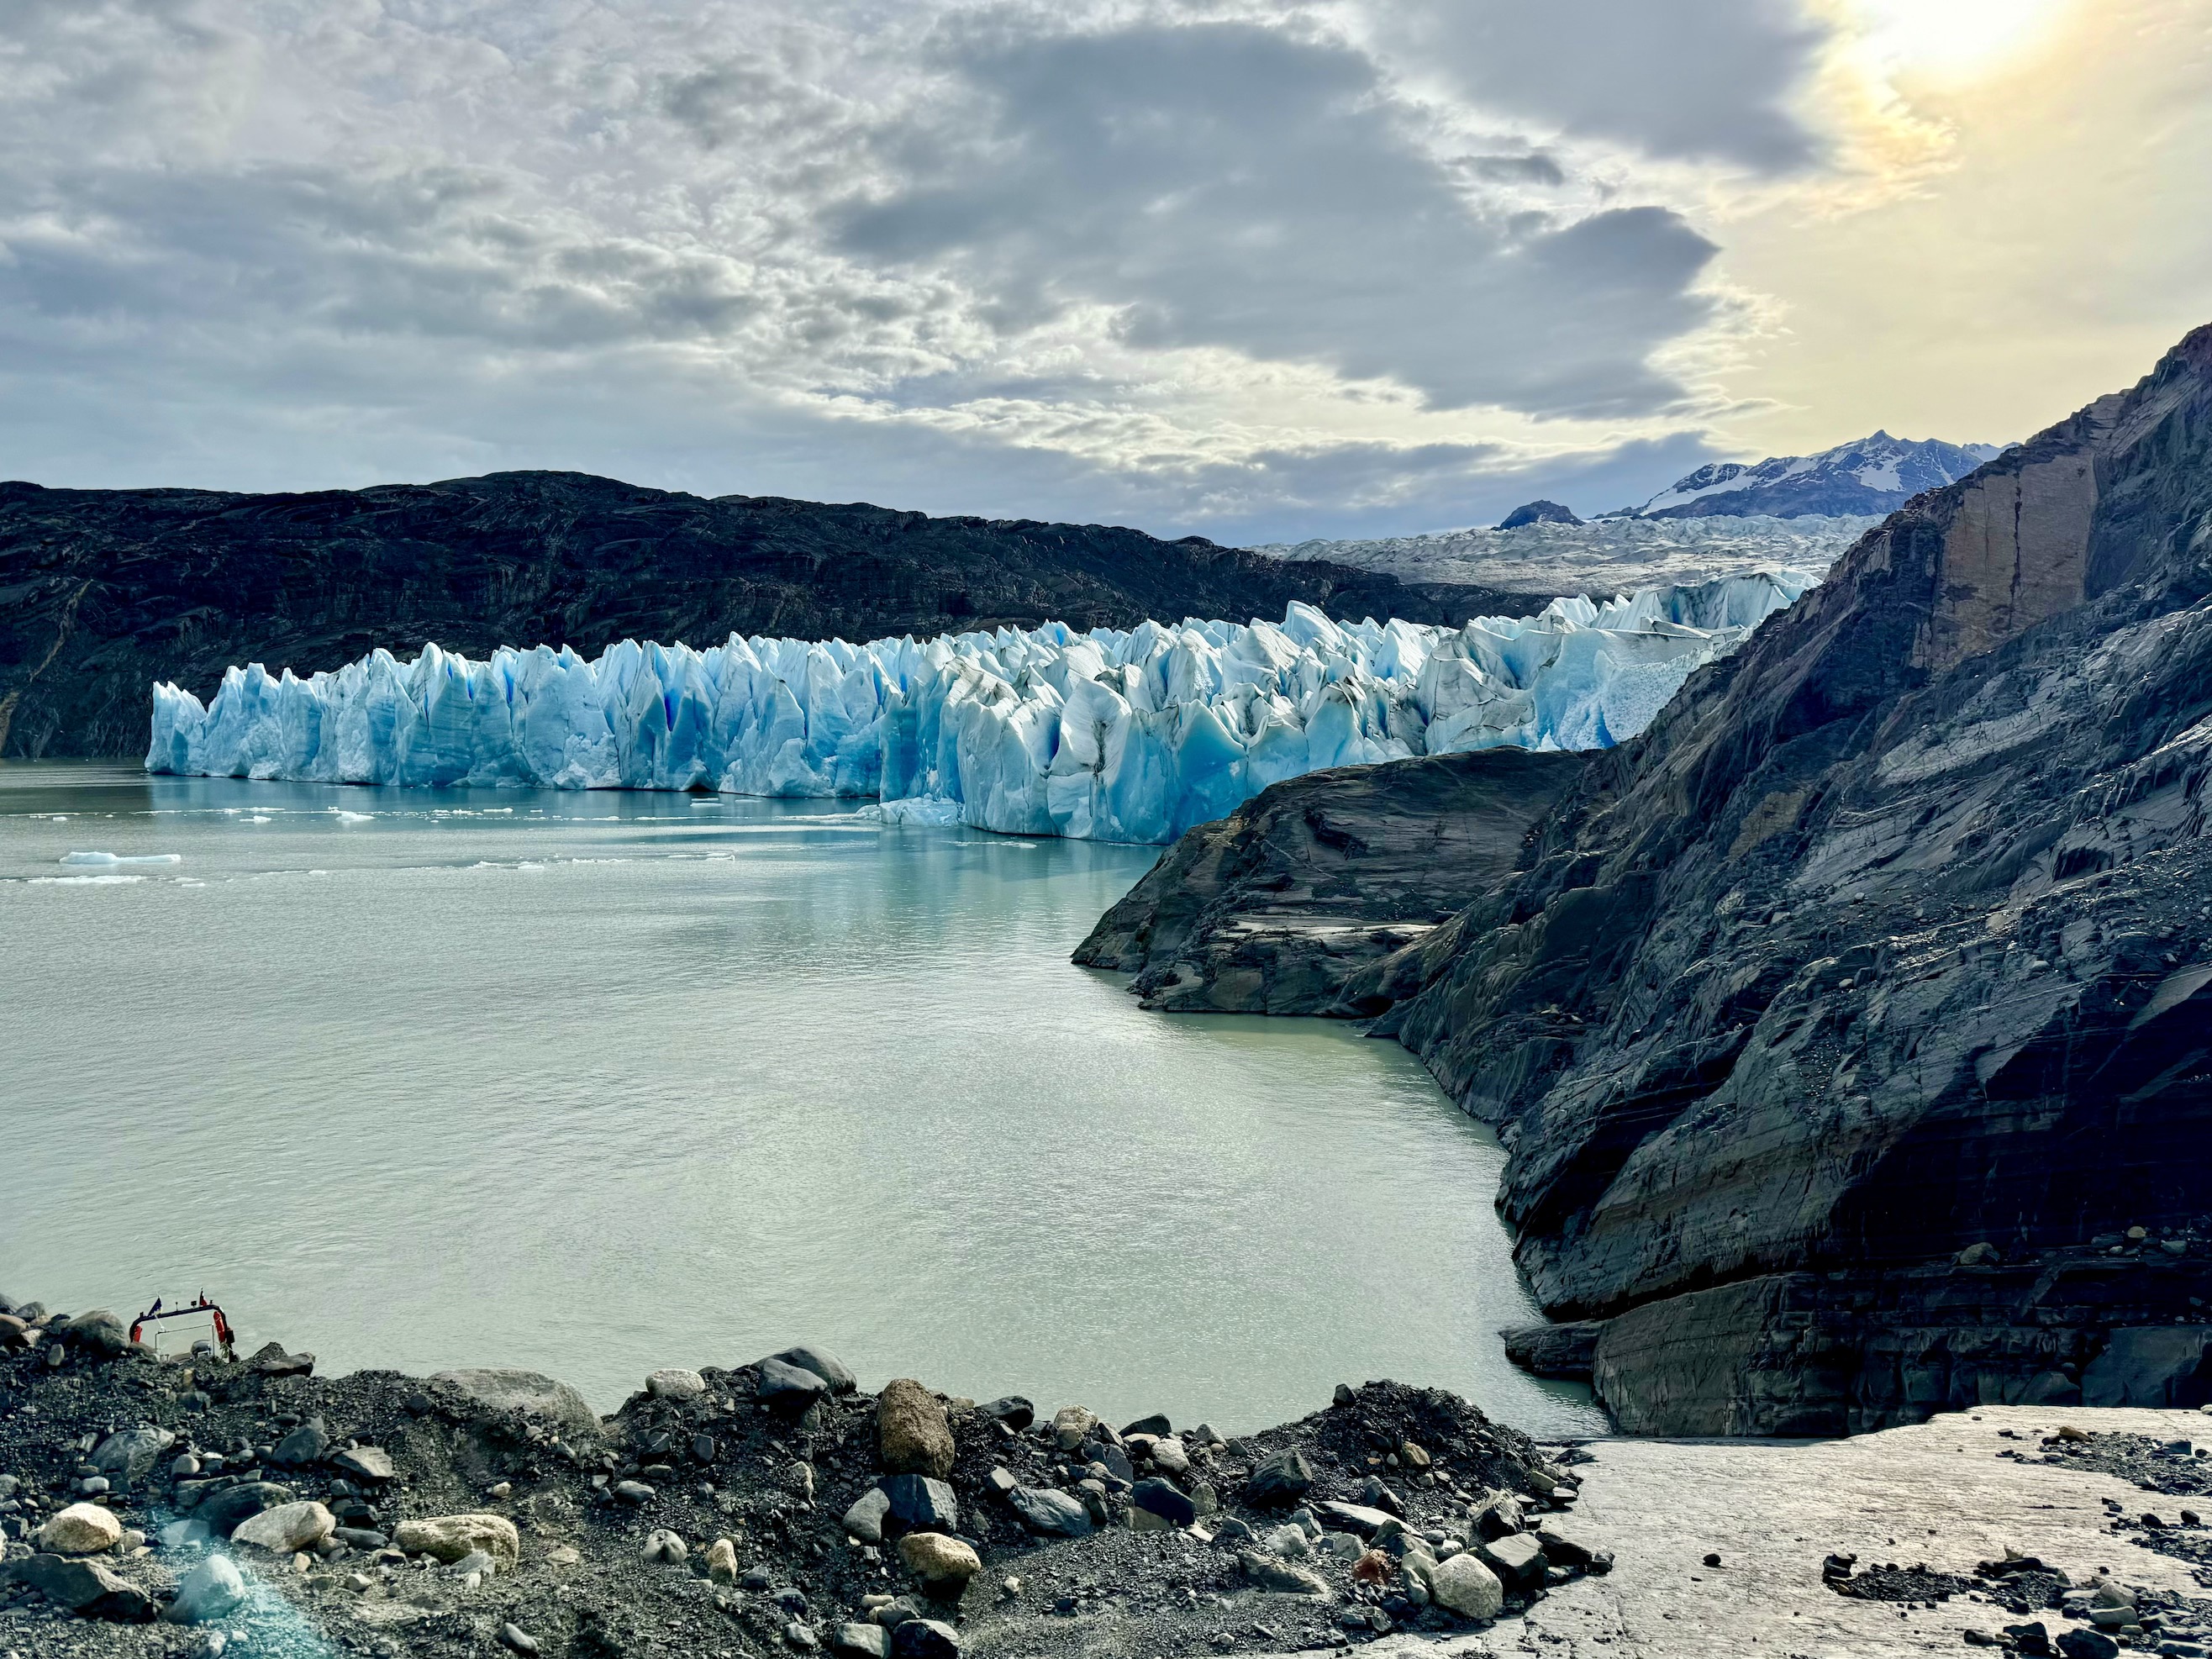
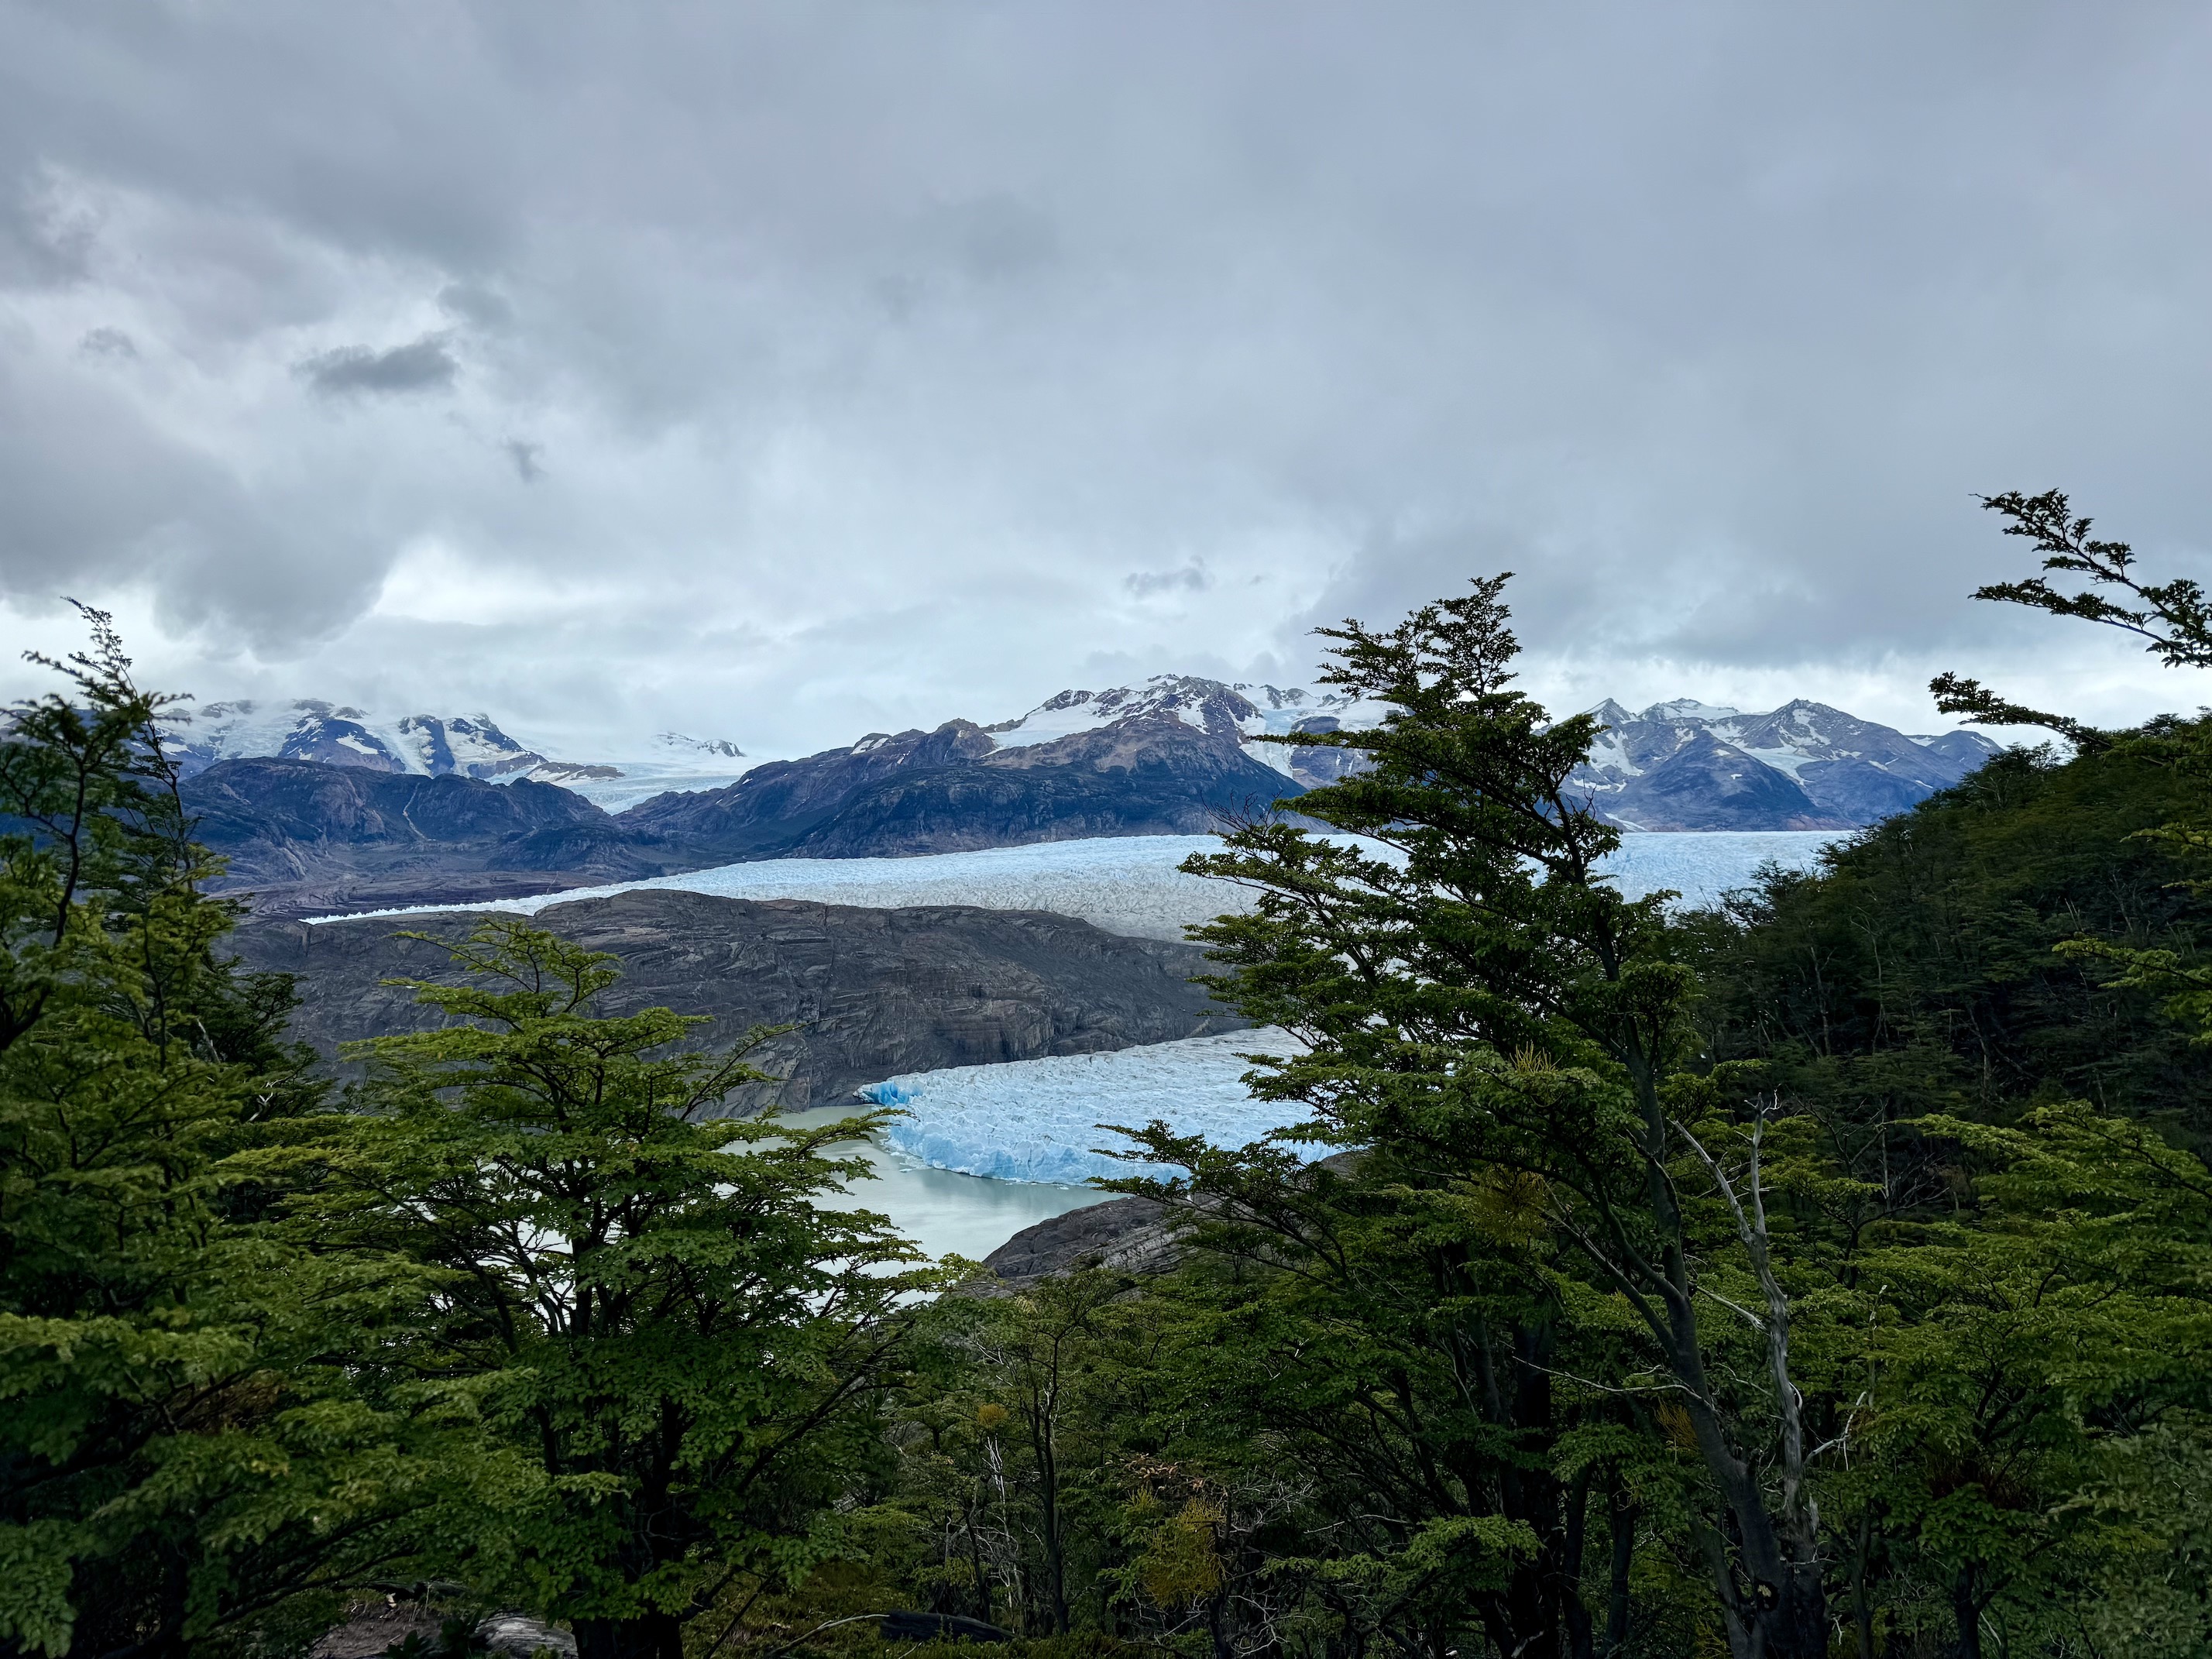
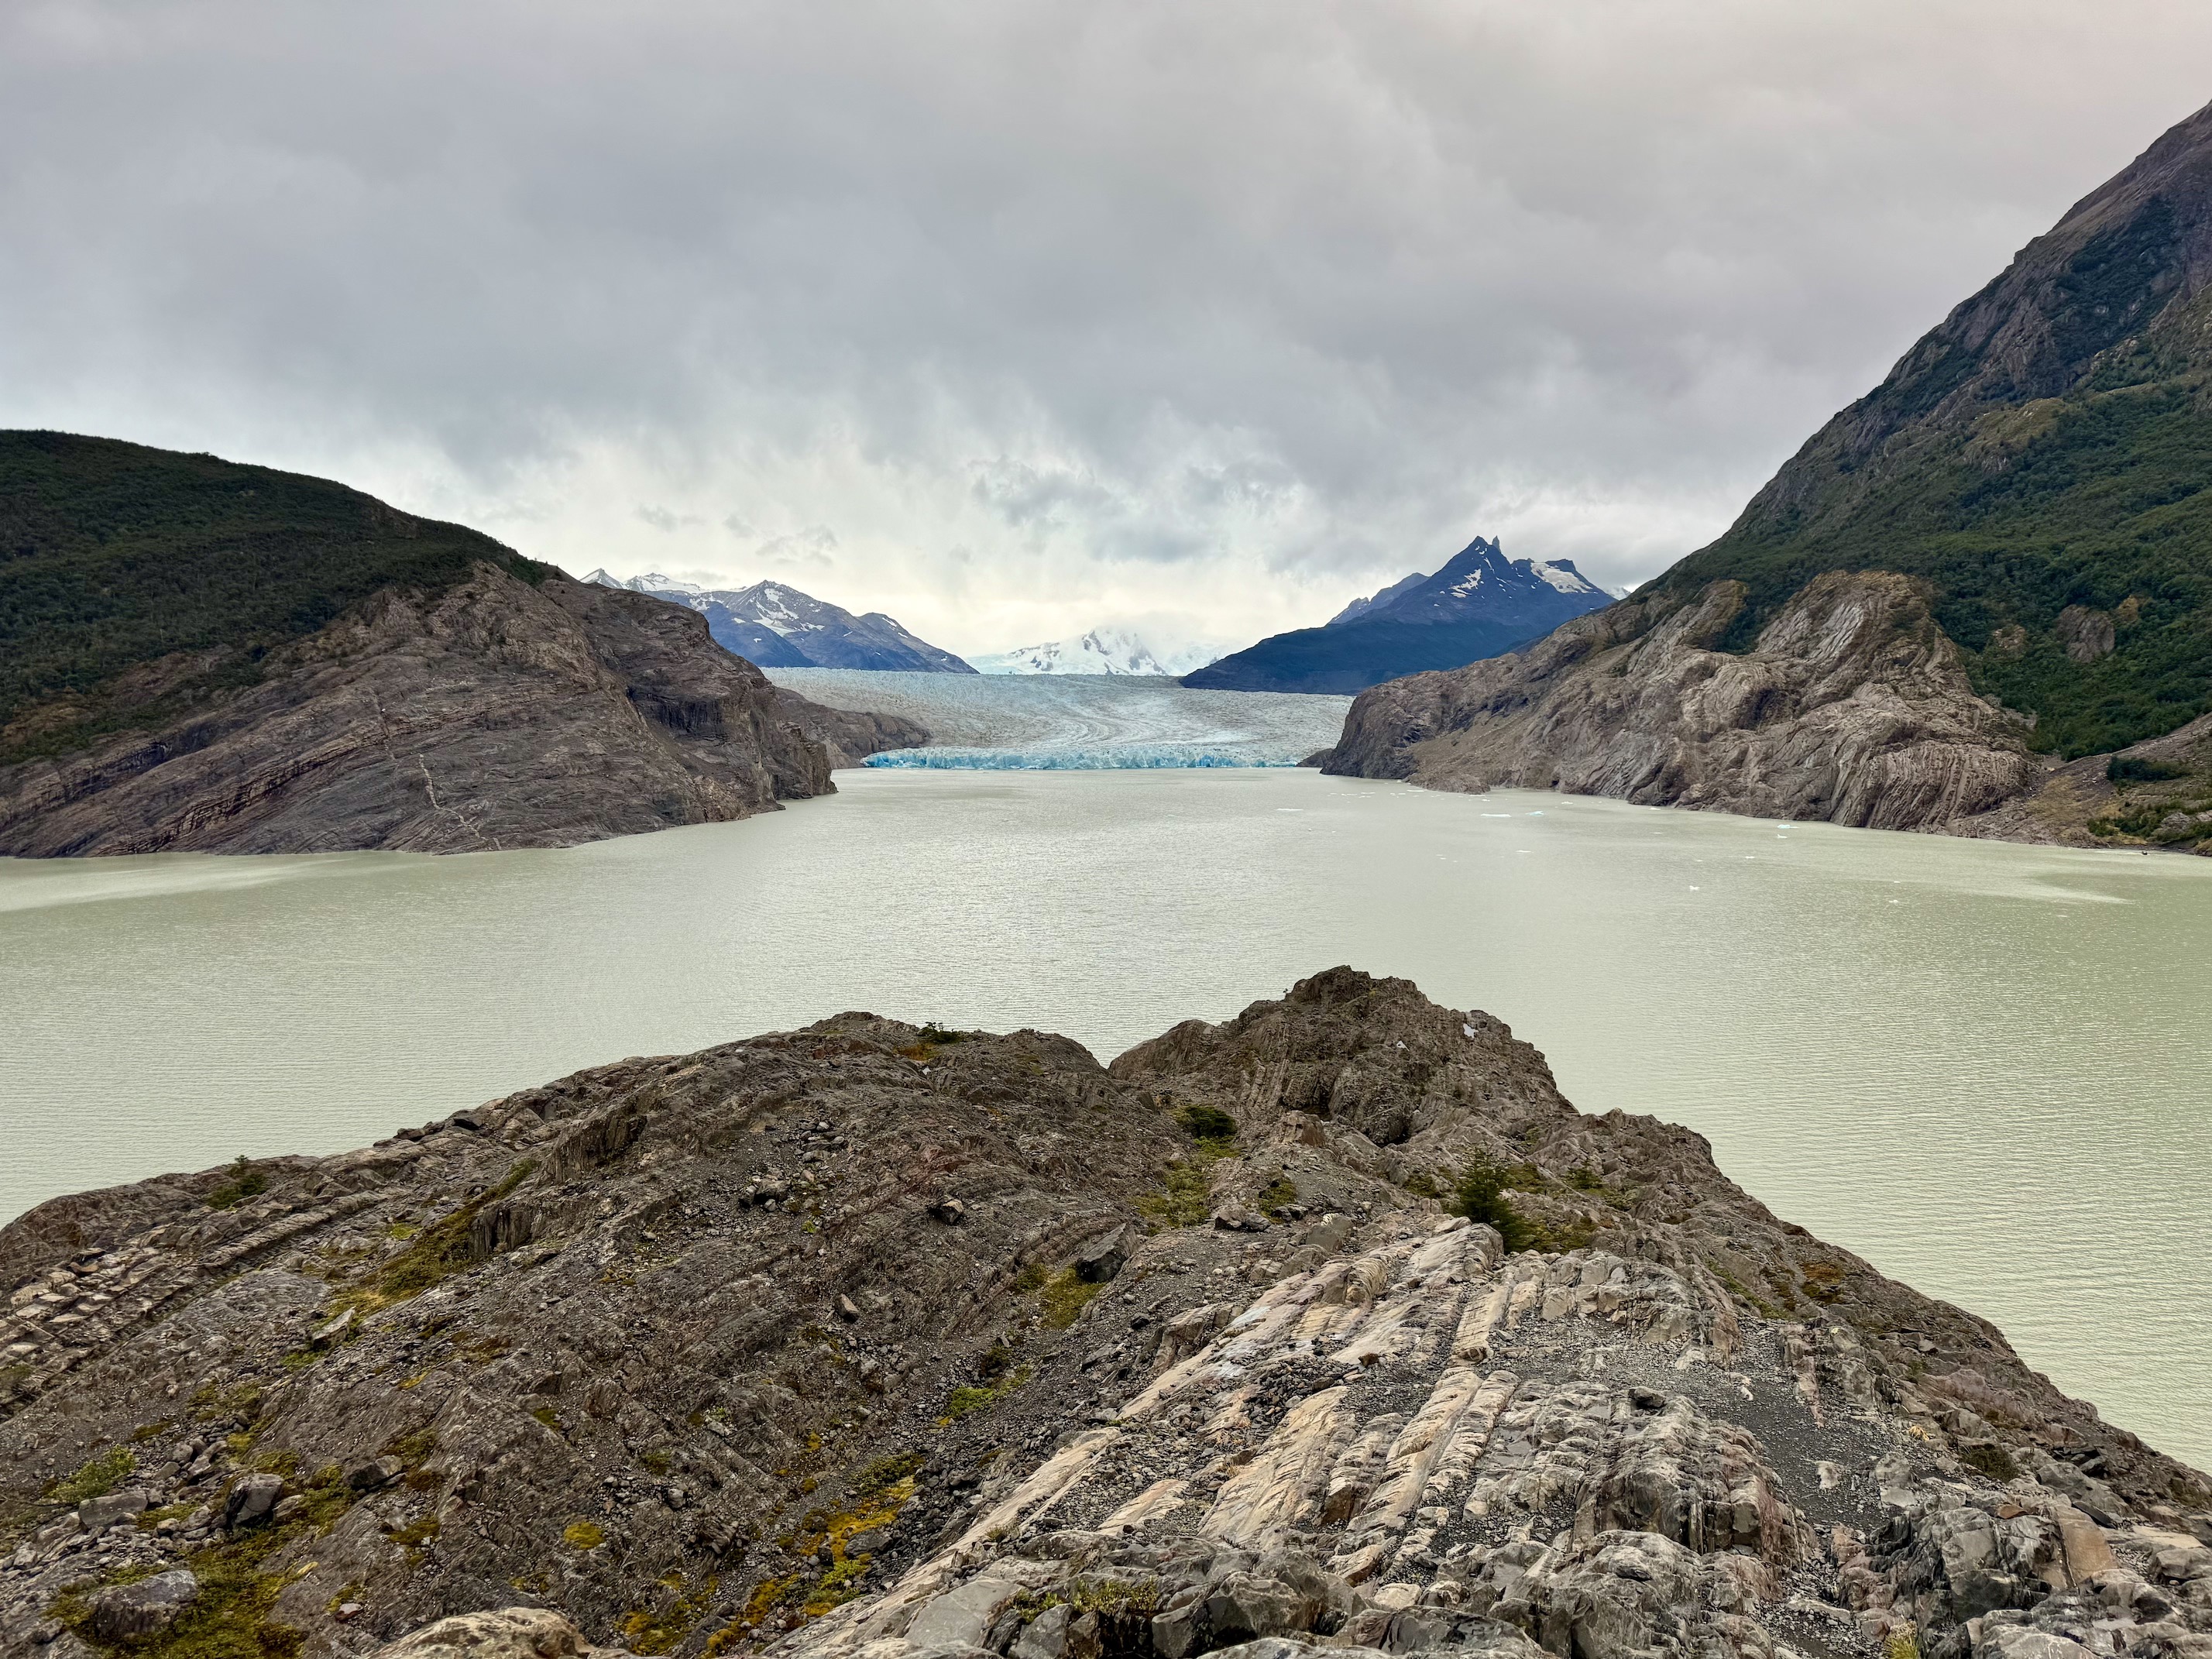
The elevation gain is relatively gradual over the course of this segment and you meander along Lake Grey toward Glacier Grey and the refugio. There are plenty of scenic viewpoints as you get closer and closer. While we had assumed initially that both Grey Lake and the glacier had gotten its name from some dead man, it turns out the naming is simpler than that -- "grey" just refers to the color of the water, which in turns comes from the sediment of the glacier melting into the lake.
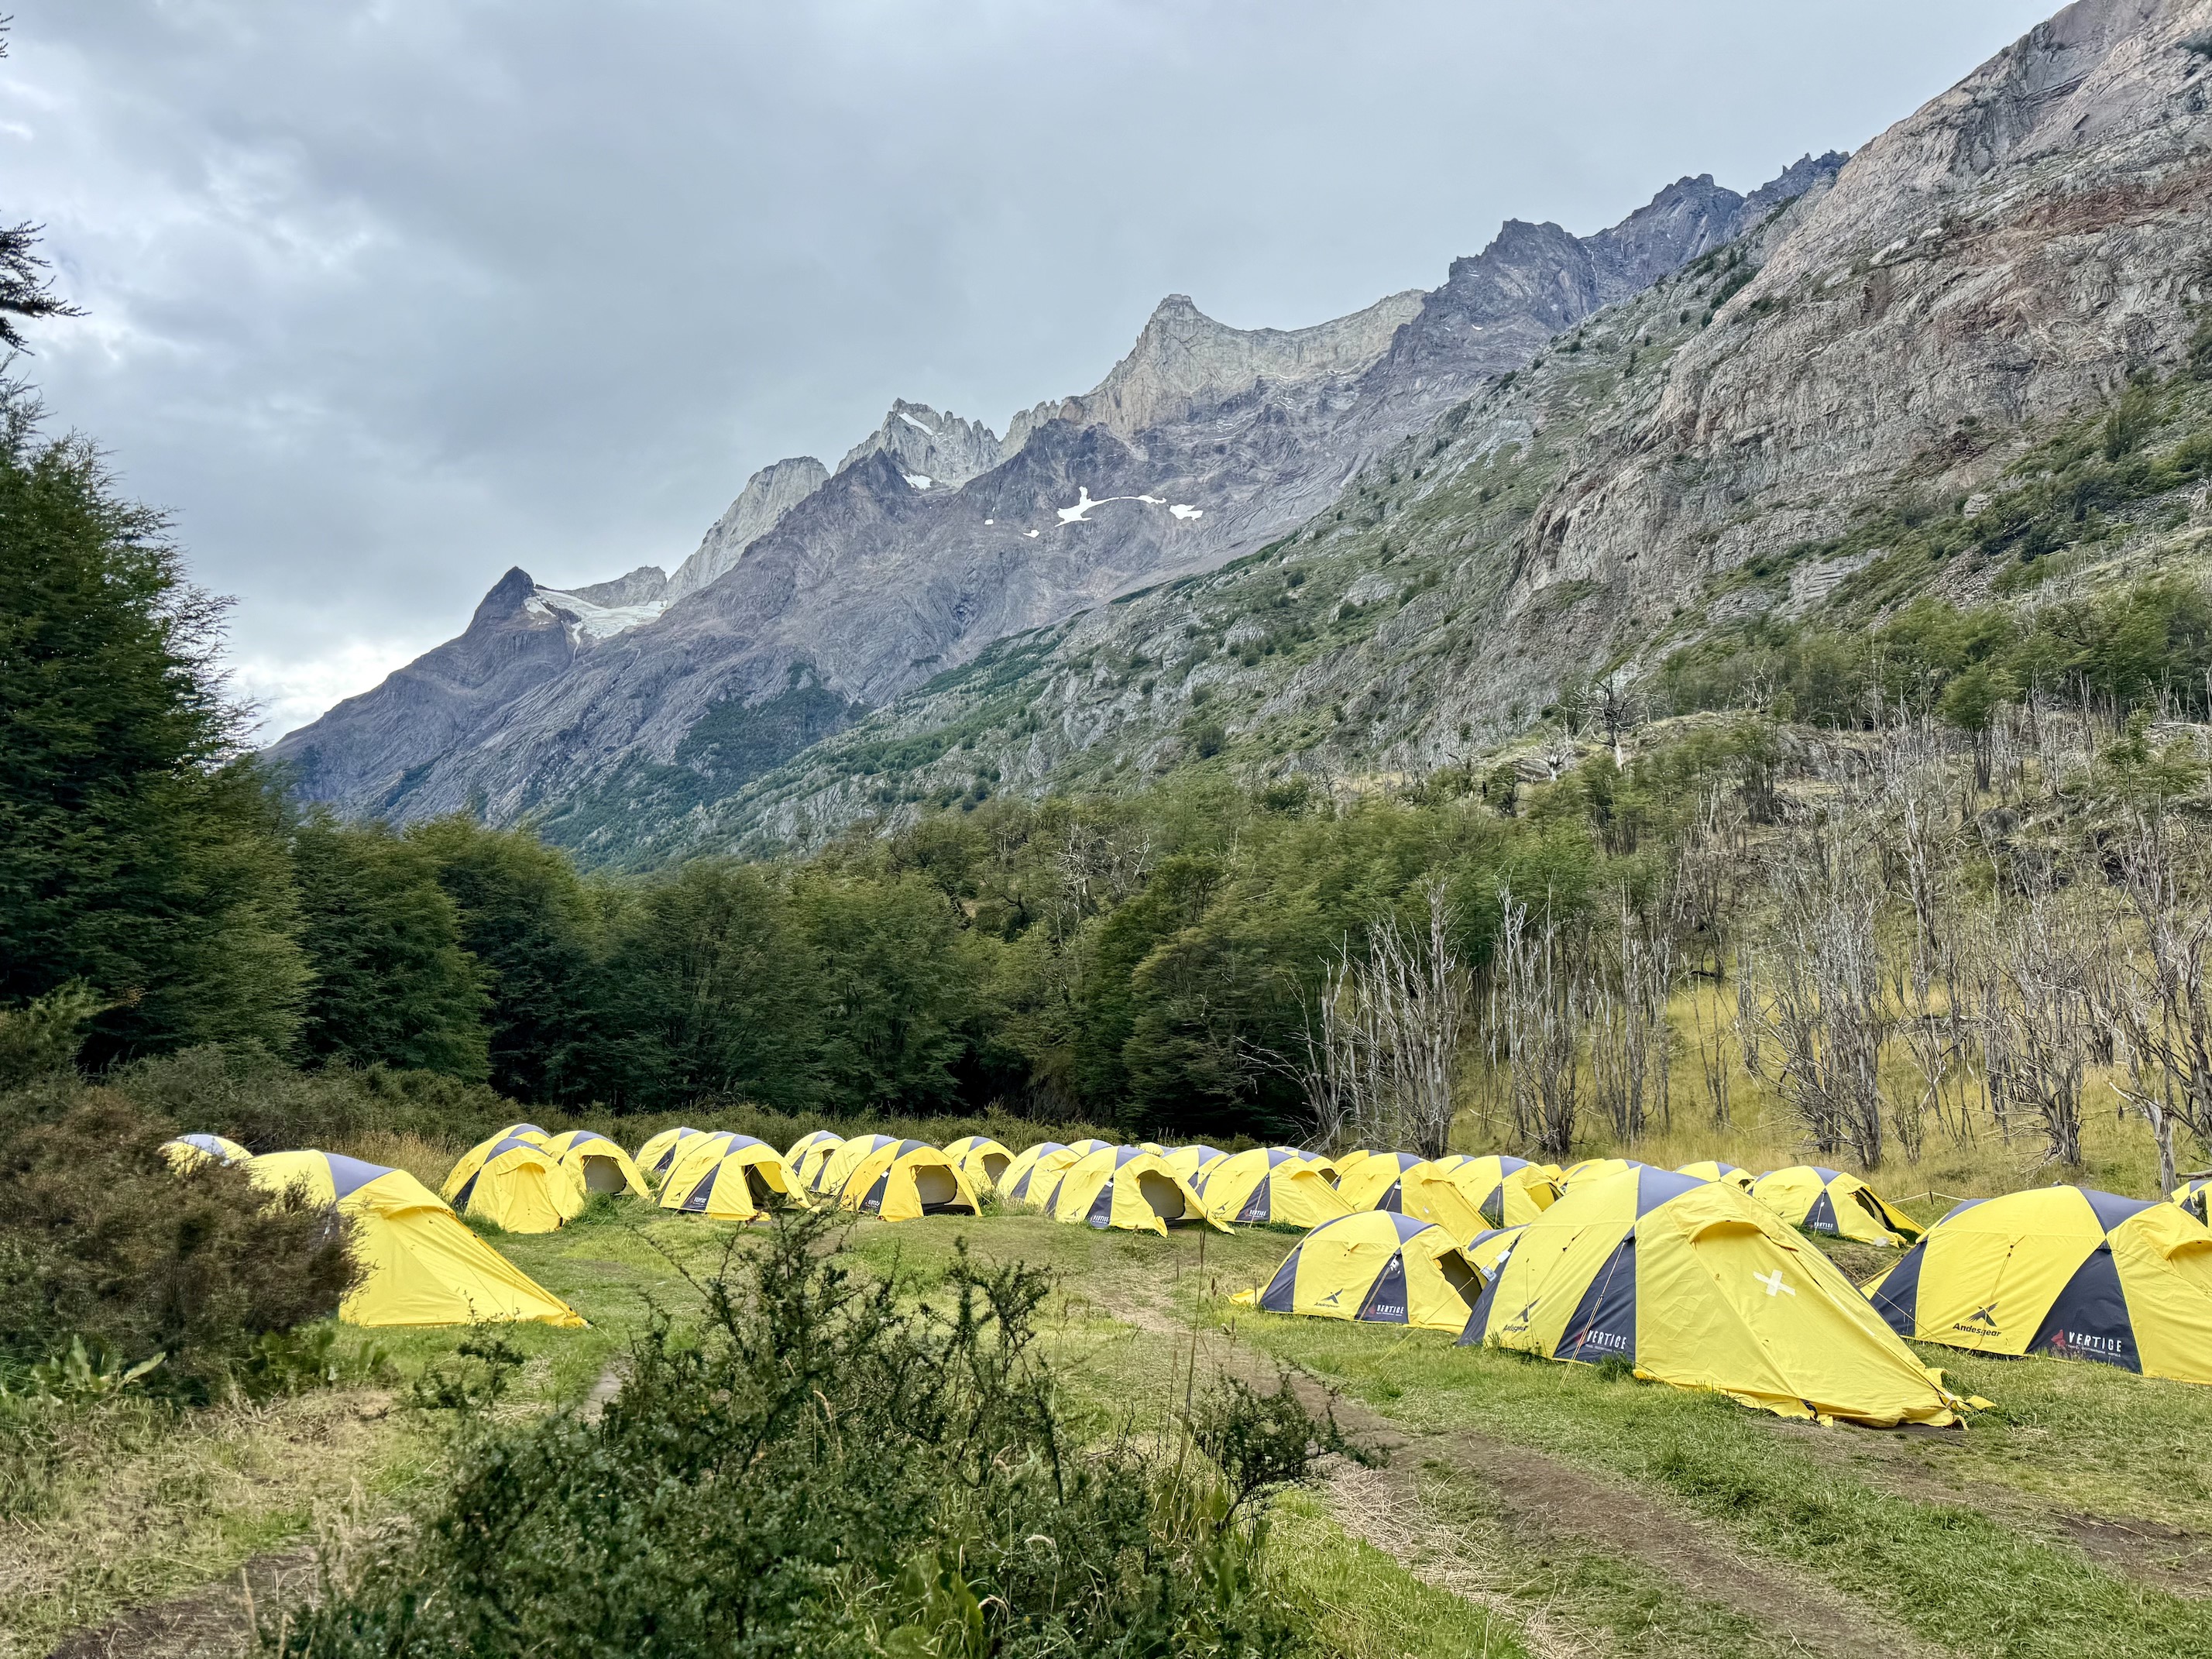
We made it to the refugio in about 3 hours, and with (we thought) plenty of time to spare before our trek. Like Paine Grande, Grey is run by Vertice and we had chosen tents (which ended up being already set up for us), with the option of sleeping pads. There was a small restaurant/cafeteria place where we ordered some hot food... and one member of our group realized she had lost her rain jacket. Sadly, while she went back on the trail to look for it, the rain jacket was not recovered or located in any of the refugio's lost and found areas. Another small mishap happened with the check in at the refugio, where initially they gave us the same tent as another group and then later gave us tents without sleeping pads. Dealing with that ended up taking most of our buffer time so once that was sorted out we had to race to the ice hike check in point, thankfully located only ~10 or so minutes from the refugio.
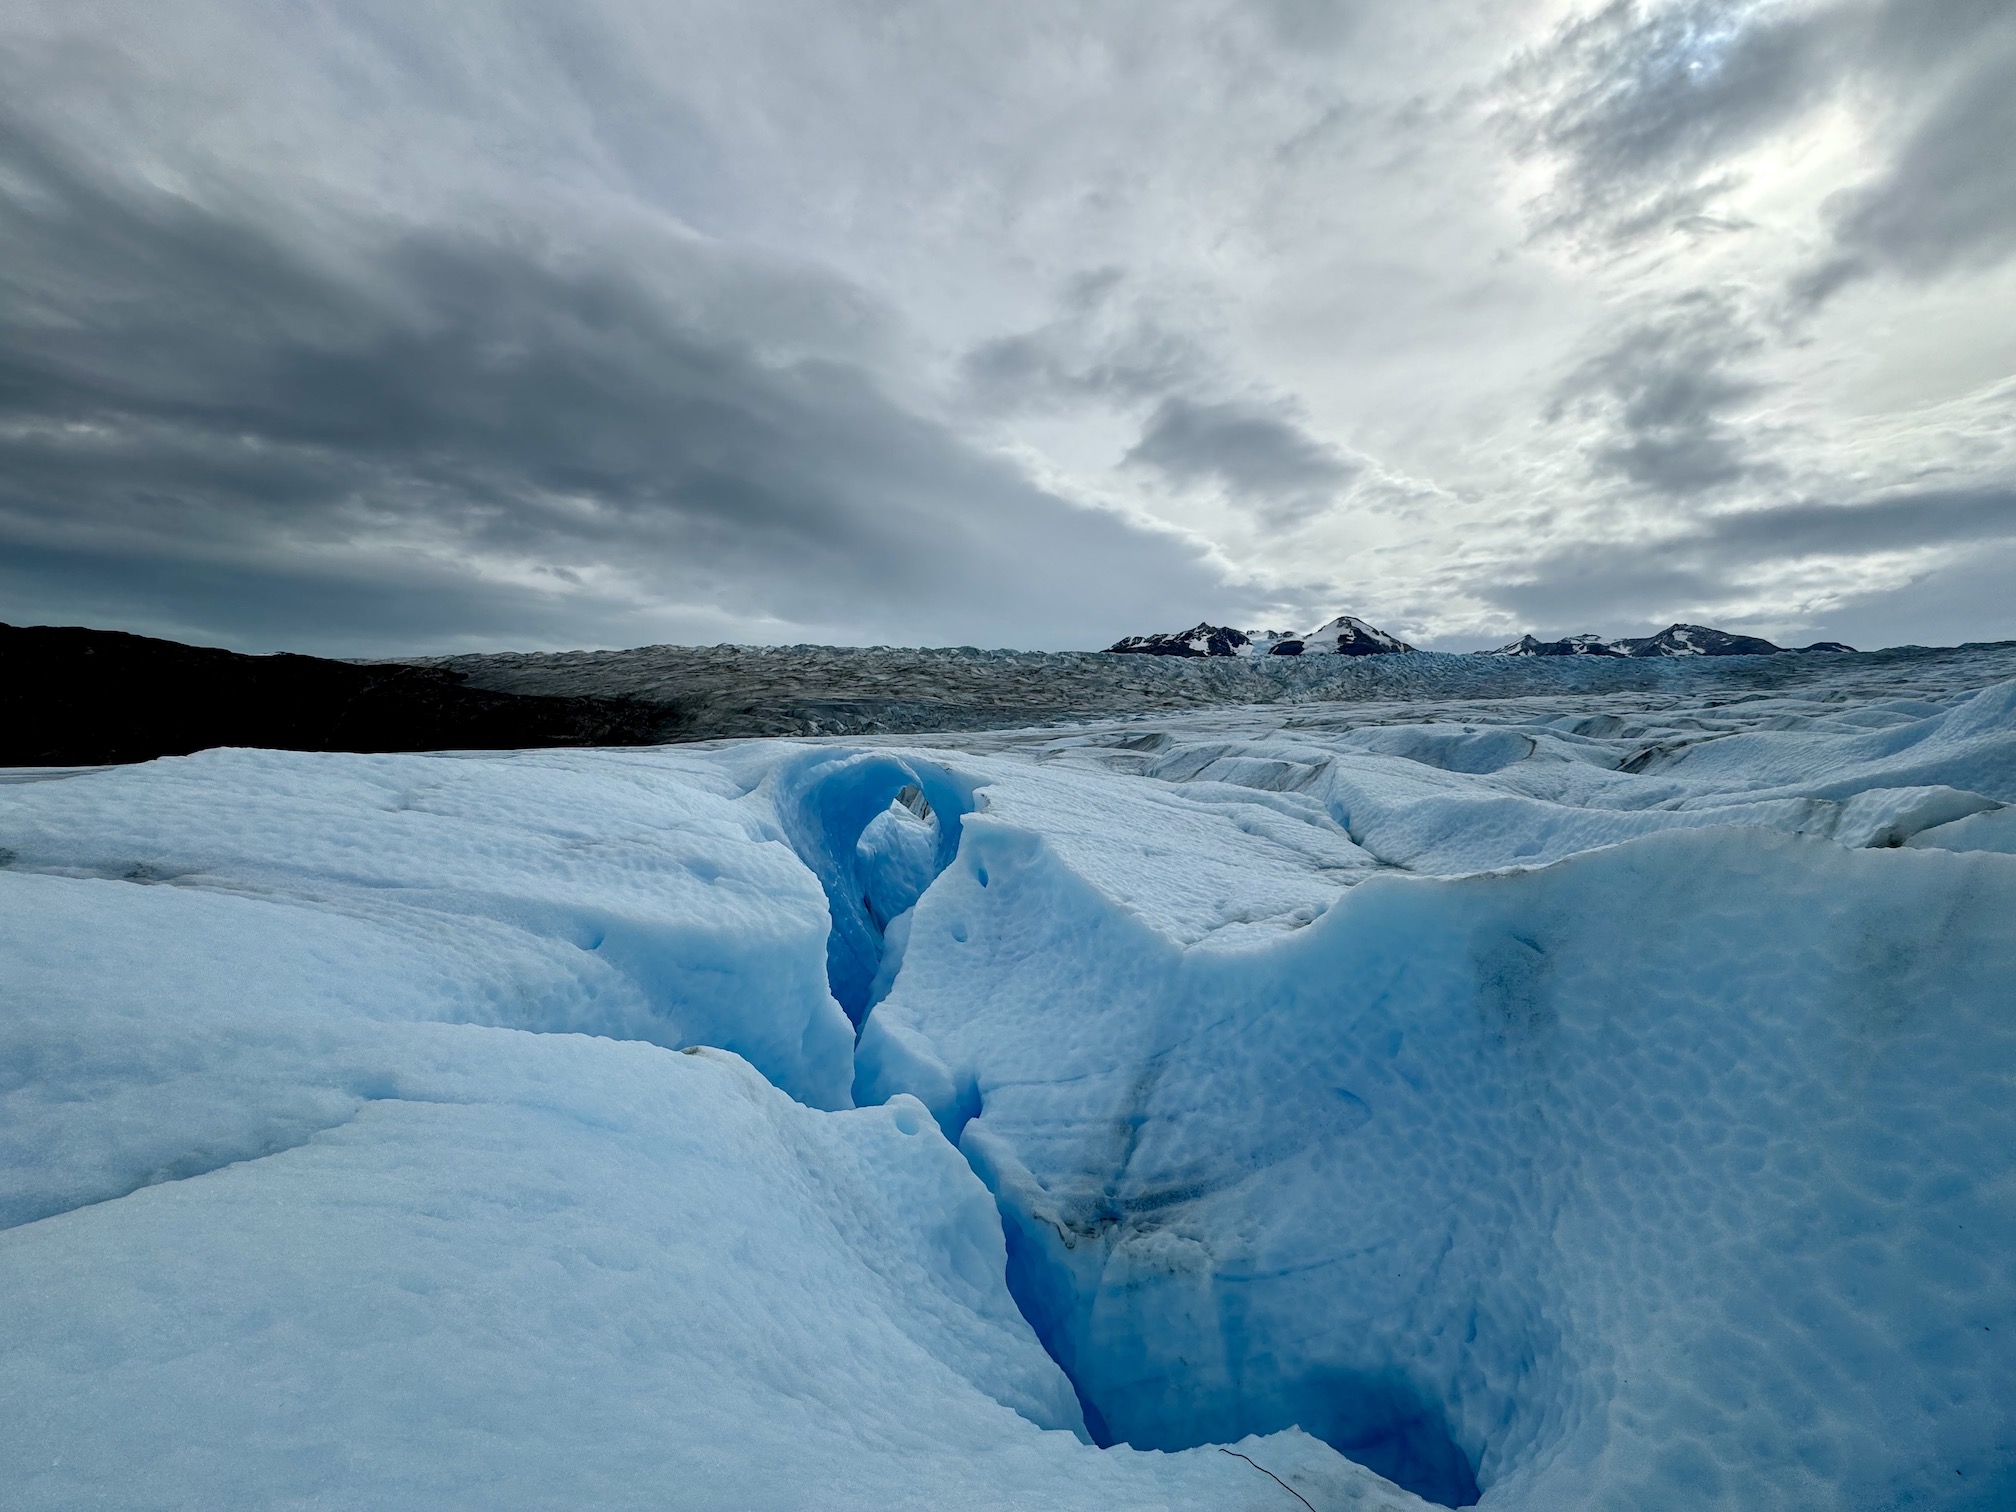
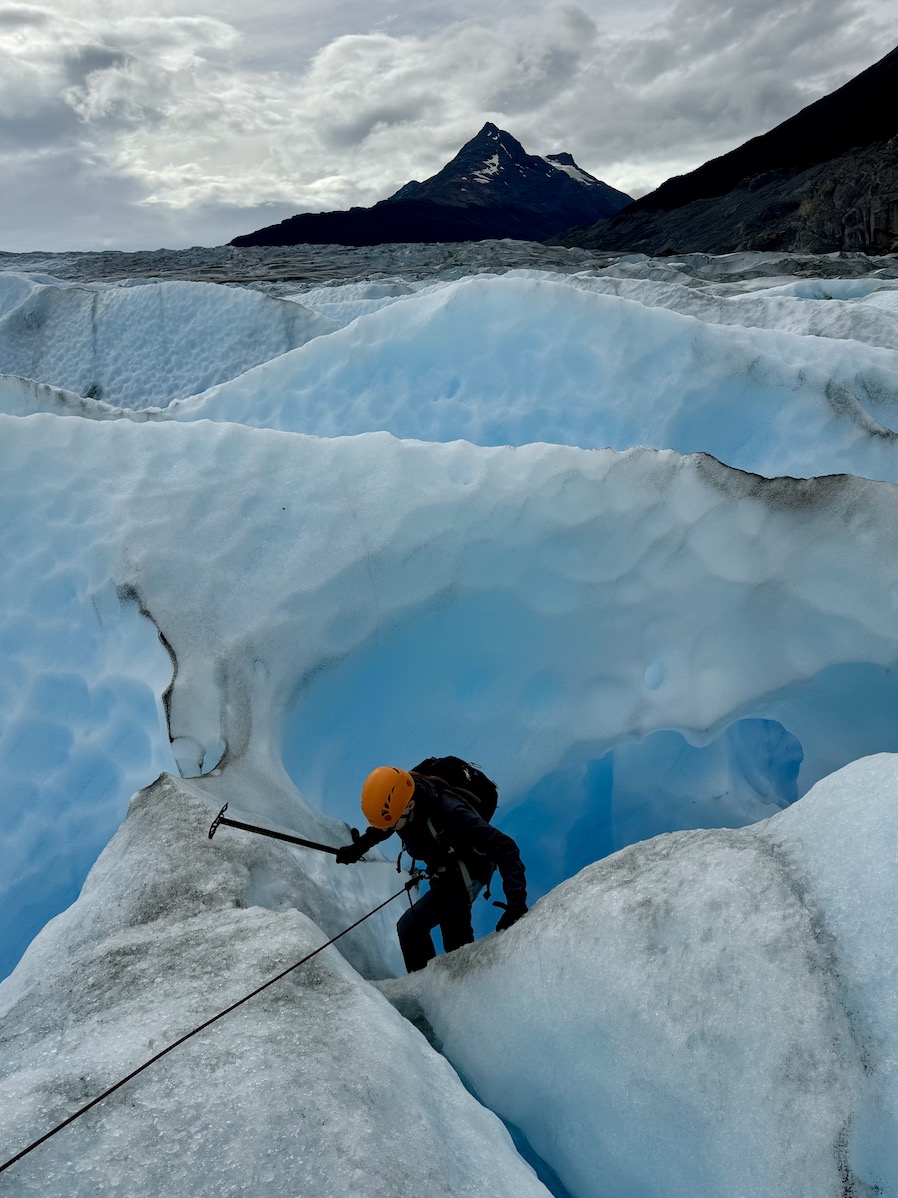
While the company provided gloves, I would recommended bringing your own if you have them and a water bottle (for later on the glacier :)). We signed the standard waivers and were off in a small speedboat to the glacier. After the boat ride, which brought us to the edge of the glacier, we walked a bit closer, put on crampons, and were equipped with an ice axe, harness, and helmet. From there, we took our steps onto the glacier!
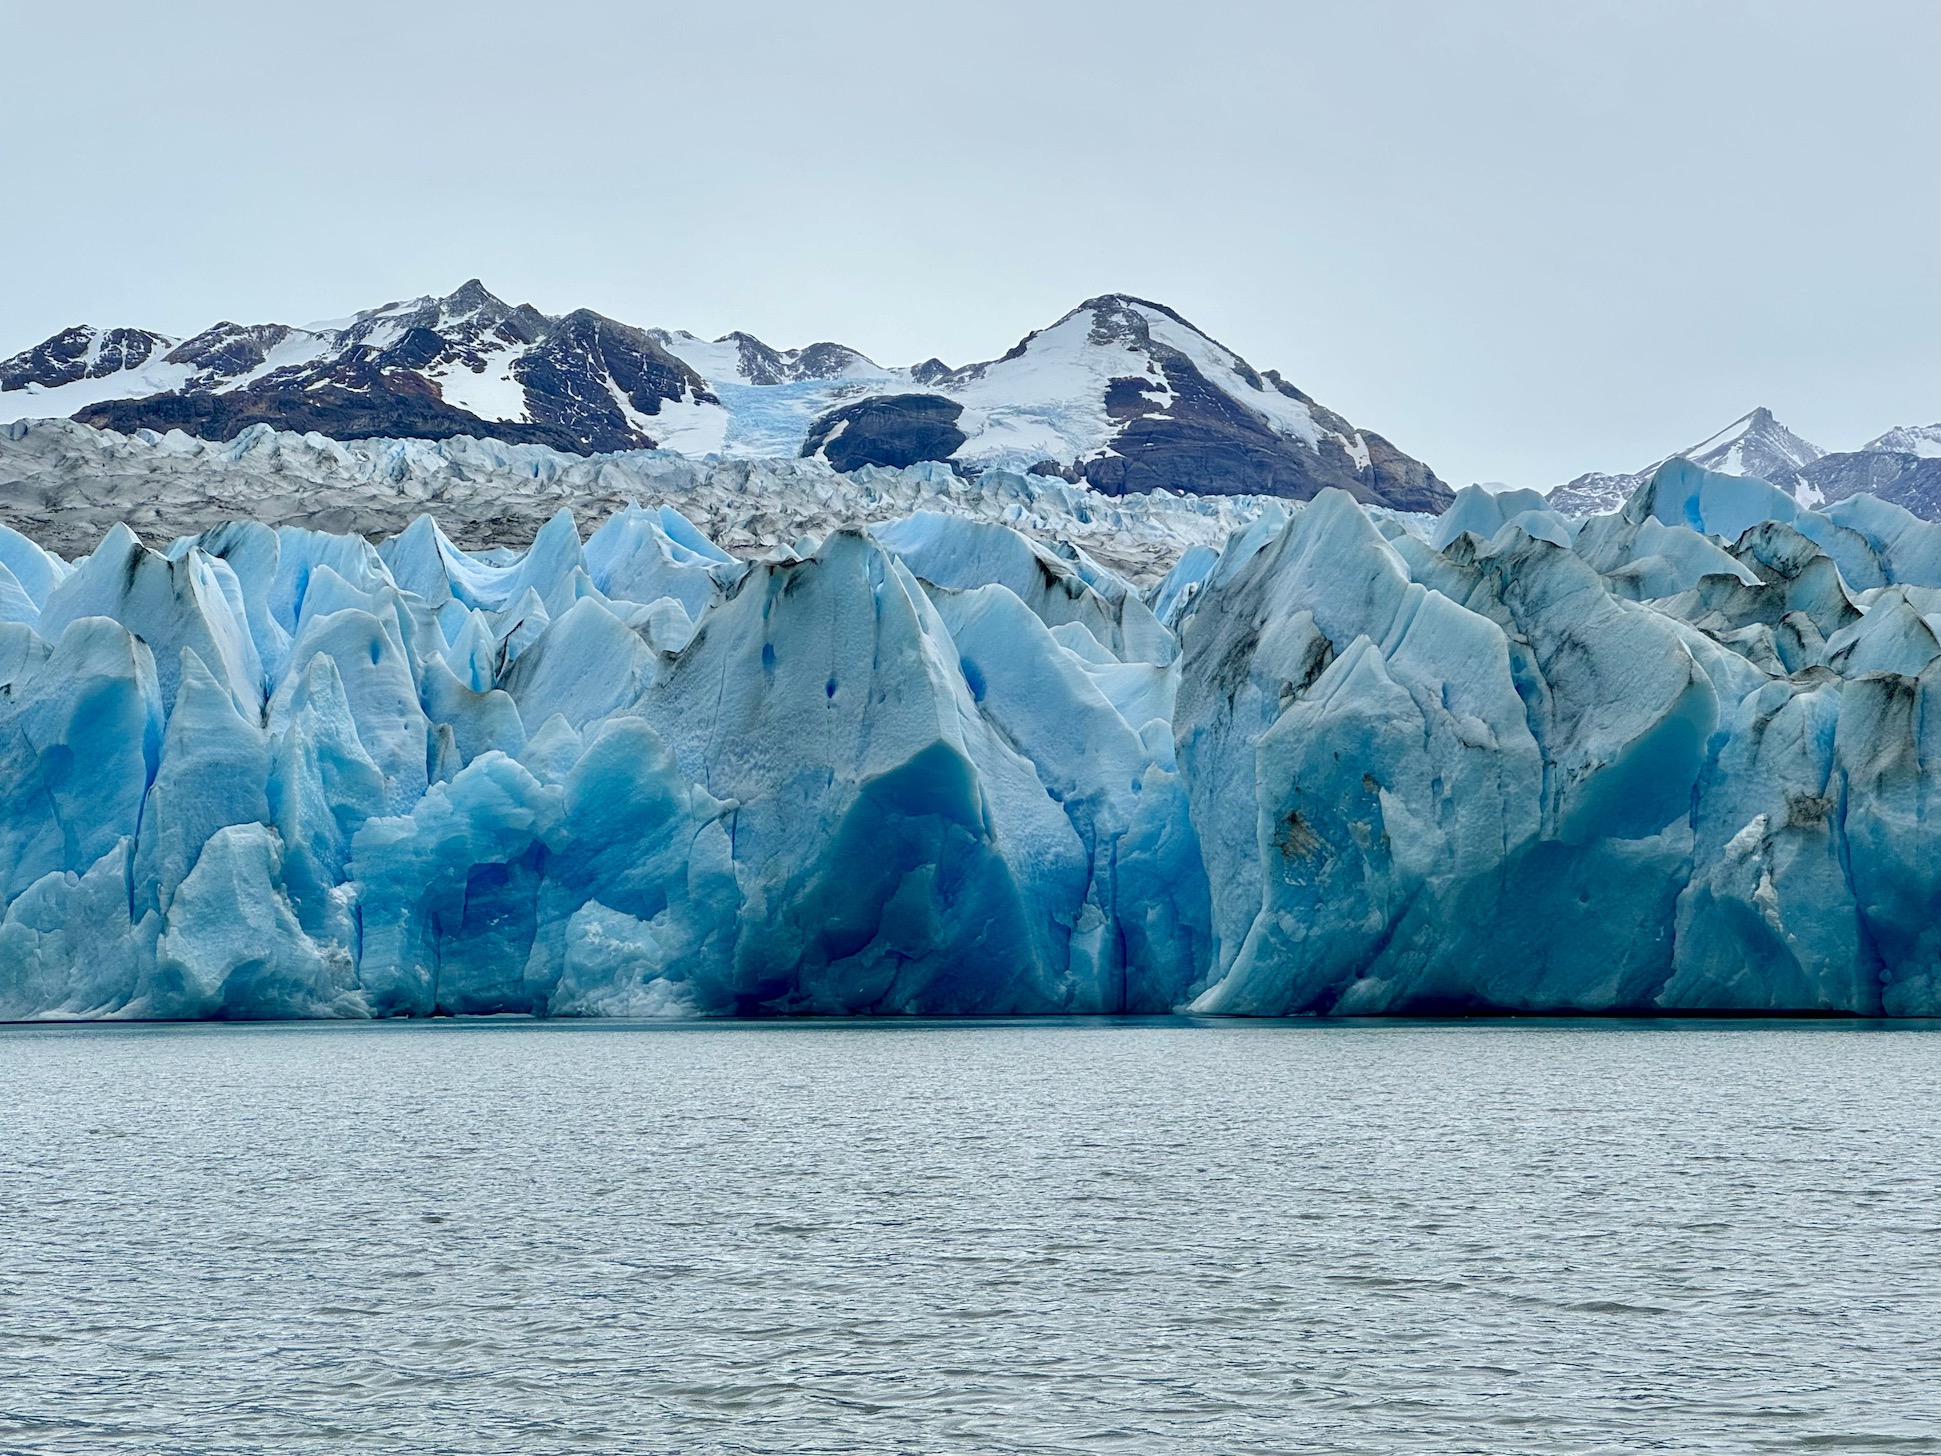
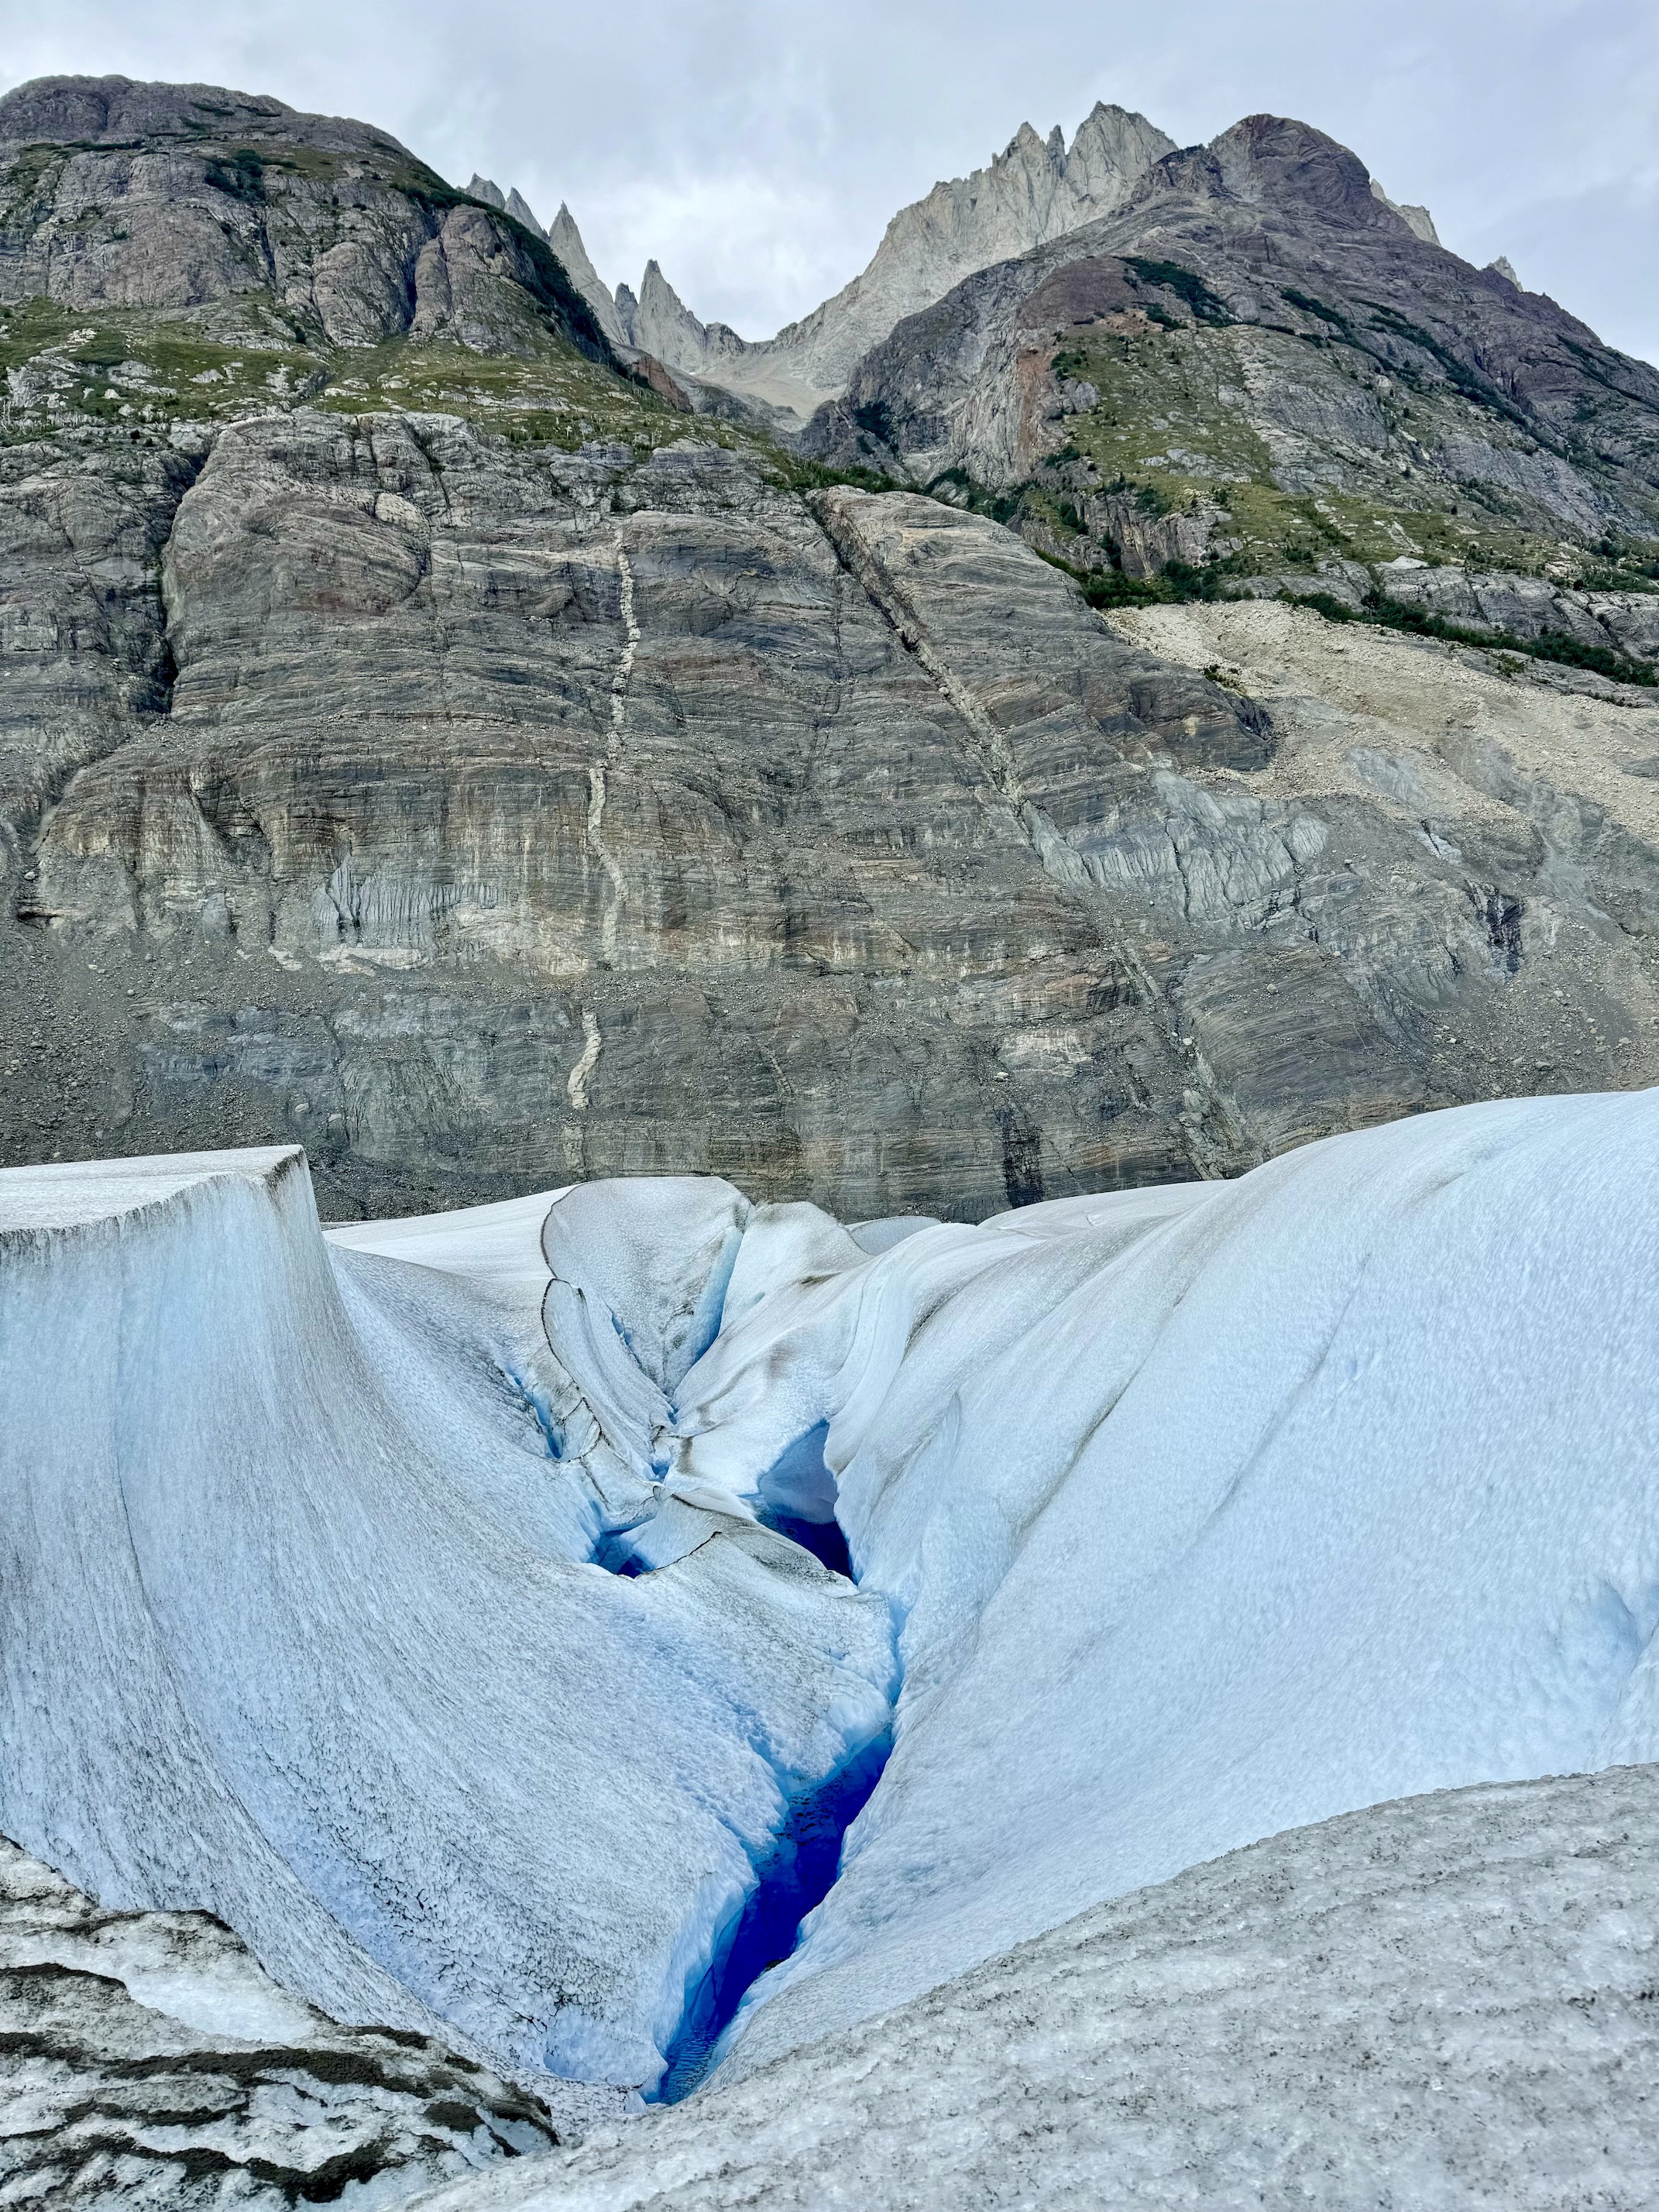
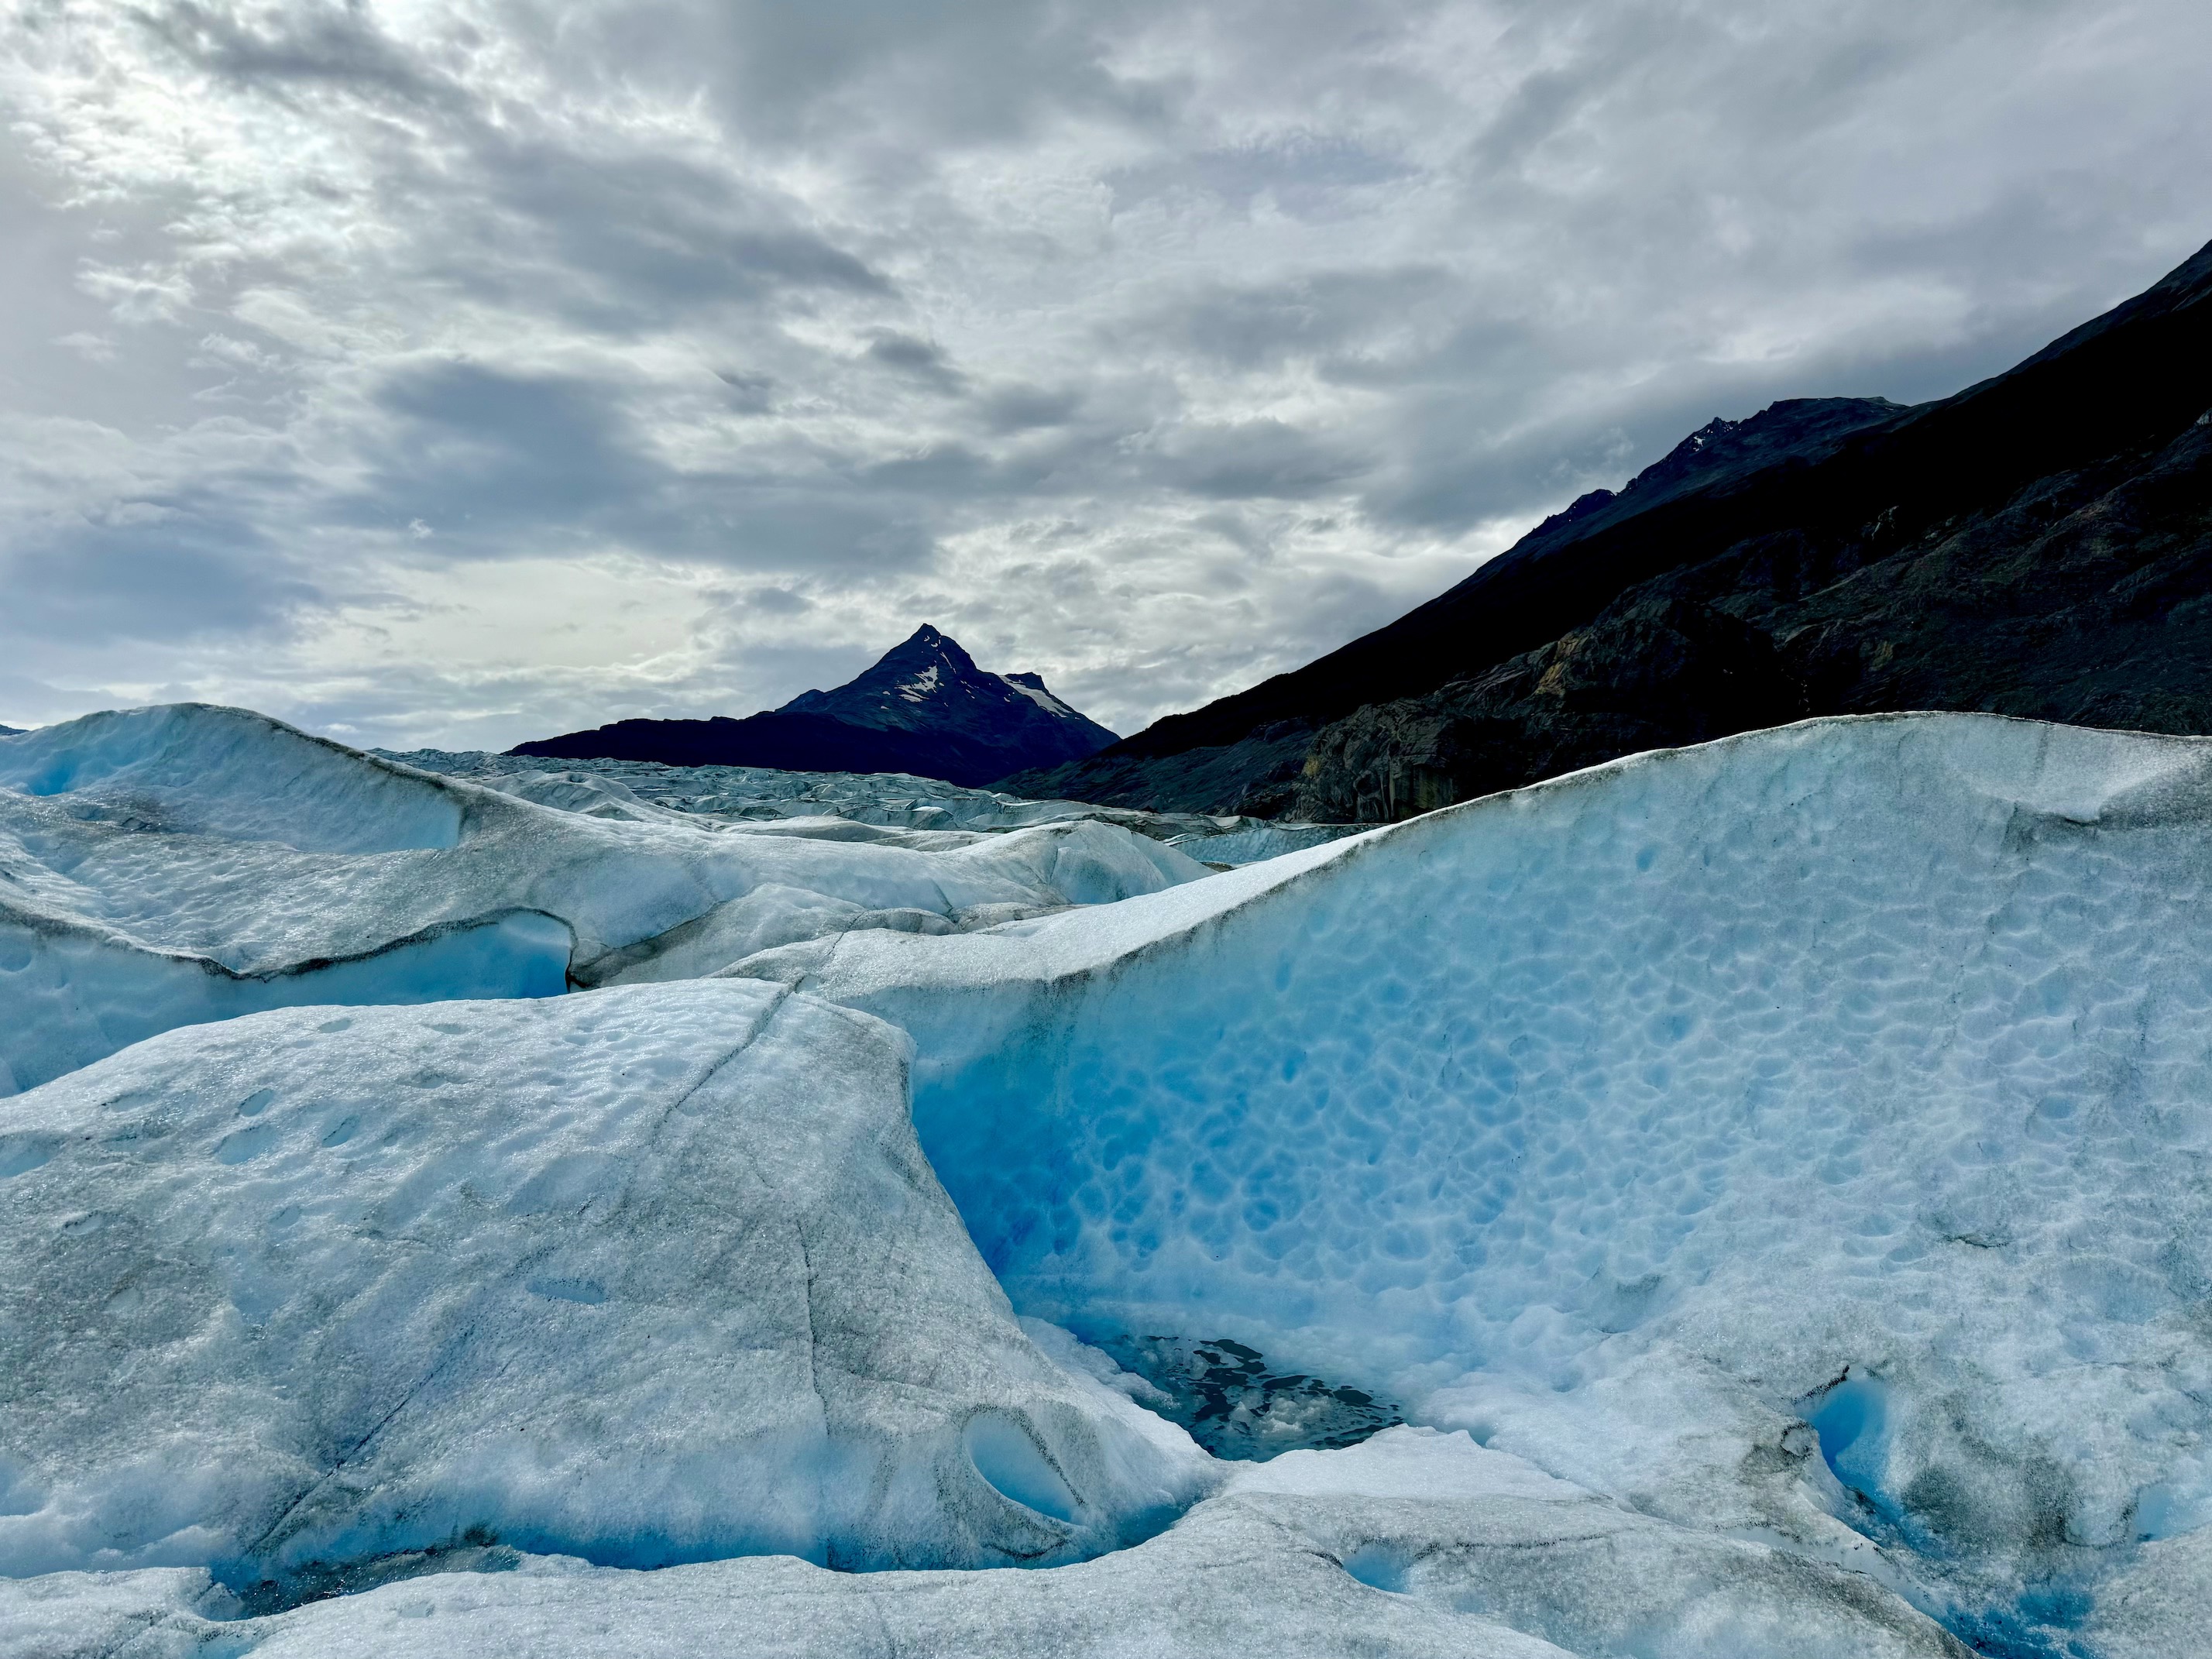
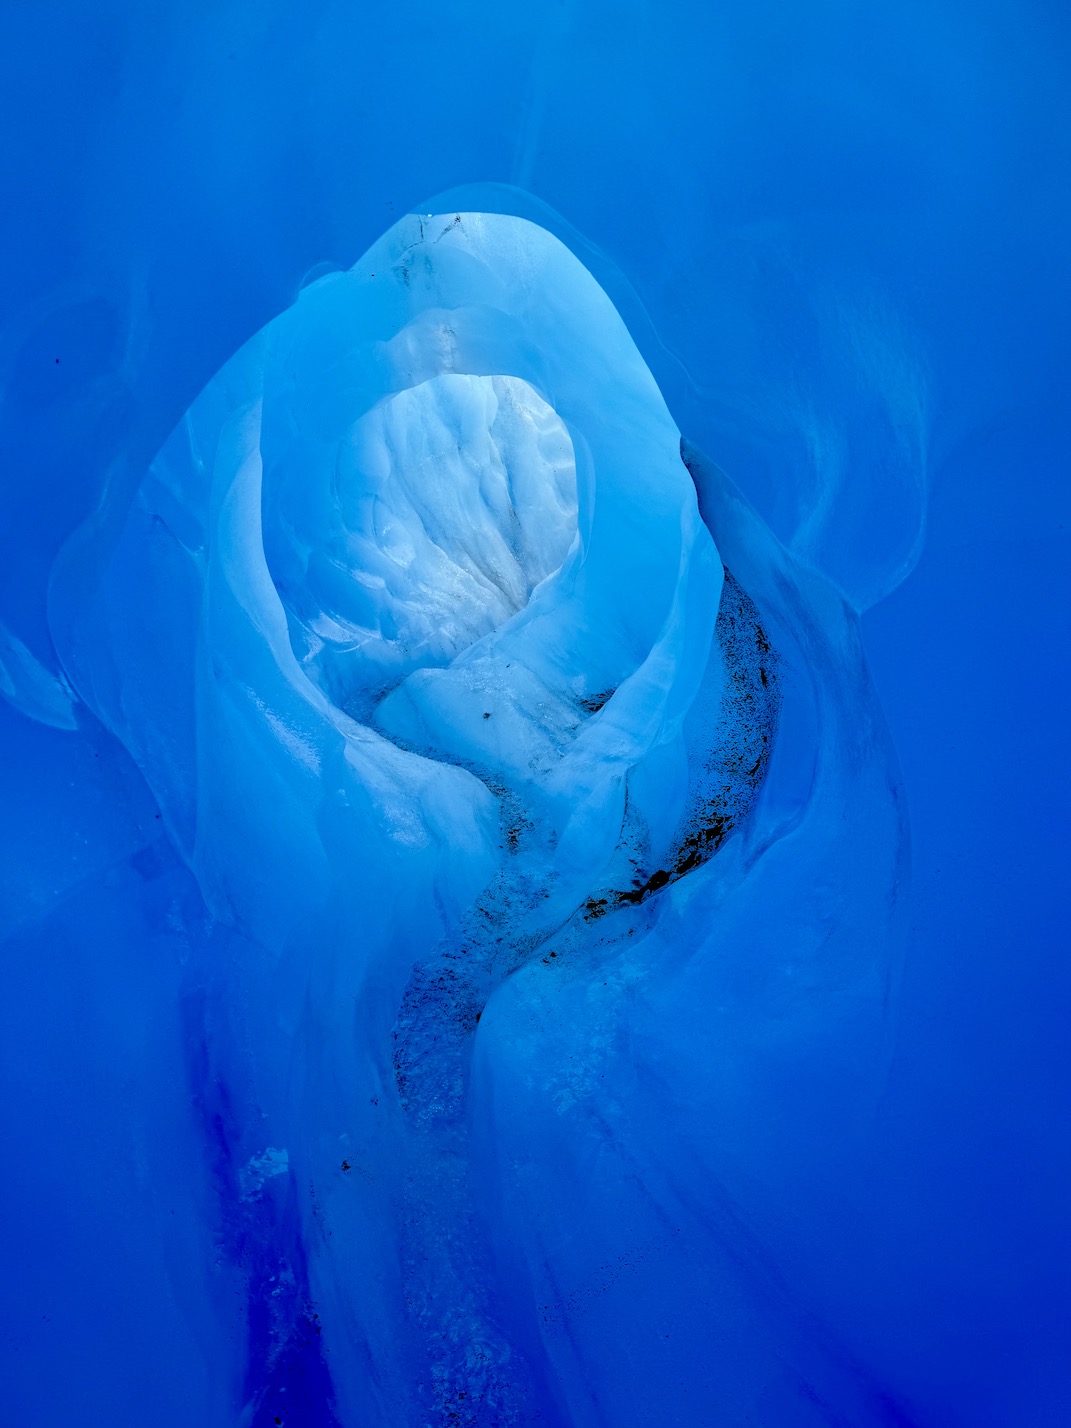
The guides were friendly, and all in all we walked about ~2 miles on the glacier itself or about ~1-2 hours (total tour time was ~5 hours). We walked not just on the glacier, but also through a small cave and "climbed" up a small ridge. The vibrant blue of the water was stunning -- it really was that color. Our guides also provided us with warm drinks, snacks, and photography service. We drank water from the glacier, which was probably some of the best water I've ever had (this is where having a water bottle would have been handy!). It was my first time actually walking on a glacier and one to remember.

Back at the refugio, we snacked on another hot, pre-paid dinner and went to bed. Overnight it did rain a bit, which made for great white noise while sleeping and I definitely had a better rest than the night before.
Day 7: W Trek - Grey back to Paine Grande (and Puerto Natales)
Segments- Grey <-> Suspension Bridges (1st, 2nd): ~5 miles, ~1000 ft, ~2-3 hours
- Grey -> Paine Grande: 7 miles, ~1300 ft, 3 hours
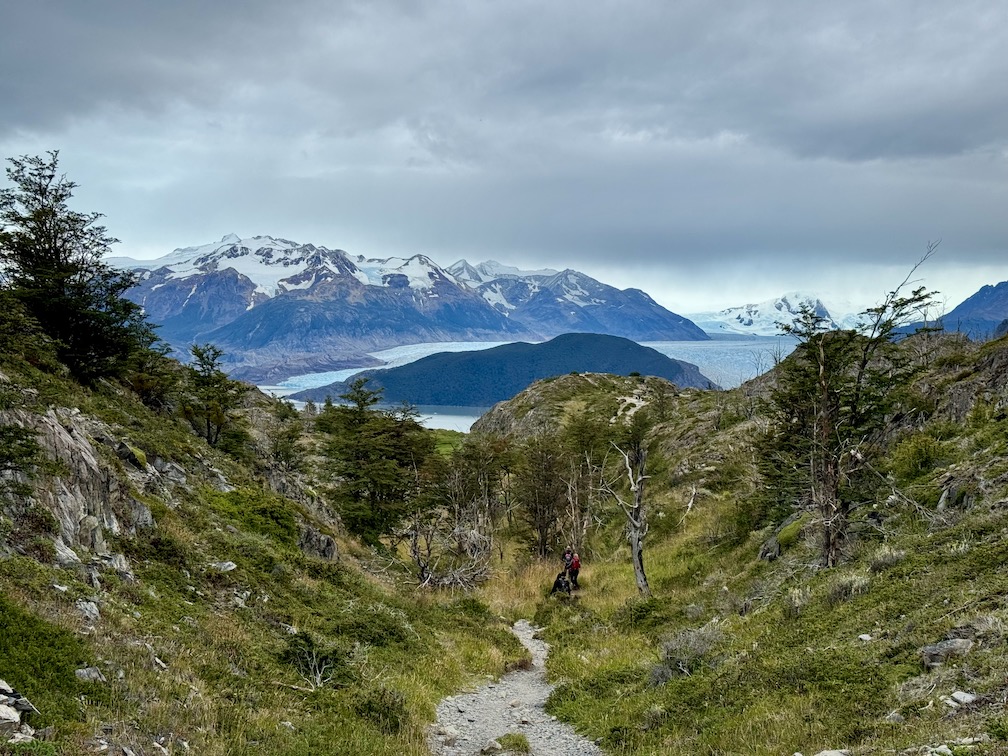
This would be our last day of the W Trek, and was the last "arm" of the W shape. It largely was just the reverse of the previous day -- where we trekked from Grey back to Paine Grande in time to catch the afternoon/evening ferry back to the bus to Puerto Natales. However, in the morning before we had to set out, a few of us first explored the area north to Grey.
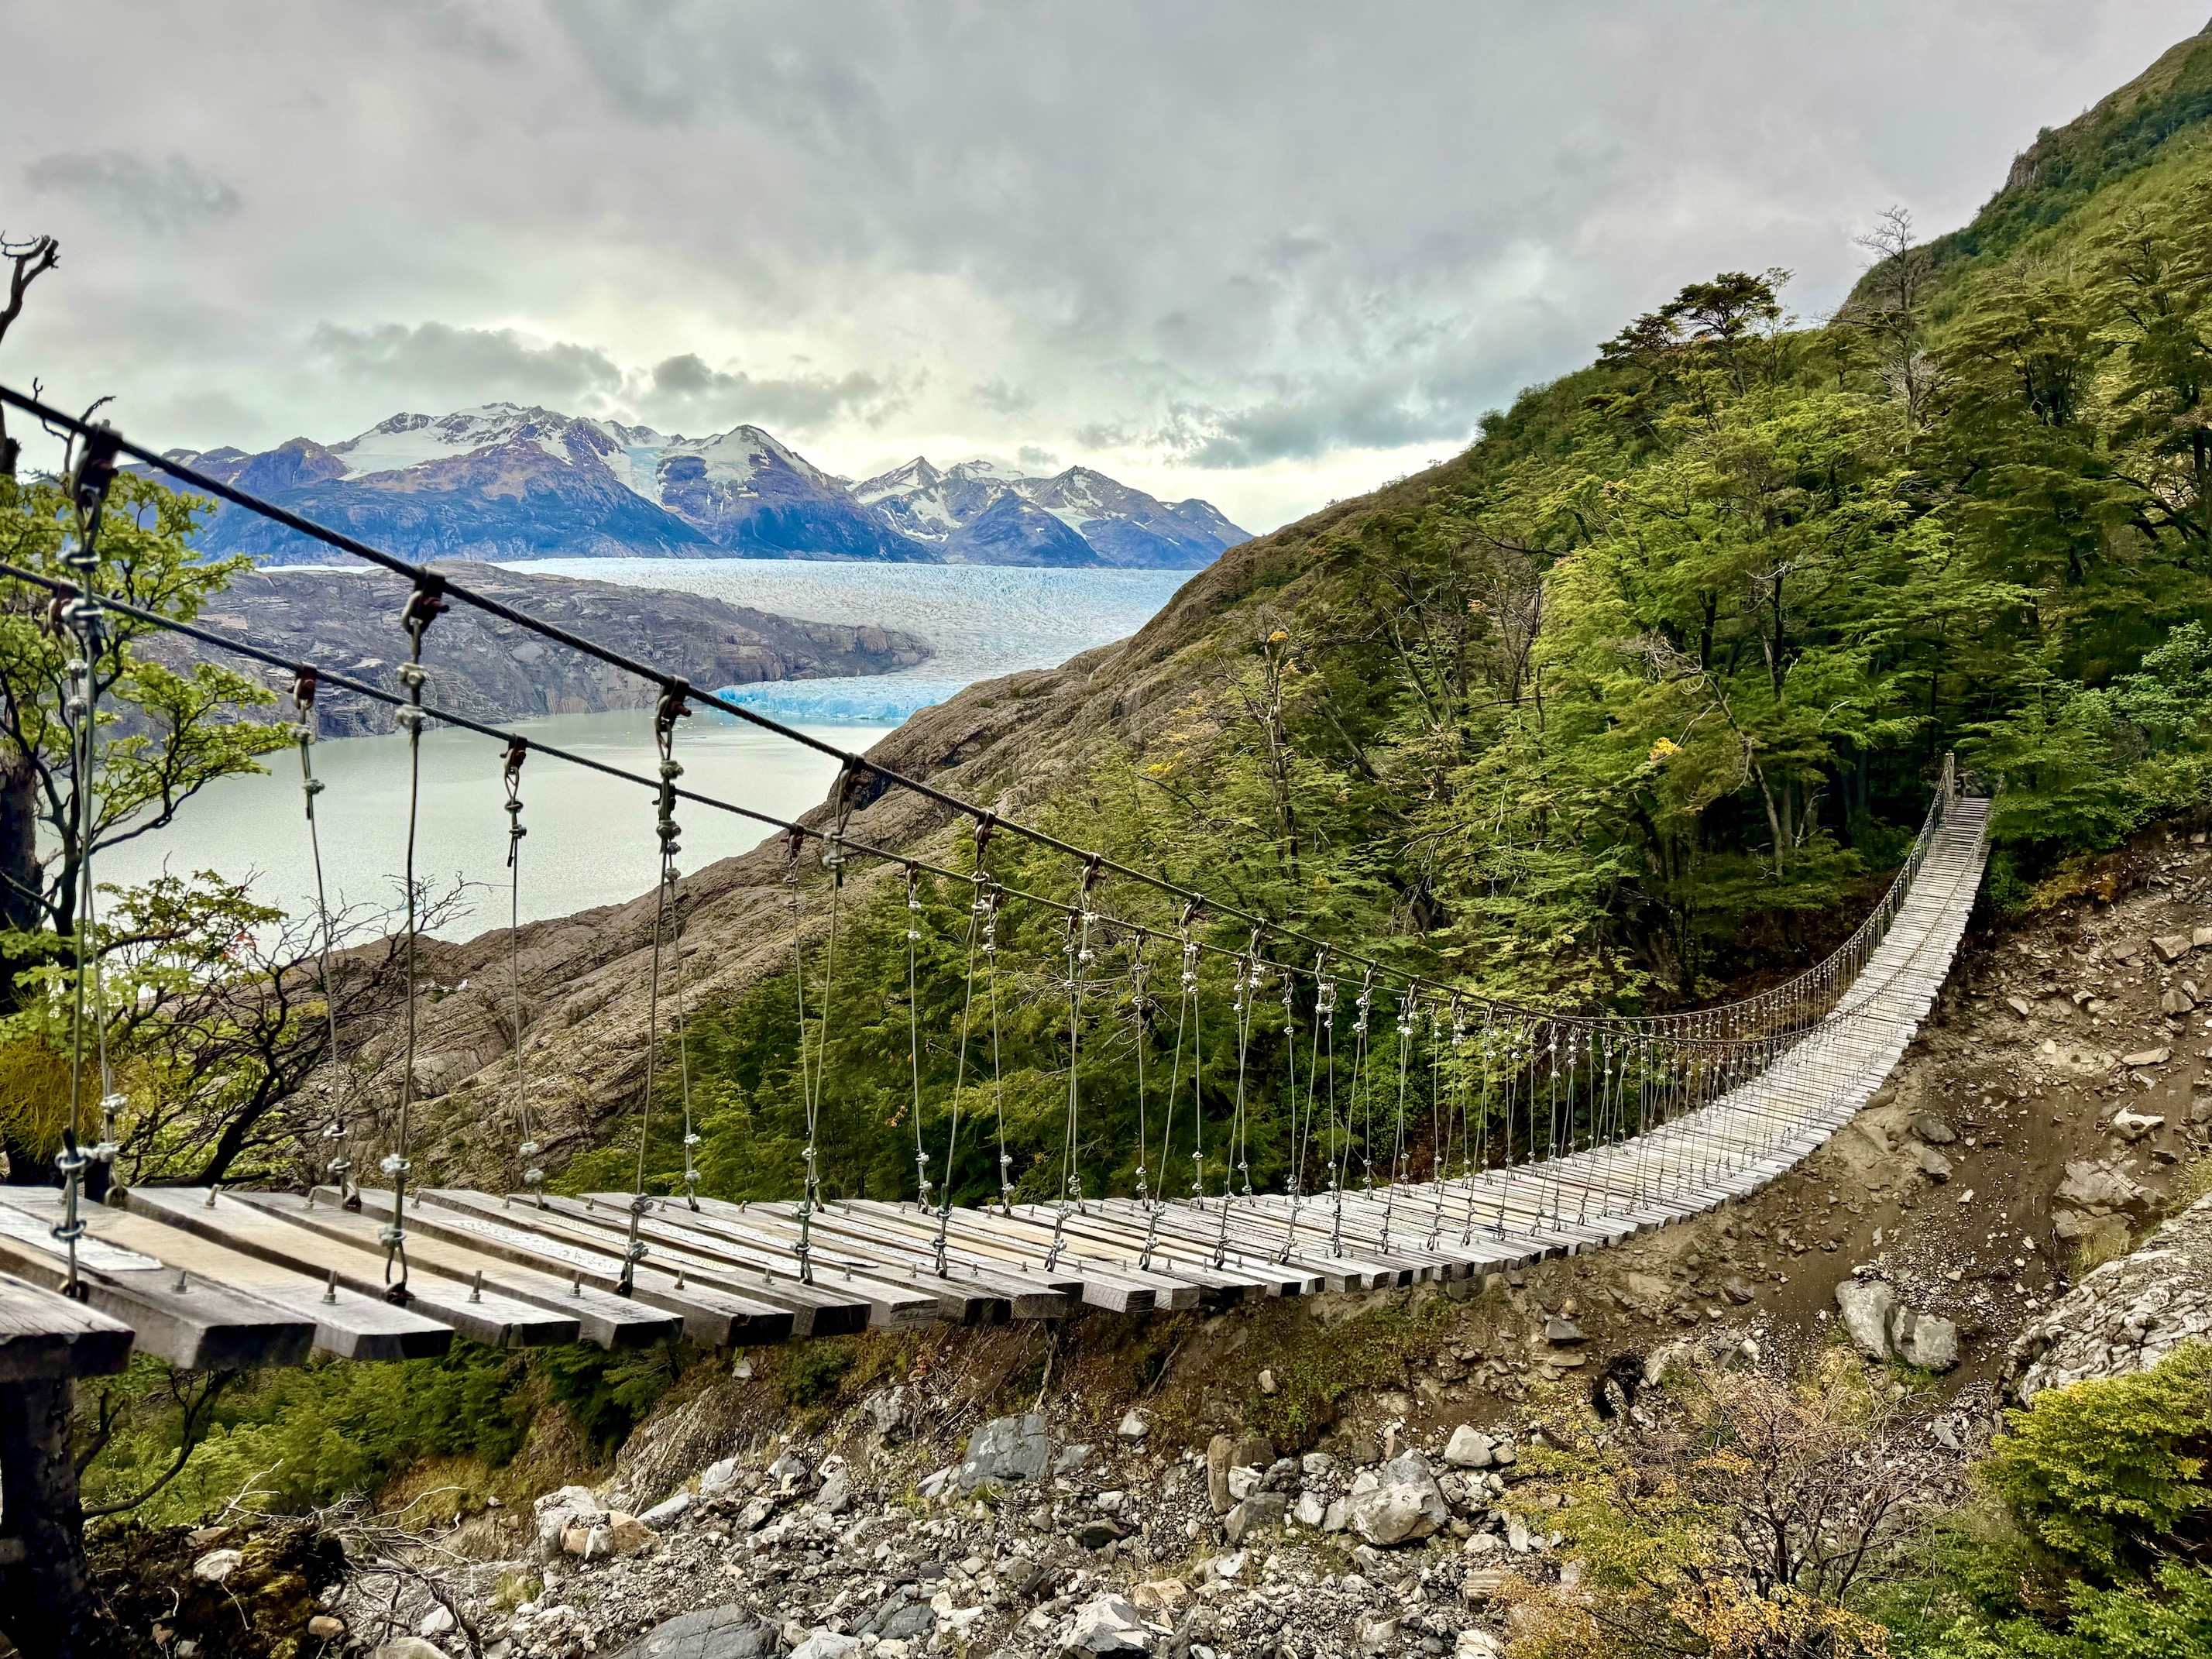
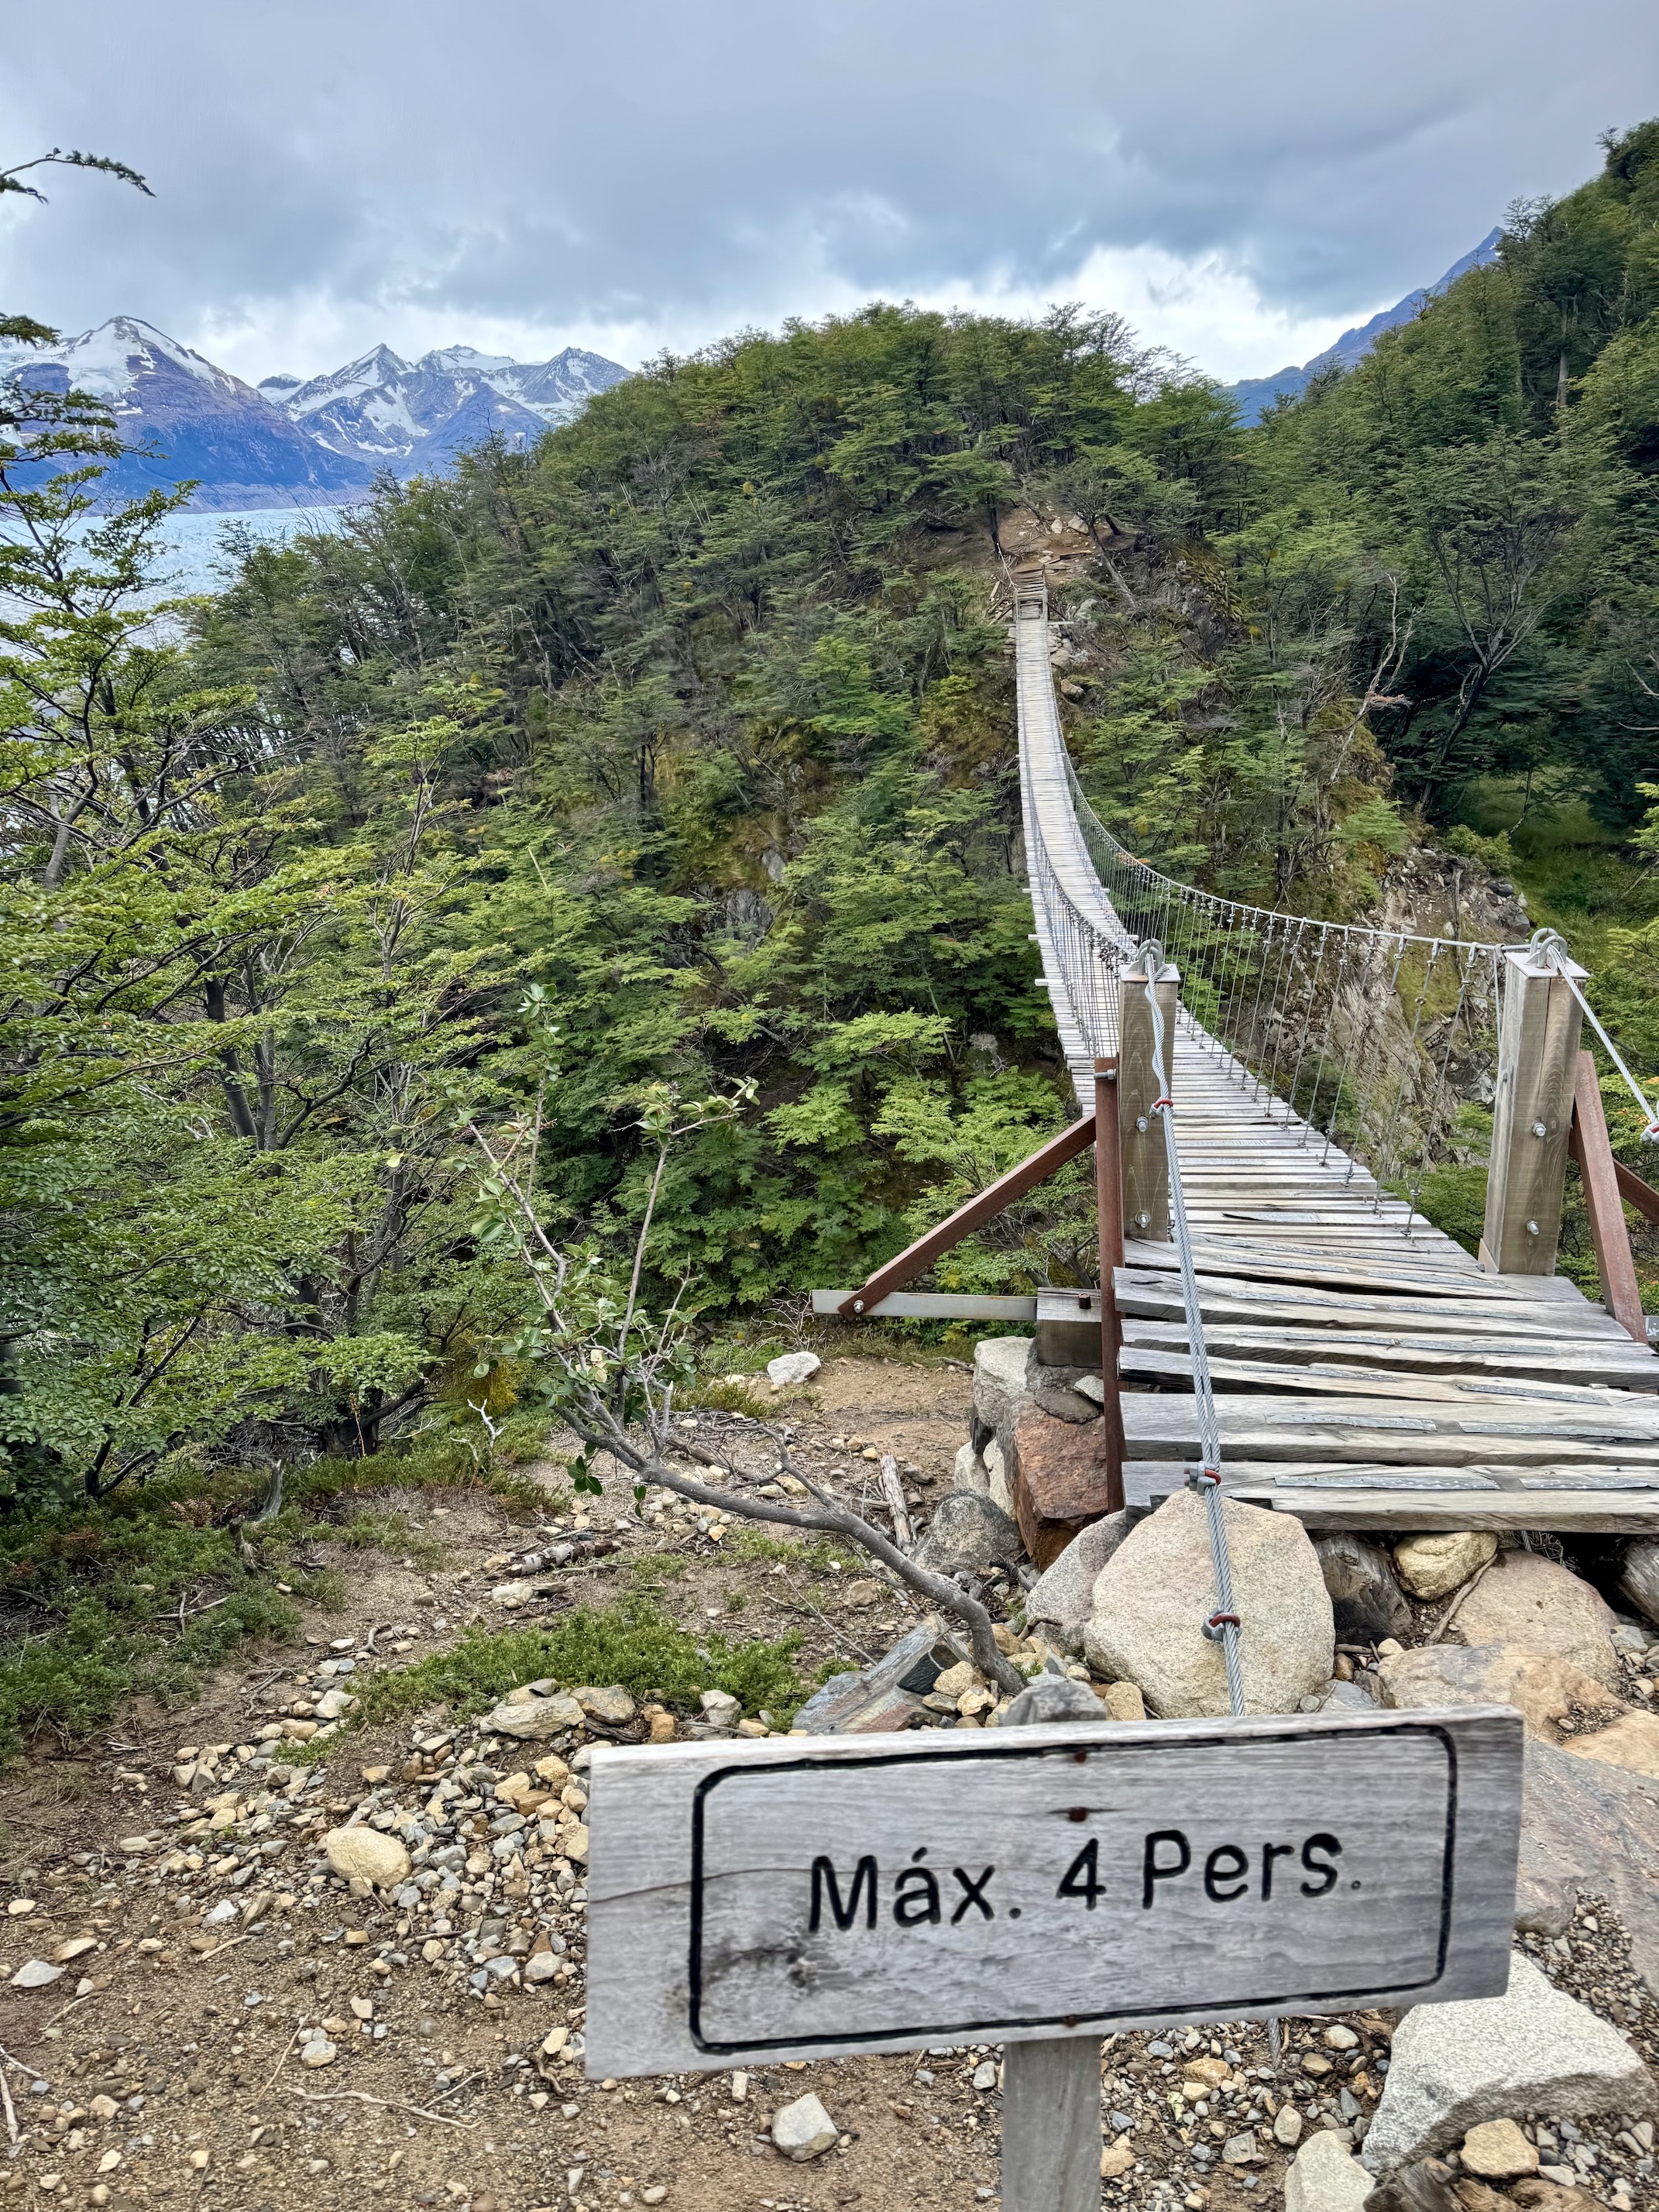
If you were doing the O Trek, this is one of the places where it would join up with the W Trek. In particular, blogs had mentioned three suspension bridges you could hike to, though many were light on details for the distance between each one. We decided to try for at least two, budgeting about 3 hours. There were definitely stretches where we weren't quite clear if we'd be able to make it to the second bridge -- but we did! It was definitely a fun morning excursion and the suspension bridges were exhilirating to walk on (I had a perpetual fear I would drop my phone). You get glimpses of the glacier, which sadly has retreated over time.
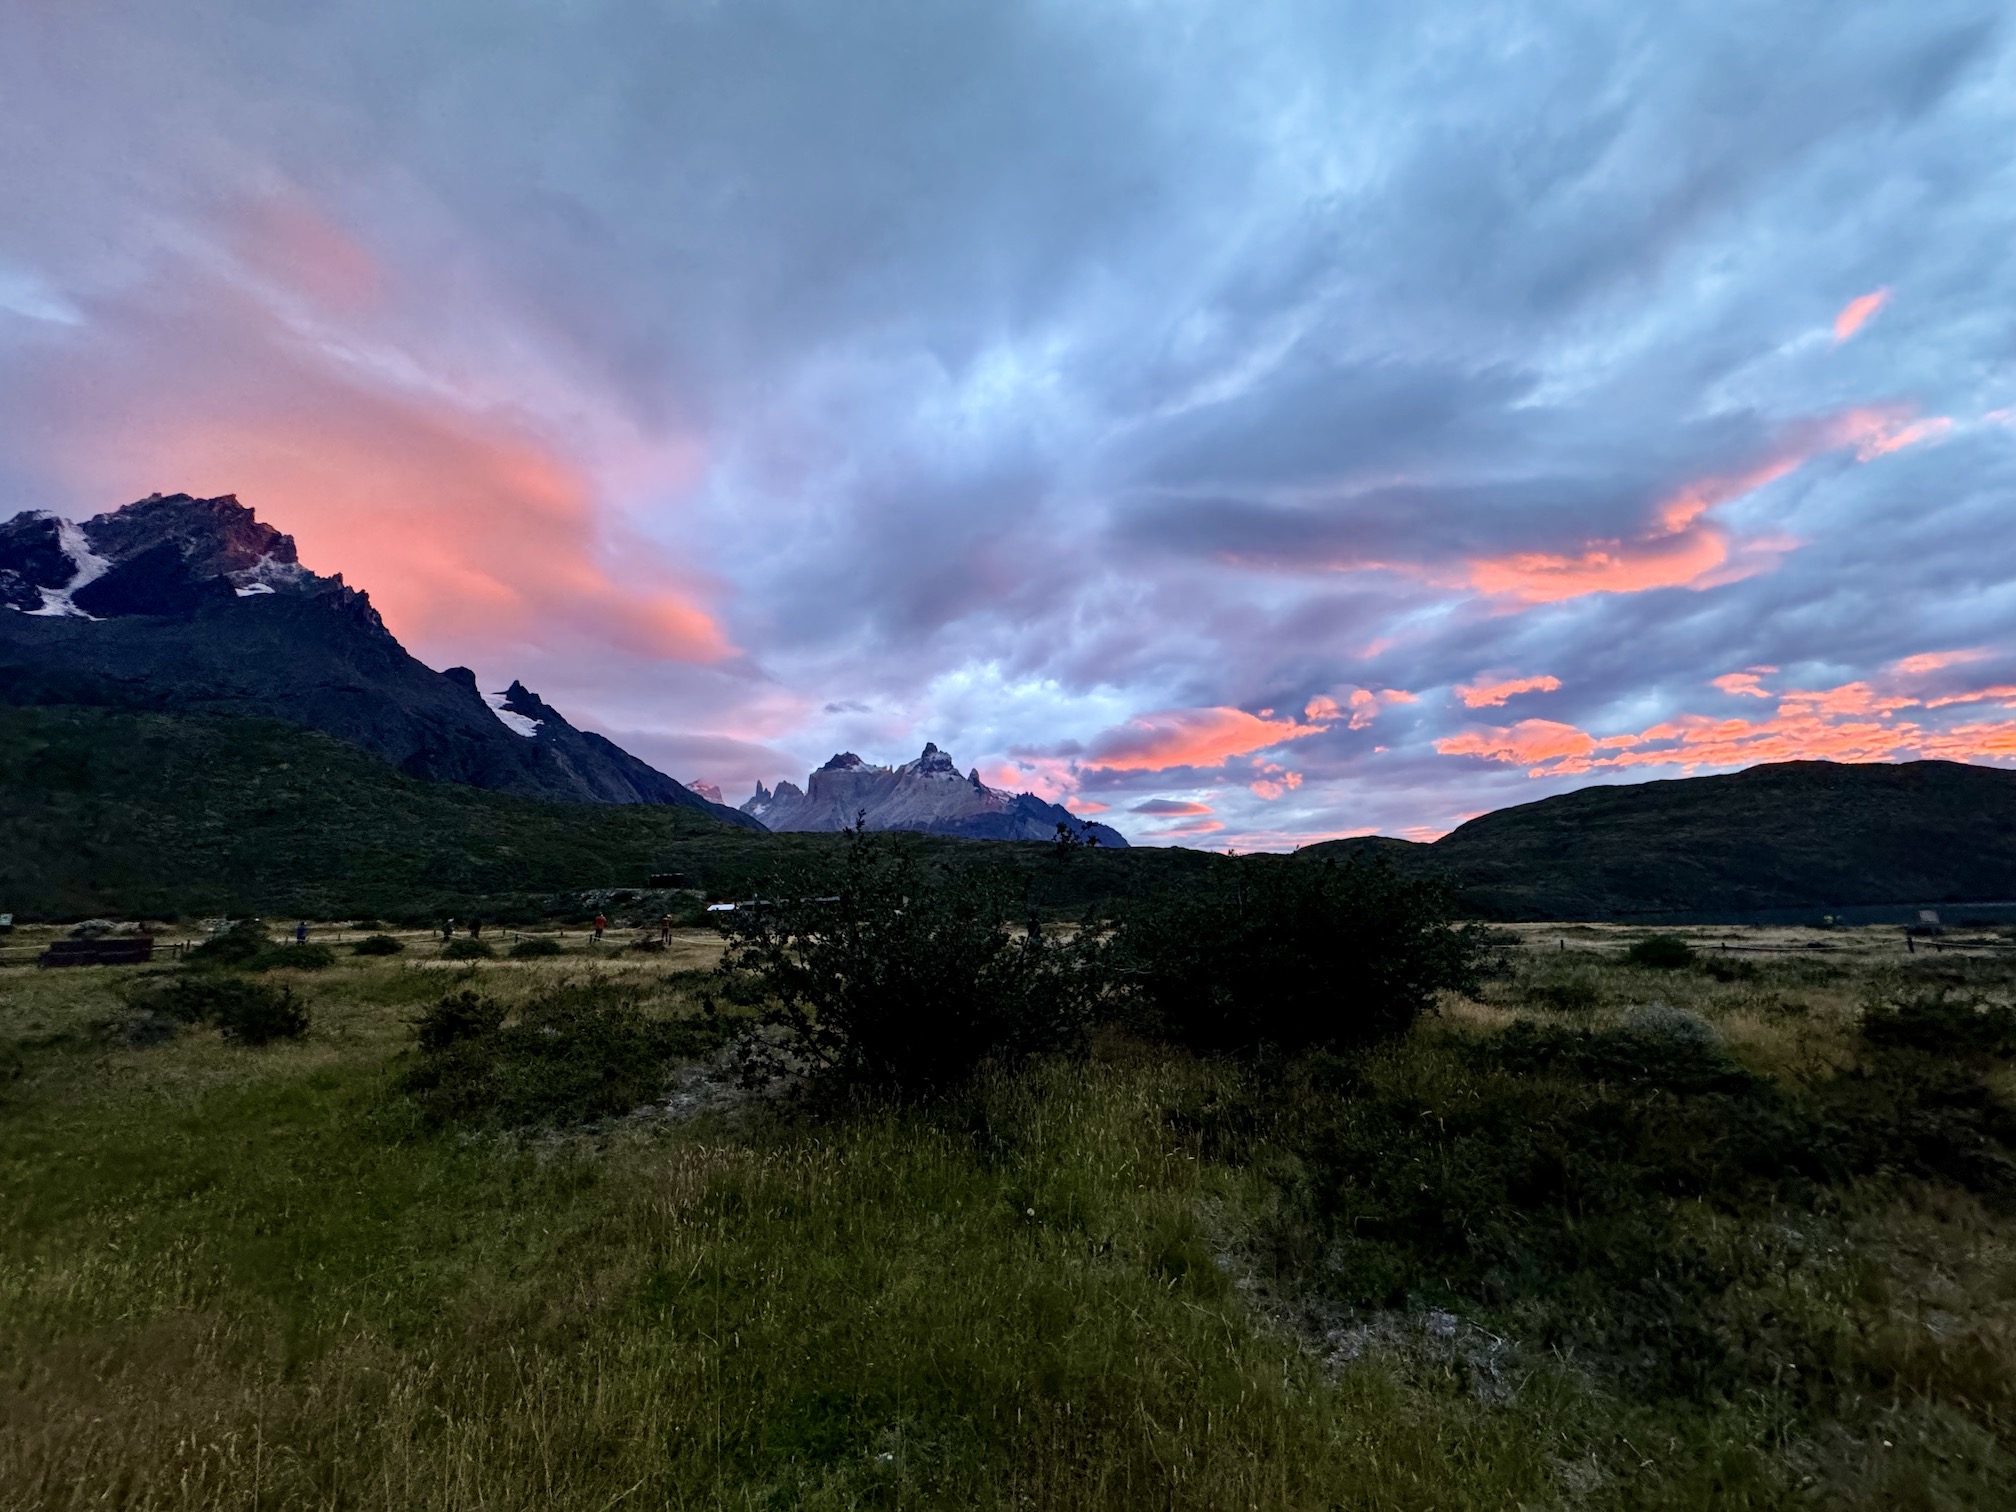
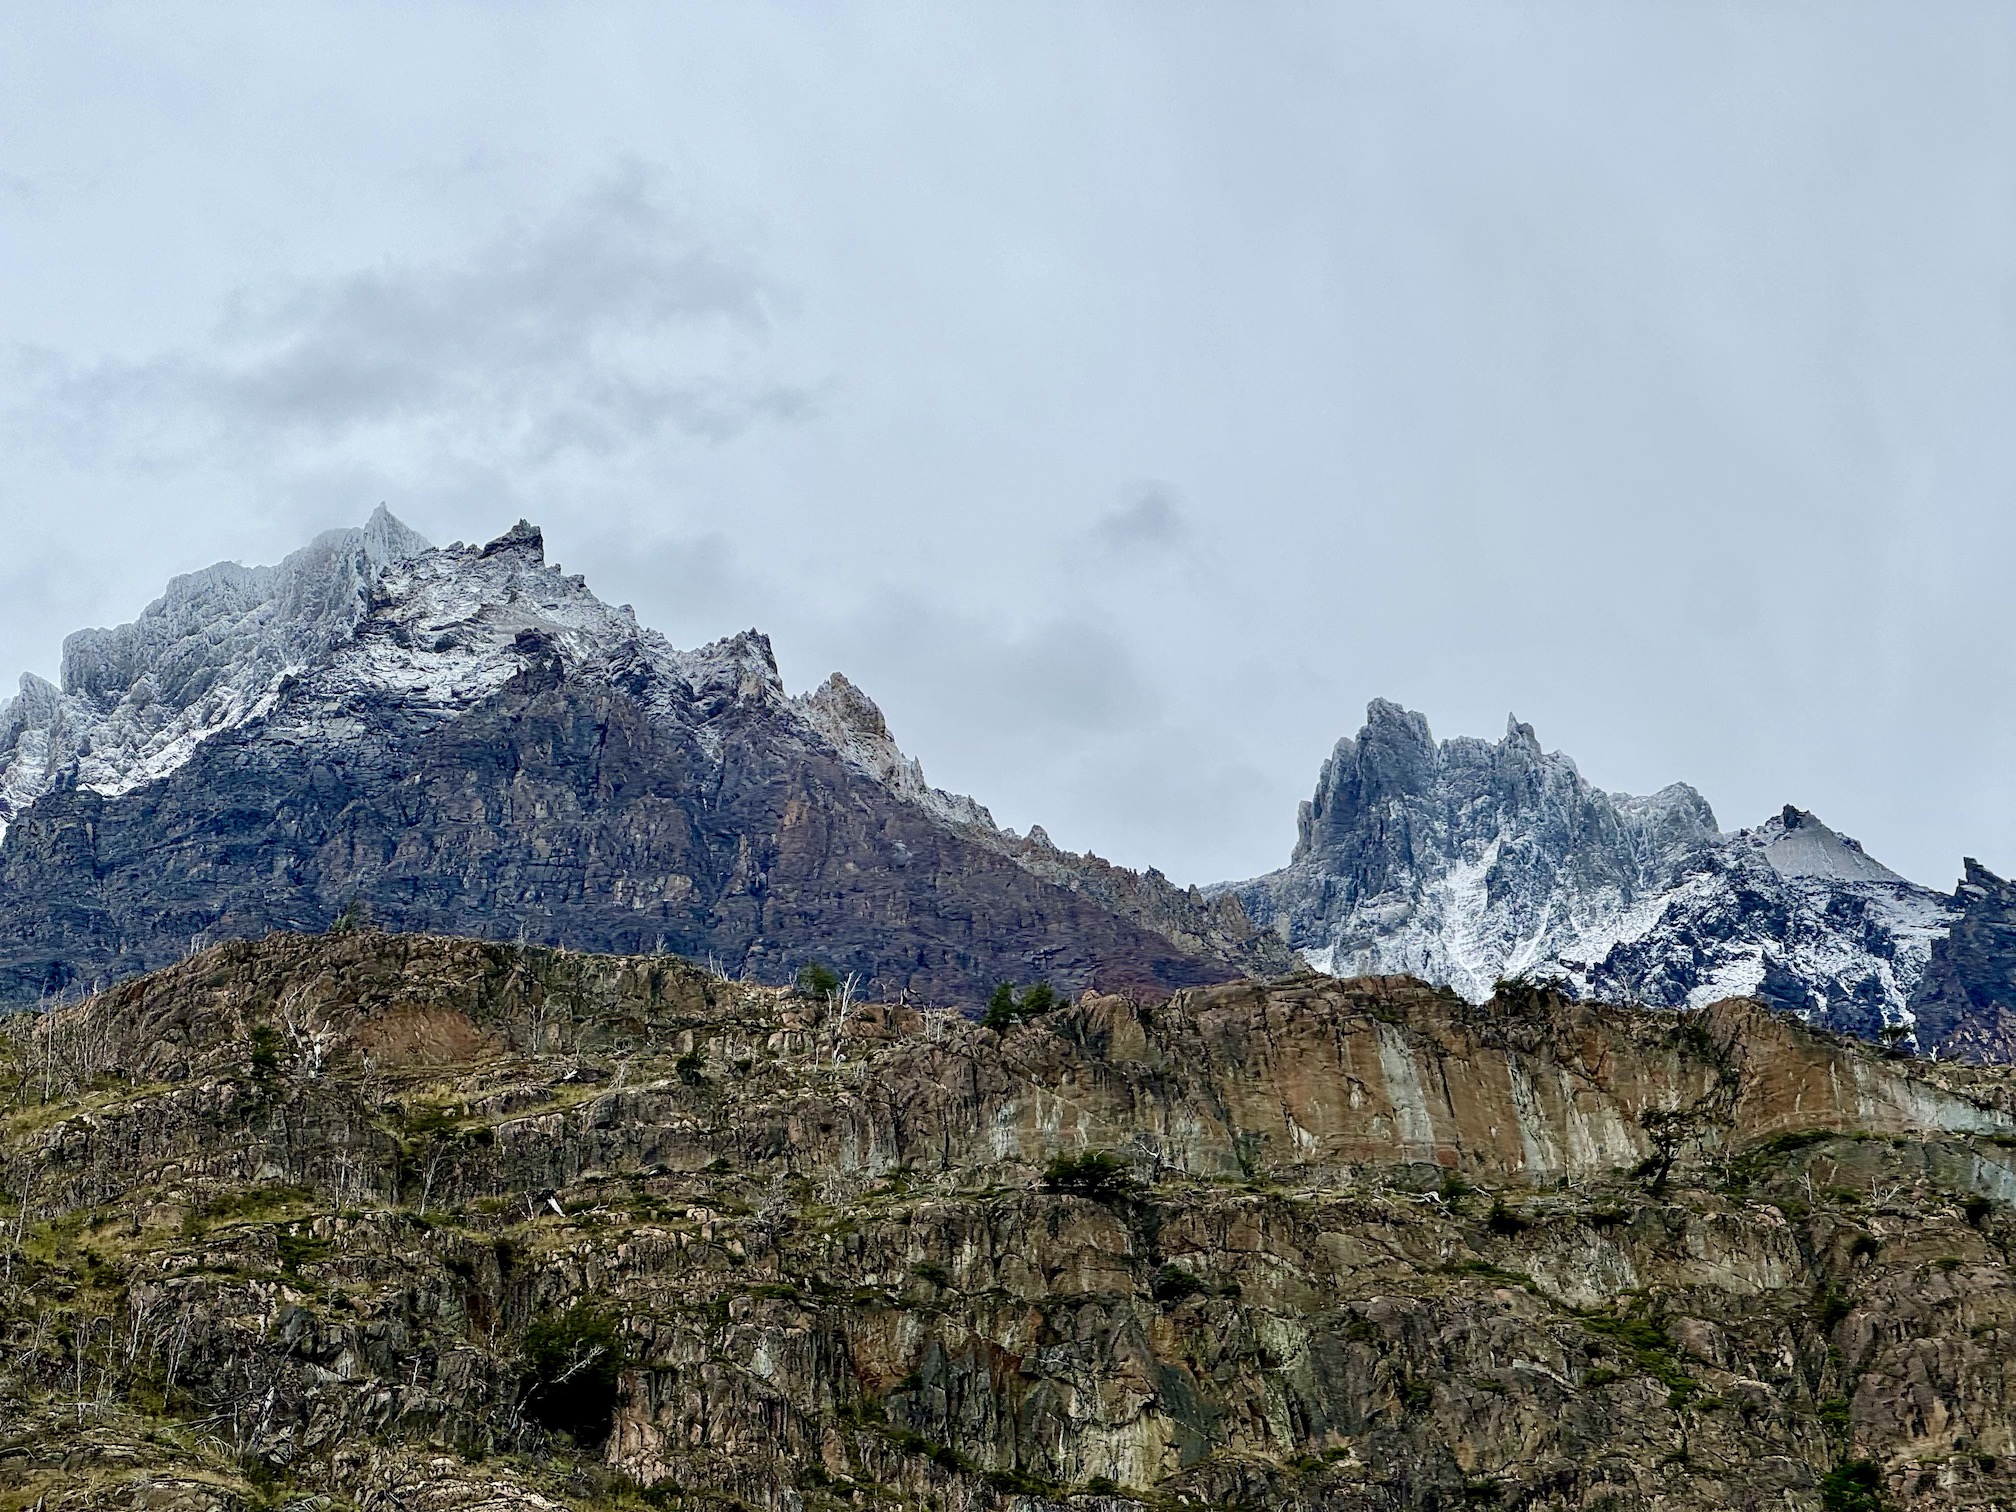
There's also a significantly closer viewpoint you can walk to if you don't want to go up to the suspension bridges. We collected the member of our group who had decided to sleep in and then headed back toward toward Paine Grande. We had heard some rain overnight and it became clear that while it was rain at lower elevations, it had snowed at the higher elevations. Many of the mountains we had seen the previous day now had a dusting of snow. We made it back to that refugio with plenty of time to spare and officially had finished the W Trek! After taking a celebratory photo, we ended up grabbing food and drinks at the refugio's bar area.
At the time, the ferry from Paine Grande to and from Pudeto was cash only and had no reservations. However, this may have changed, so it is worth checking ahead of time. While our weather luck held while we were on the trek, it did get significantly windier while on the ferry. After taking the ferry (about a 30 min relatively scenic boat ride across Lago Grey), we waited at Pudeto for our pre-booked bus (there seemed to be a variety of companies that served this, we used Bus Sur) for some time to go back to Puerto Natales (~2 hours ride). Ariving back at the same Airbnb which we had booked previously, we collected our baggage our hosts had graciously left for us back in the Airbnb and finally enjoyed a good night's sleep in a real bed.
Day 8: Departure
This was another largely buffer day for us to head back to the USA. We did have the chance to sleep in and spendmost of the morning to wander around Puerto Natales, though it is a town that definitely tends to open on the later side. We returned the gear we had rented and went to Chocolatería Patagonia Dulce. The shuttle we had taken from the airport to the town had given us a card and we had scheduled our return shuttle to the airport with them on WhatsApp the night before (spoiler: it was reliable!).
We arrived at the Puerto Natales airport (small) and headed back to Santiago, where we had a long layover before finally departing back to the United States. And that was our trip! A whirlwind of Patagonia, all solidly within a weeks time.
Glacier
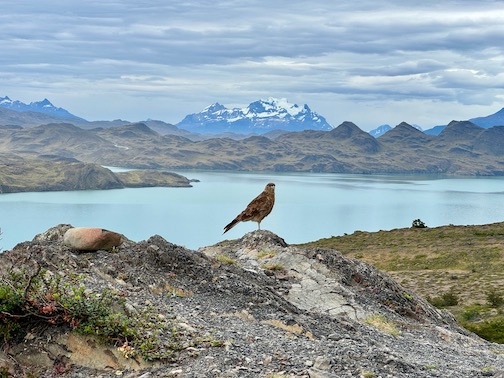
Lakes, mountains, wildlife 👇
Zion
Desert scenes like no other 👇
Italy
Art, wine, and mountains 👇